How to Build a Gaming PC
Building your own gaming PC is one of the most satisfying parts of the hobby, providing a sense of accomplishment versus buying an off-the-shelf system. However, it’s not without its pitfalls, so as an award-winning manufacturer of 3XS Systems gaming PCs here is our step-by-step guide on how to build a PC.
Step-by-Step Guide
Now, Let's Get Started.
What You Need to Get Started
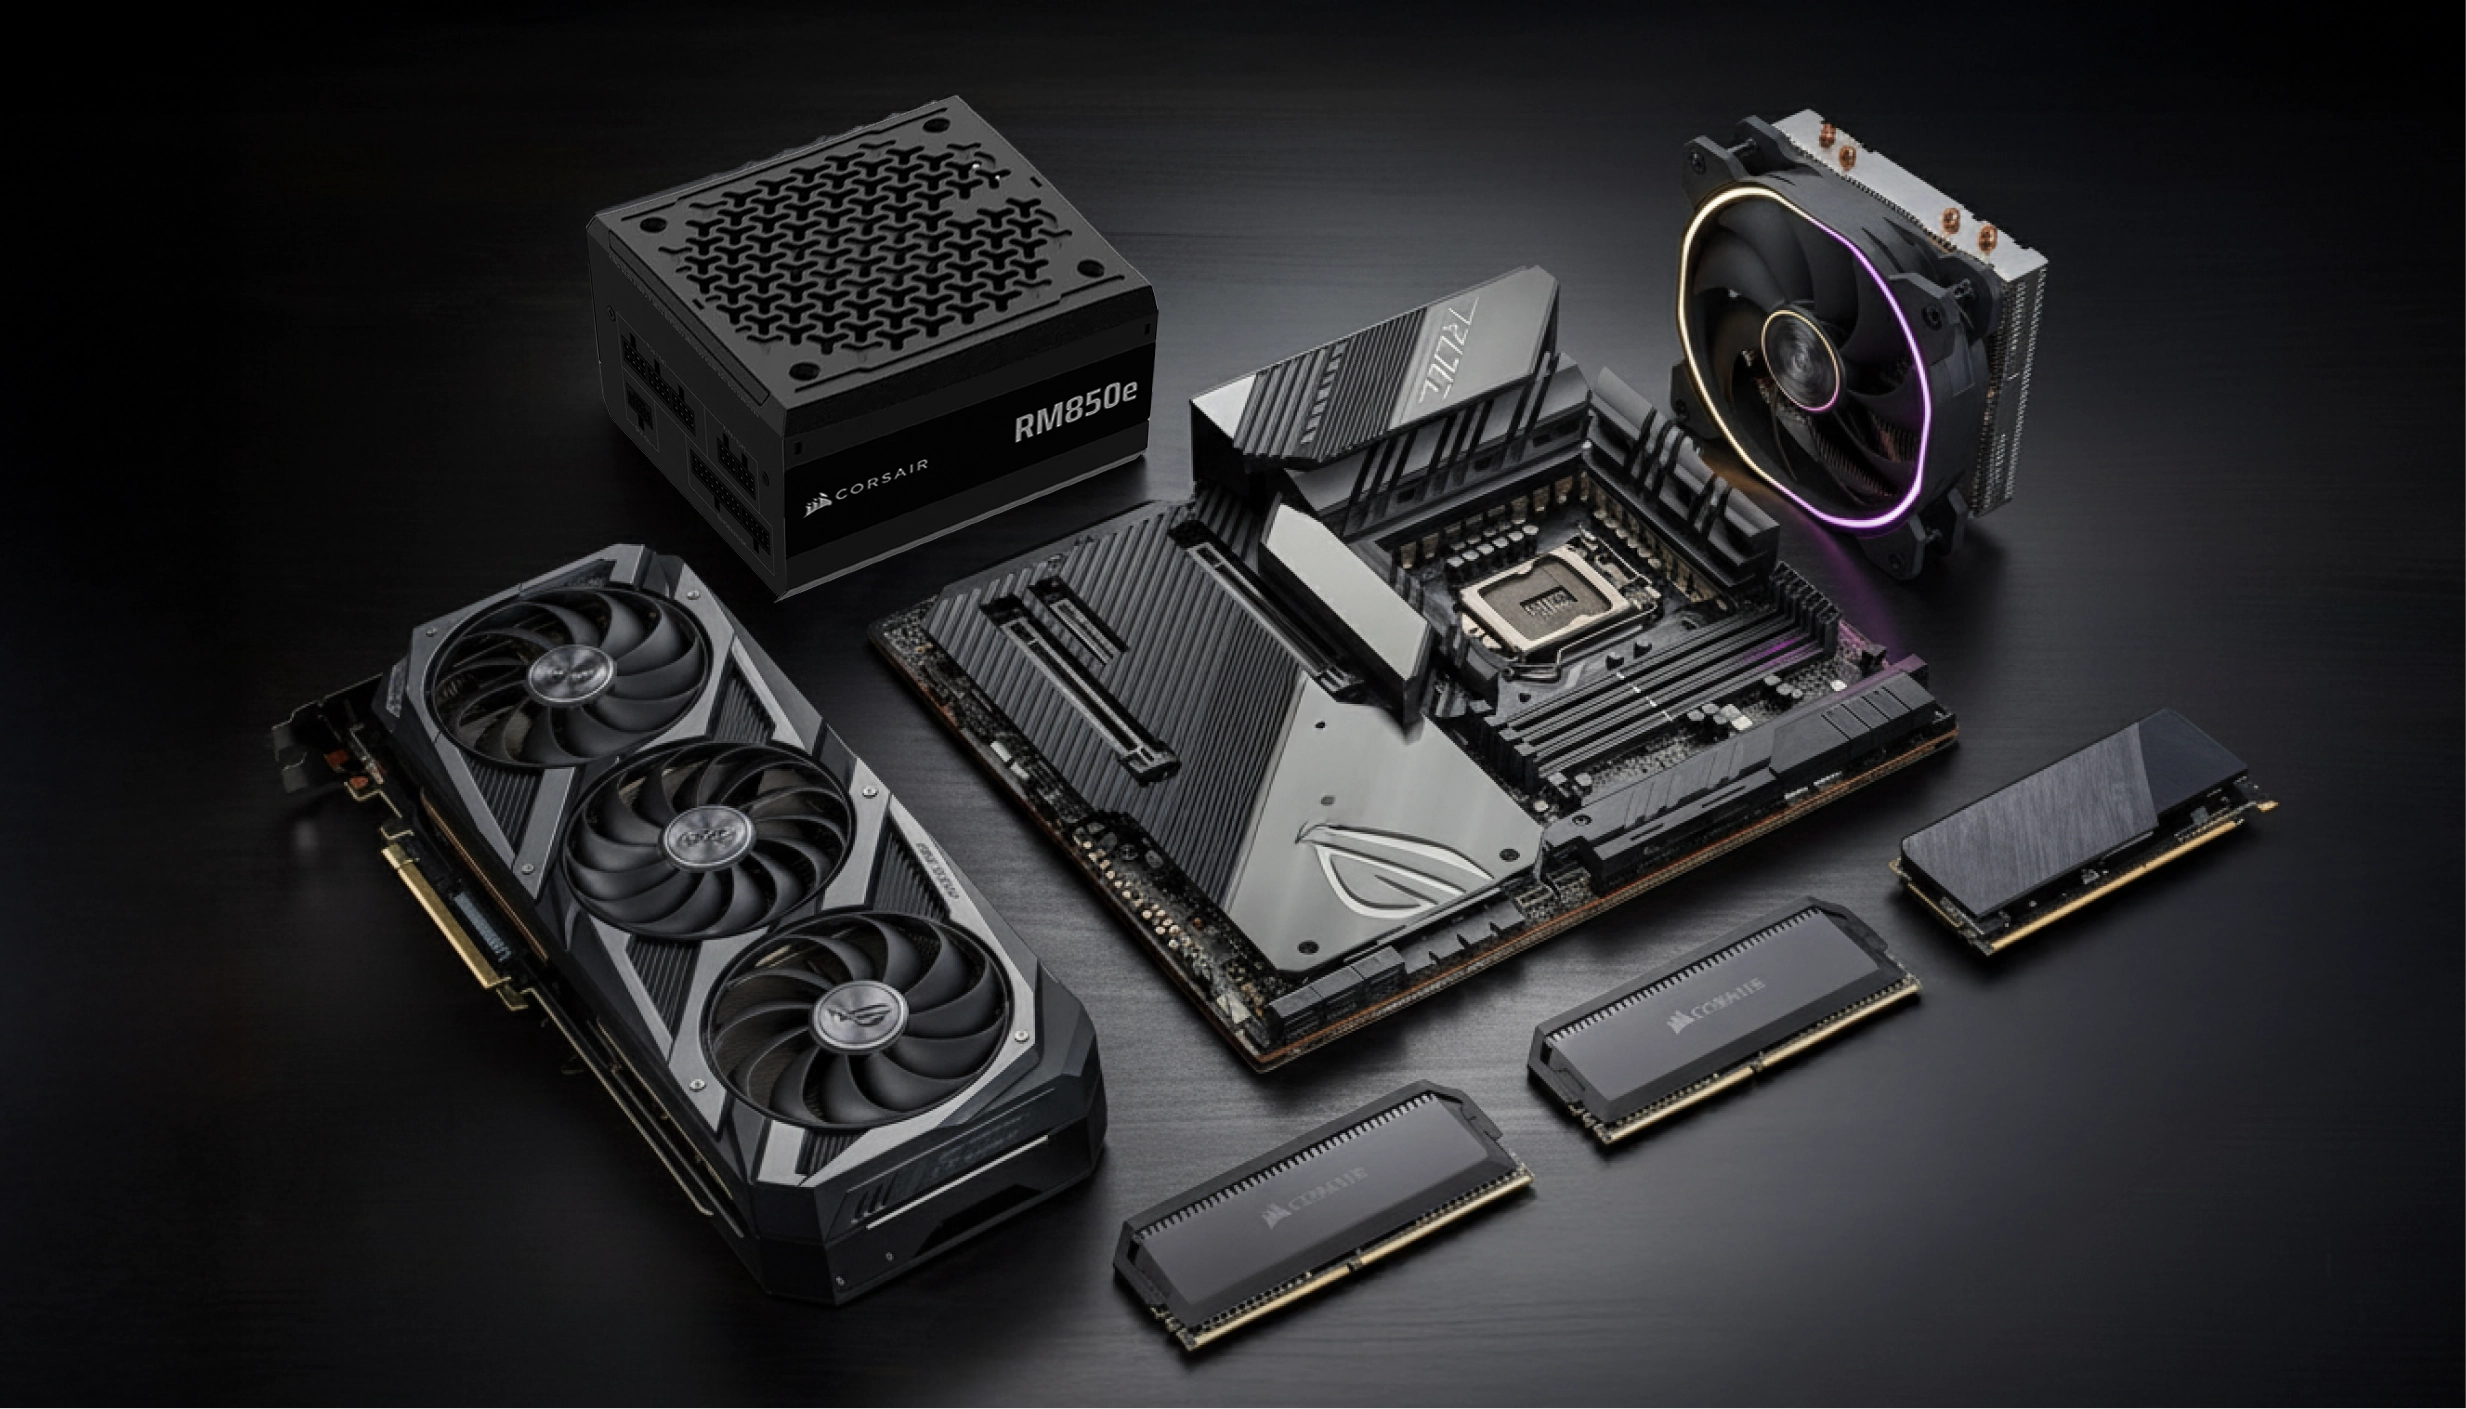
Before you start unboxing and assembling components there are a few simple, but crucial things to make sure you have on hand.
The Right Tools
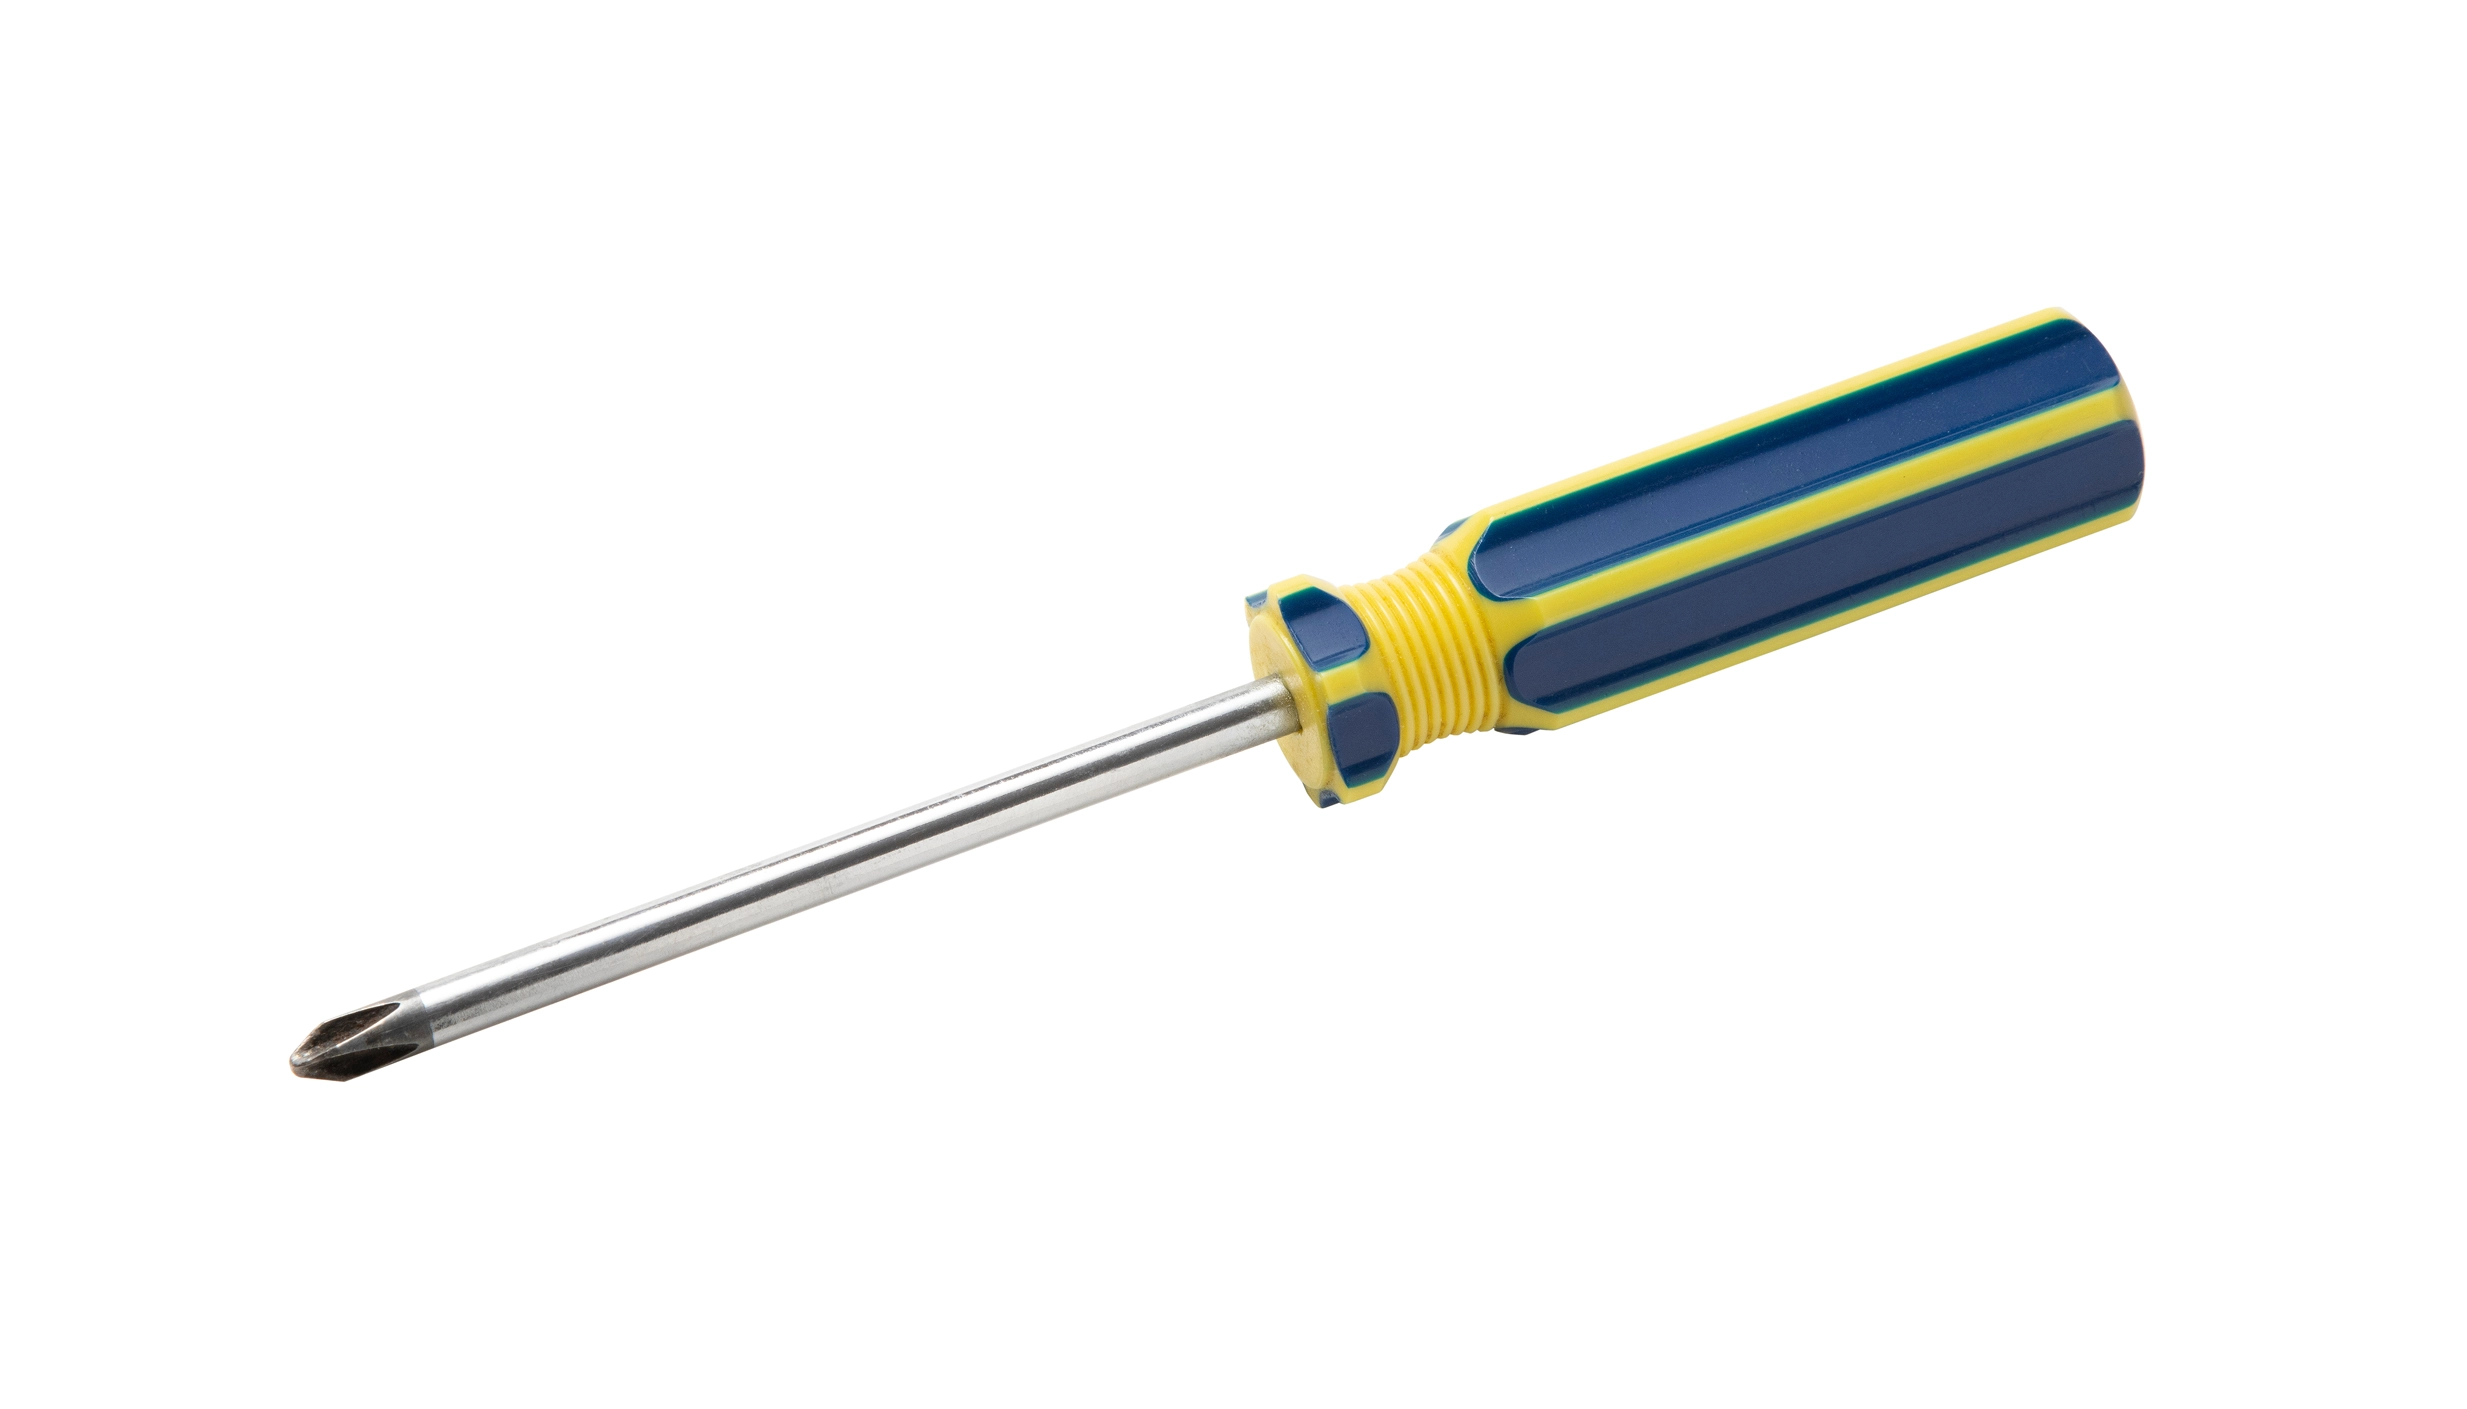
The most essential tool for building a gaming PC is a magnetised screwdriver with a number 2 Phillips head. This is the perfect size for securing components such as the case, motherboard, PSU, graphics card and drives.
PC builders shouldn’t leave home without a number 2 Phillips screwdriver.
Although many cases now include a few cable ties as standard, a packet of extra ties doesn’t go amiss either. If do you use cable ties, make sure to have a pair of wire snips to hand to cut off excess tie.
The Right Space
It’s also essential to have a suitable space to build your PC. A large flat space such as desk or dining table are ideal, but if you’re using the latter you might want to put a protective mat down to ensure it doesn’t get scratched when you’re moving the case around. Whatever surface you end up using, make sure that its flat, well-lit and most importantly of all non-conductive – wood, cardboard or paper are all safe choices here.
Need tools?
If you're struggling for tools, then we have a range of tool kits specially designed for PC builders.
Shop Tool Kits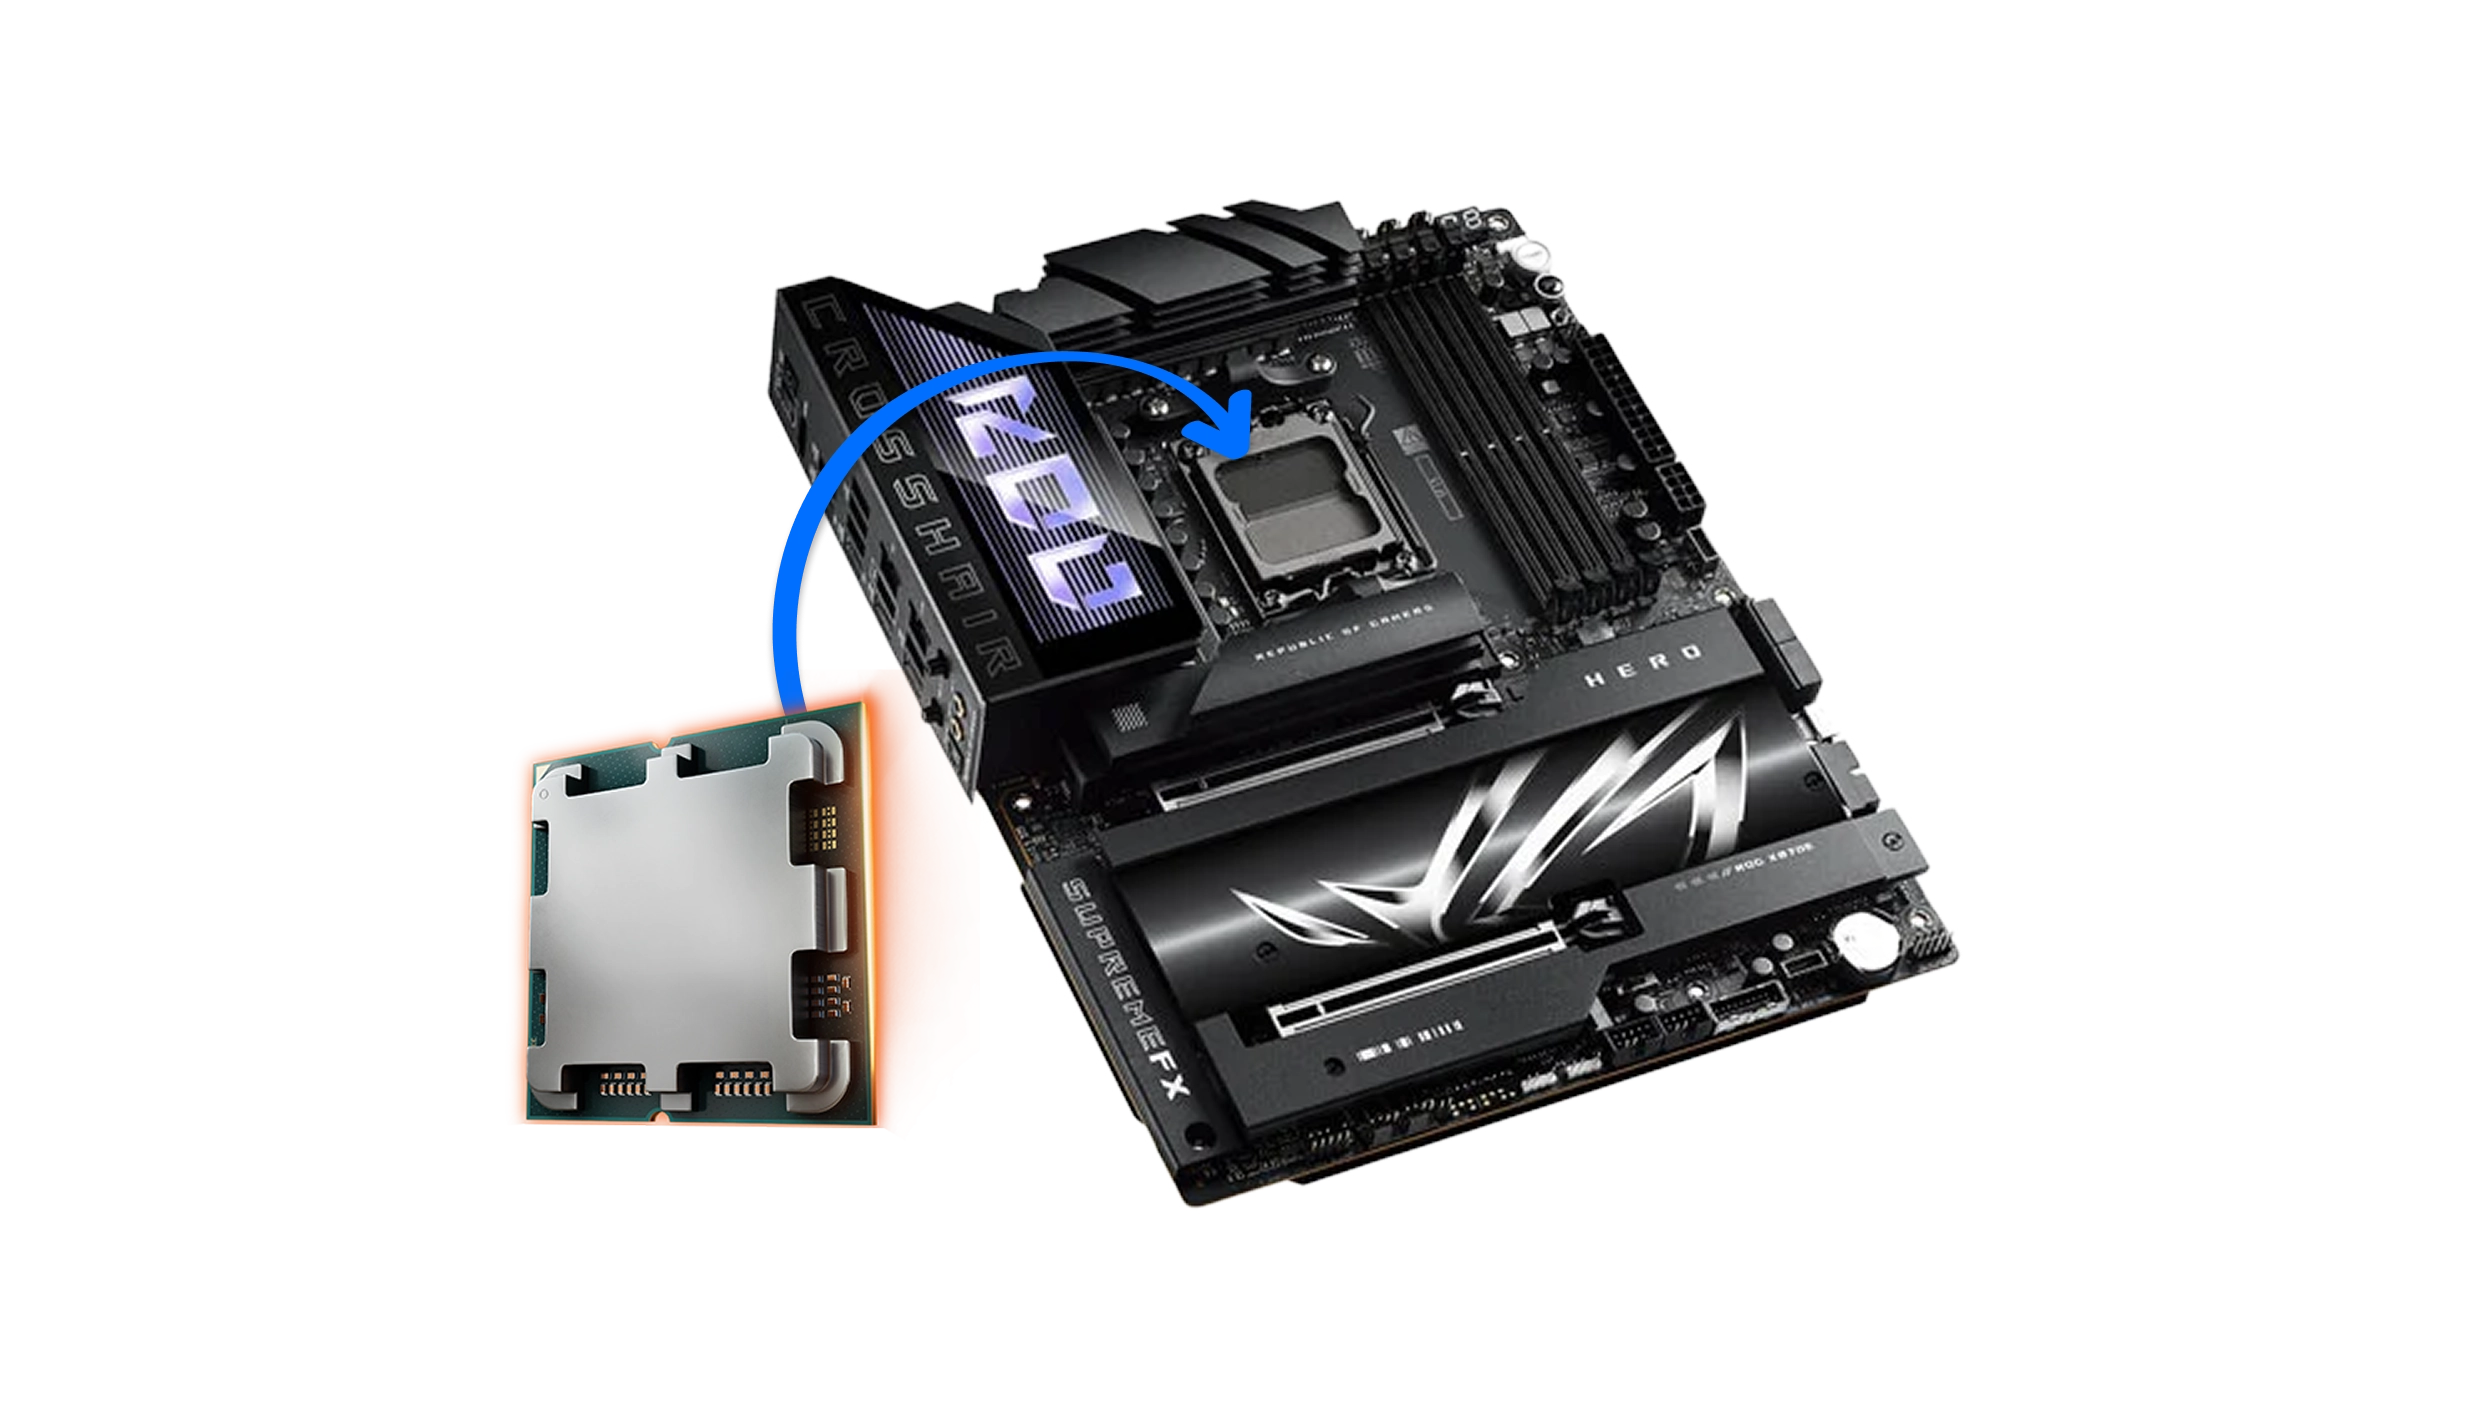
Installing the CPU
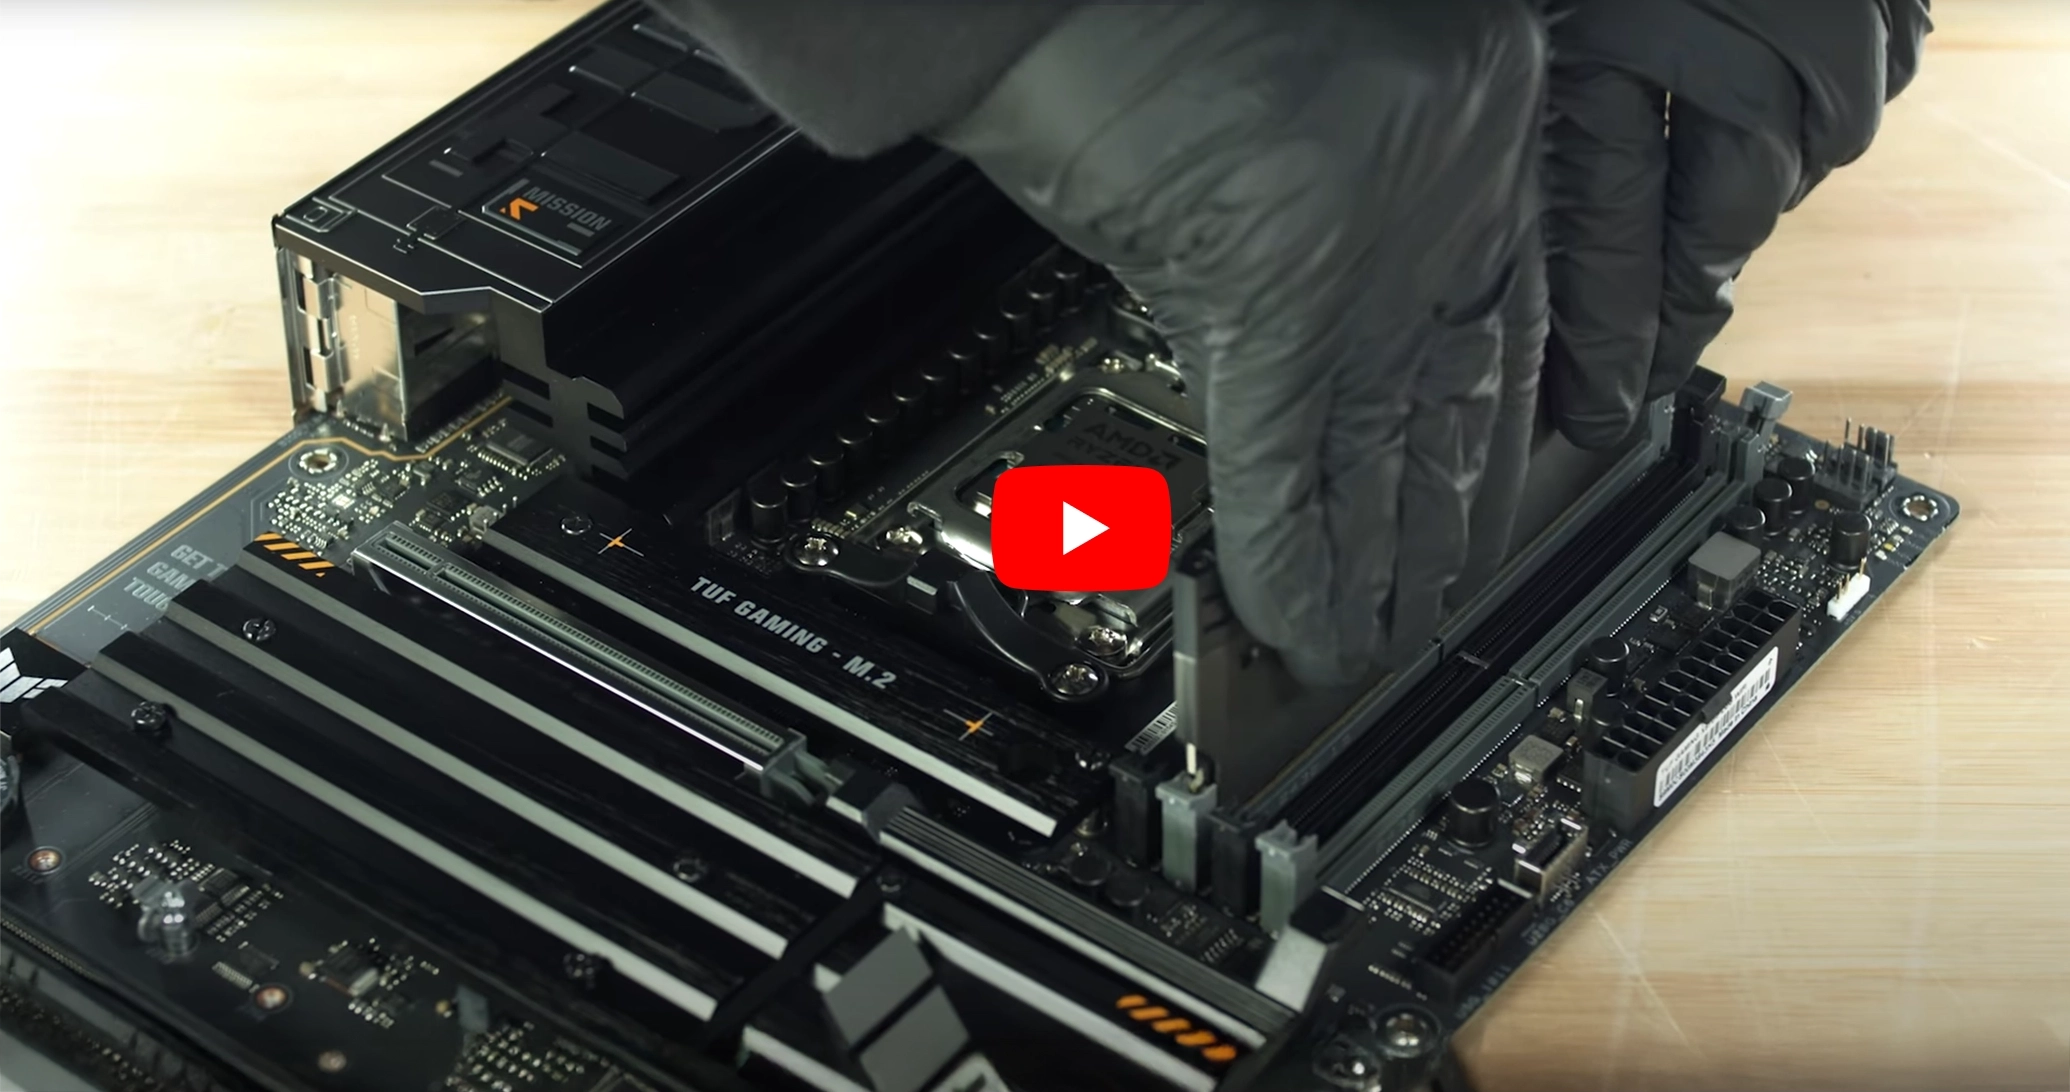
The first two components to install together are the CPU into the motherboard. Whether you're installing an AMD or Intel CPU the installation process is fundamentally the same as both brands use what is known as LGA pins in the motherboard to connect to pads on the underside of the CPU.
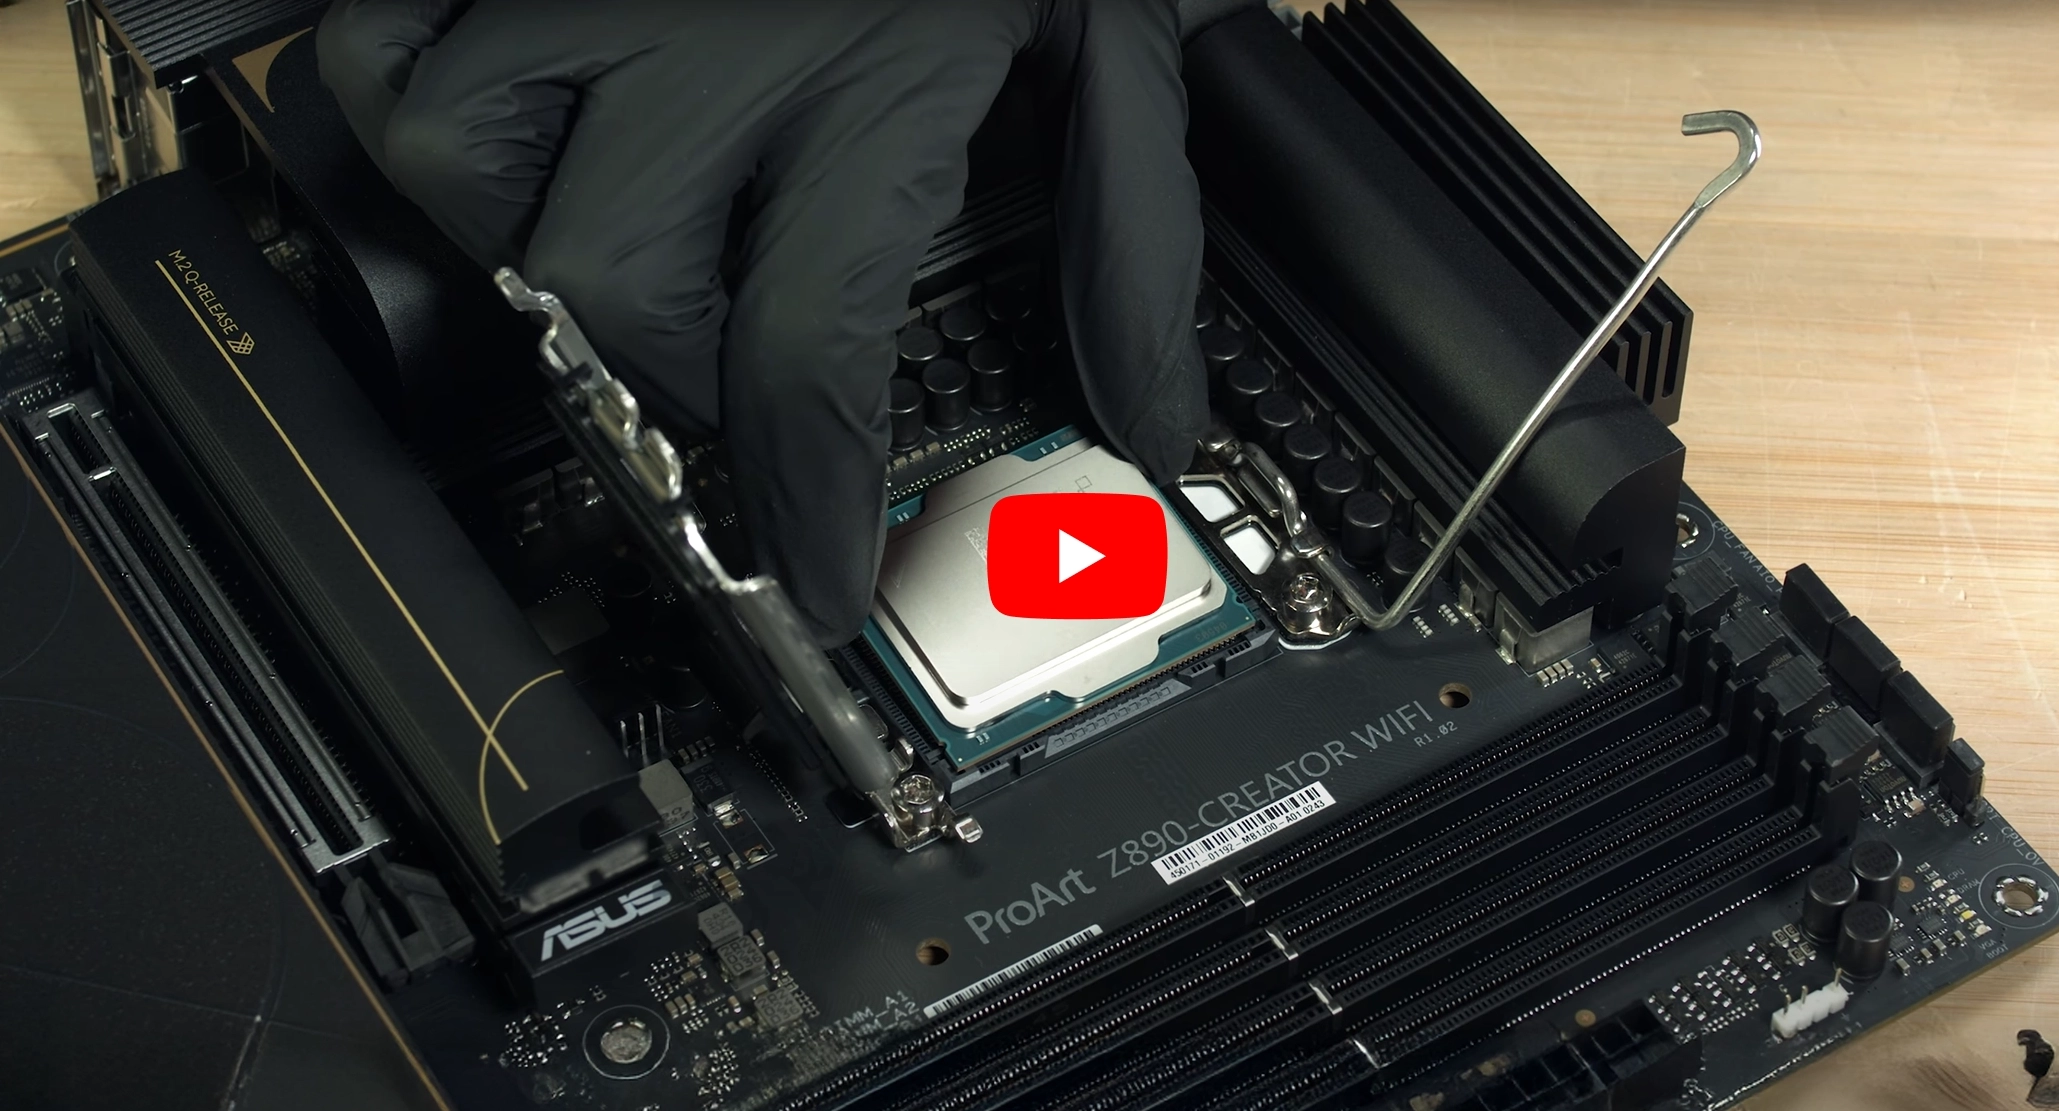
The first step is to unlock and lift the lever on the side of the CPU socket on the motherboard. This opens the lid that partially covers the socket, revealing all the delicate pins underneath. To install the CPU, hold it carefully by the edges and line it up with the notches around the CPU socket before gently lowering it into place. You should now be able to close the socket lid by lowering and locking the lever on the side of the CPU socket.
This process should also push away the plastic cover that was covering the socket lid up till now. Although you shouldn't need this cover any more, don't throw it away, as you'll need to reattach it if you ever need to return the motherboard.
Watch our step-by-step video guide for installing the CPU.
Still undecided on what to buy?
If you're still struggling with which components to buy, check out our AMD CPU buyers guide or Intel CPU buyers guide. We've also written an AMD motherboard buyers guide and Intel motherboard buyers guide.
How to install RAM
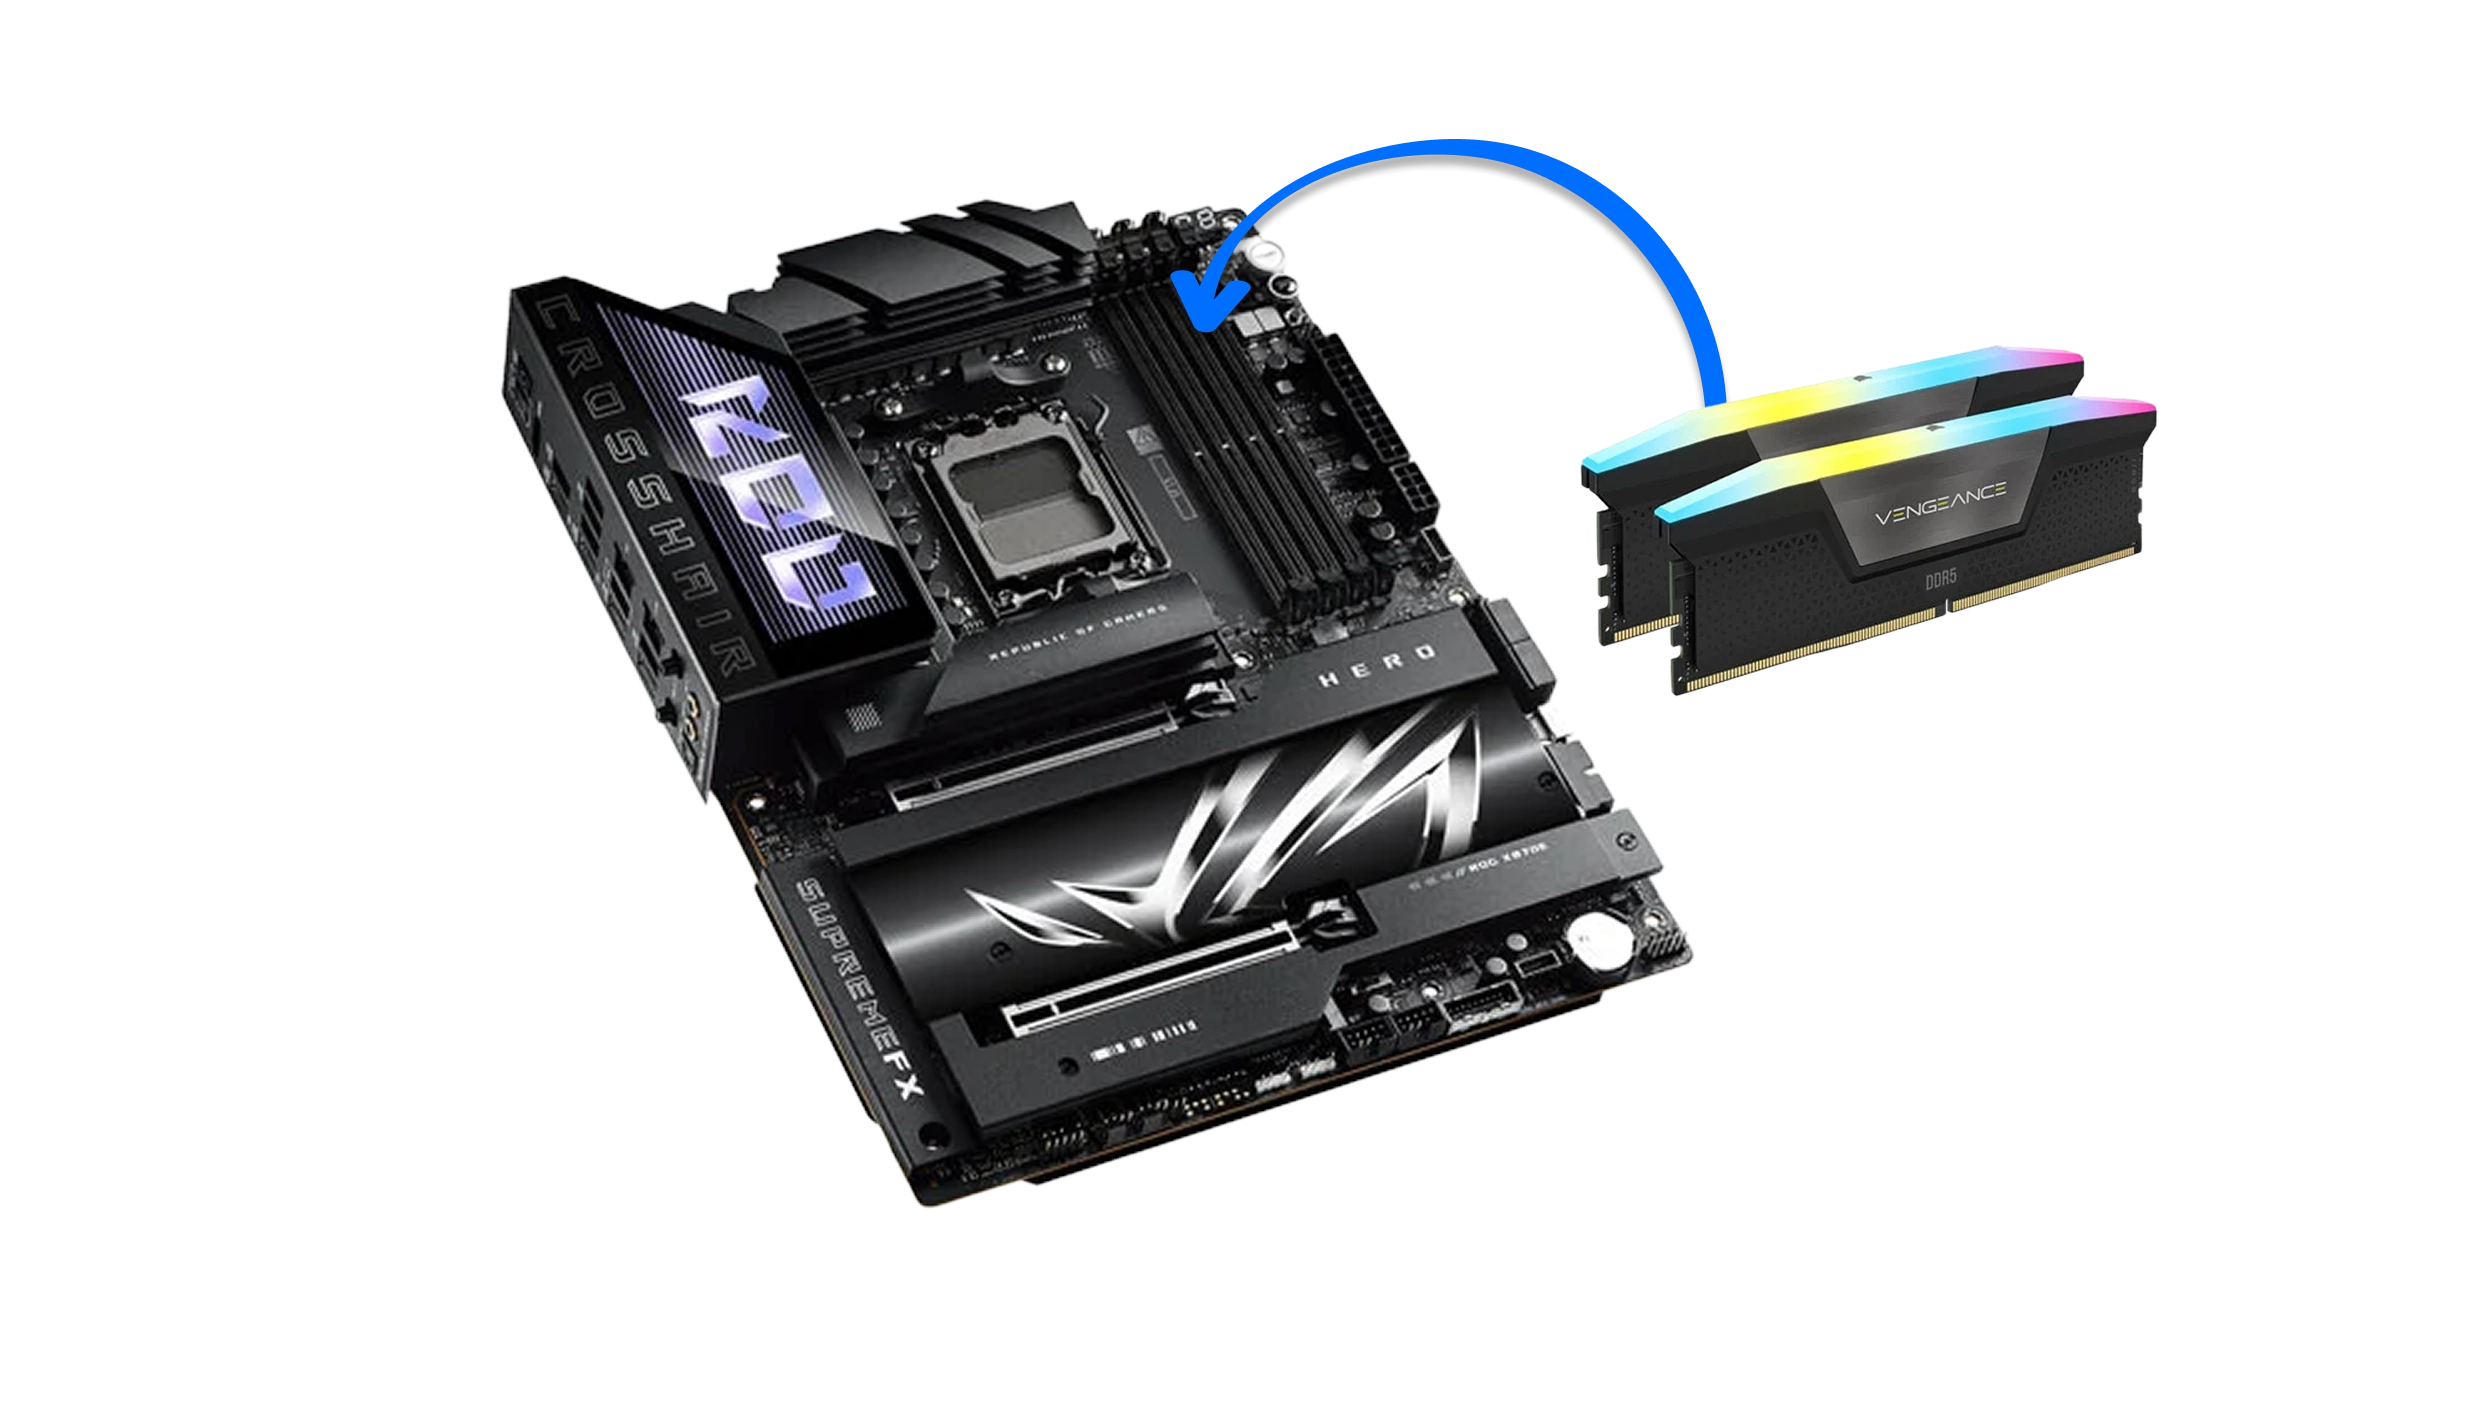
The next components to install is the RAM, or more specifically the DIMMs (memory sticks) in the motherboard. Before you do anything make sure to check the motherboard manual for which DIMM slots to use as your PC may not boot or perform properly if you use the wrong slots.
Once you're sure which slots you're going to use flip down the clip on one end of the DIMM slot and holding the DIMM by the edges, keeping away from the contact pads along the bottom, firmly push it into place. It will only fit one way round, as the DIMM has a notch that needs to be lined up with a tab in the motherboard. If correctly installed you'll hear a satisfying click, and the clip on the end of the DIMM slot will close itself, securely holding the DIMM in place. Repeat this process for each DIMM that you're going to install.
Watch our step-by-step video guide for installing RAM modules into your motherboard.
Still undecided on what to buy?
If you’re still struggling with which components to buy, check out our memory buyers guide.
View Memory Buyers GuideApplying Thermal Paste
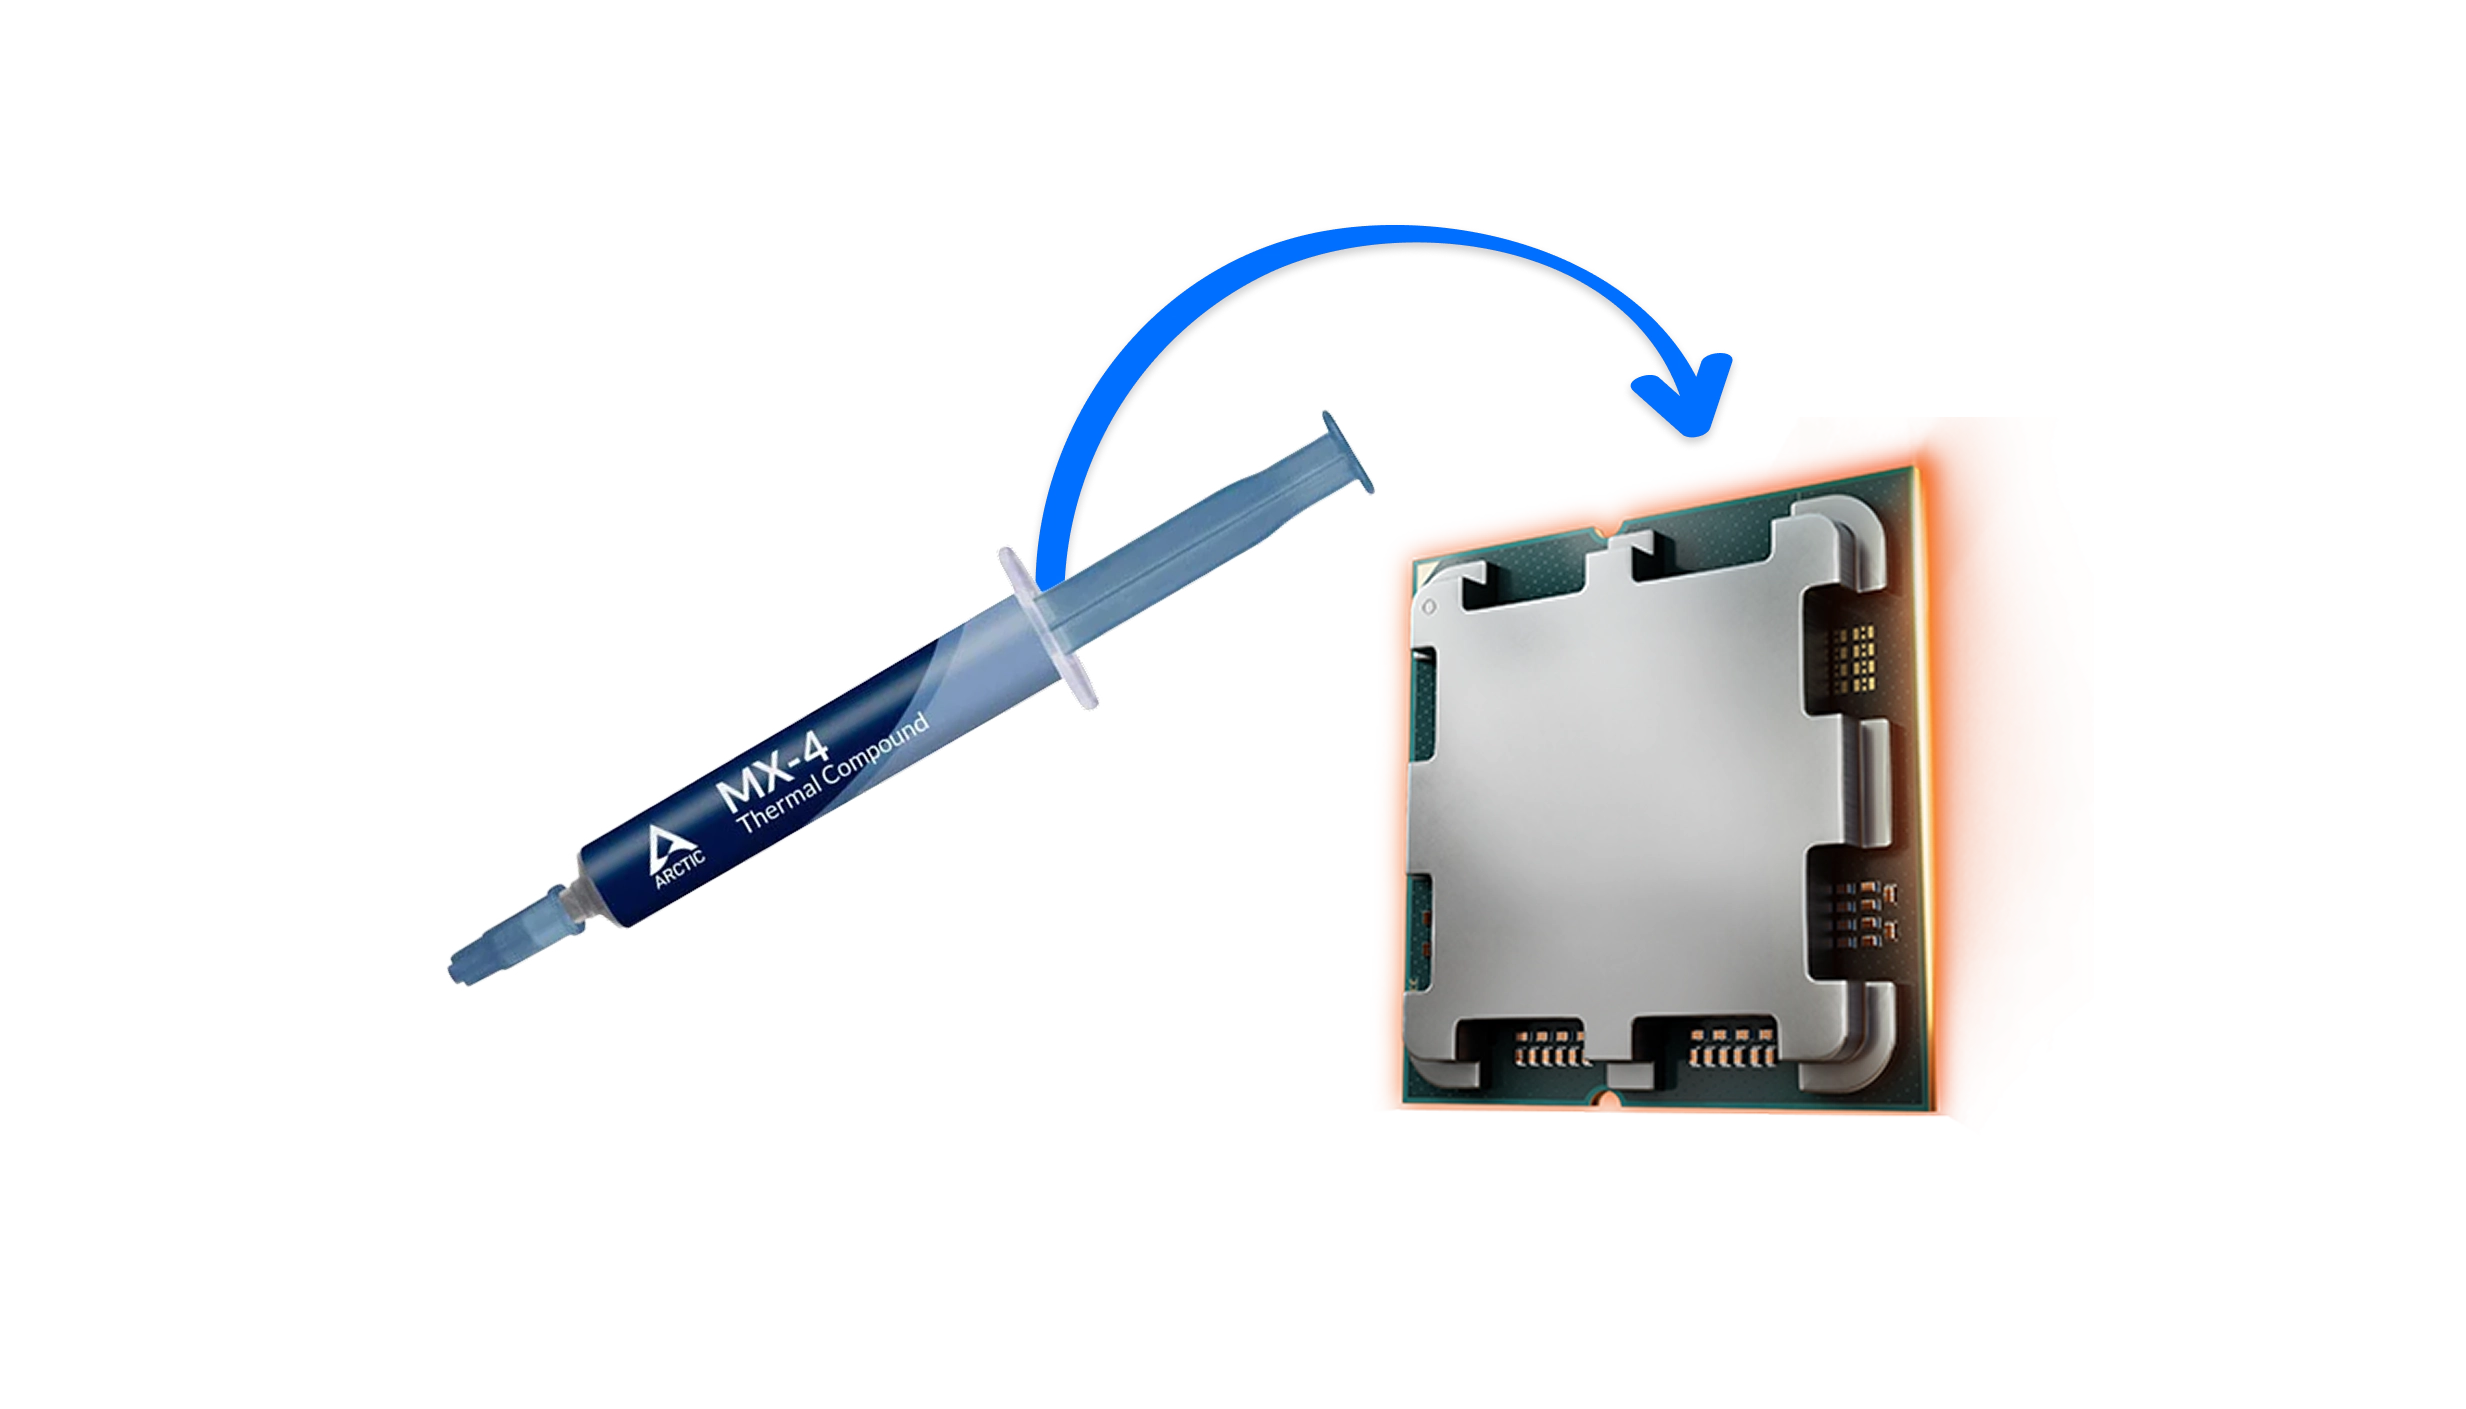
The next step is to apply some Thermal Interface Material (TIM), a thermal paste, to the top of the CPU. TIM helps smooth out any imperfections in the top (heatspreader) of the CPU and the base of the CPU cooler, aiding heat transfer. Many coolers come with TIM pre-applied or packaged in a small syringe for you to apply, but it's worth checking before installation, as you may want to invest in higher quality TIM to lower the CPU temperature.
Watch our step-by-step video guide for applying thermal paste to your CPU.
There are multiple techniques of how to apply TIM; whichever you use you should aim for lines/dots about the thickness of a grain of rice:

AMD Ryzen / Intel Core CPUs
Single line across the middle of the CPU

AMD Ryzen / Intel Core CPUs
Like above, but add two dots, creating a divide sign

AMD Threadripper / Intel Xeon-W CPUs
Three lines on larger CPUs
Whichever technique you use the key thing is not to apply too much or too little TIM, as the wrong amount can make cooling worse rather than better.
Need TIM?
We stock a wide range of TIM and TIM cleaner for removing unwanted TIM.
Shop Thermal CompoundsInstalling the CPU Cooler
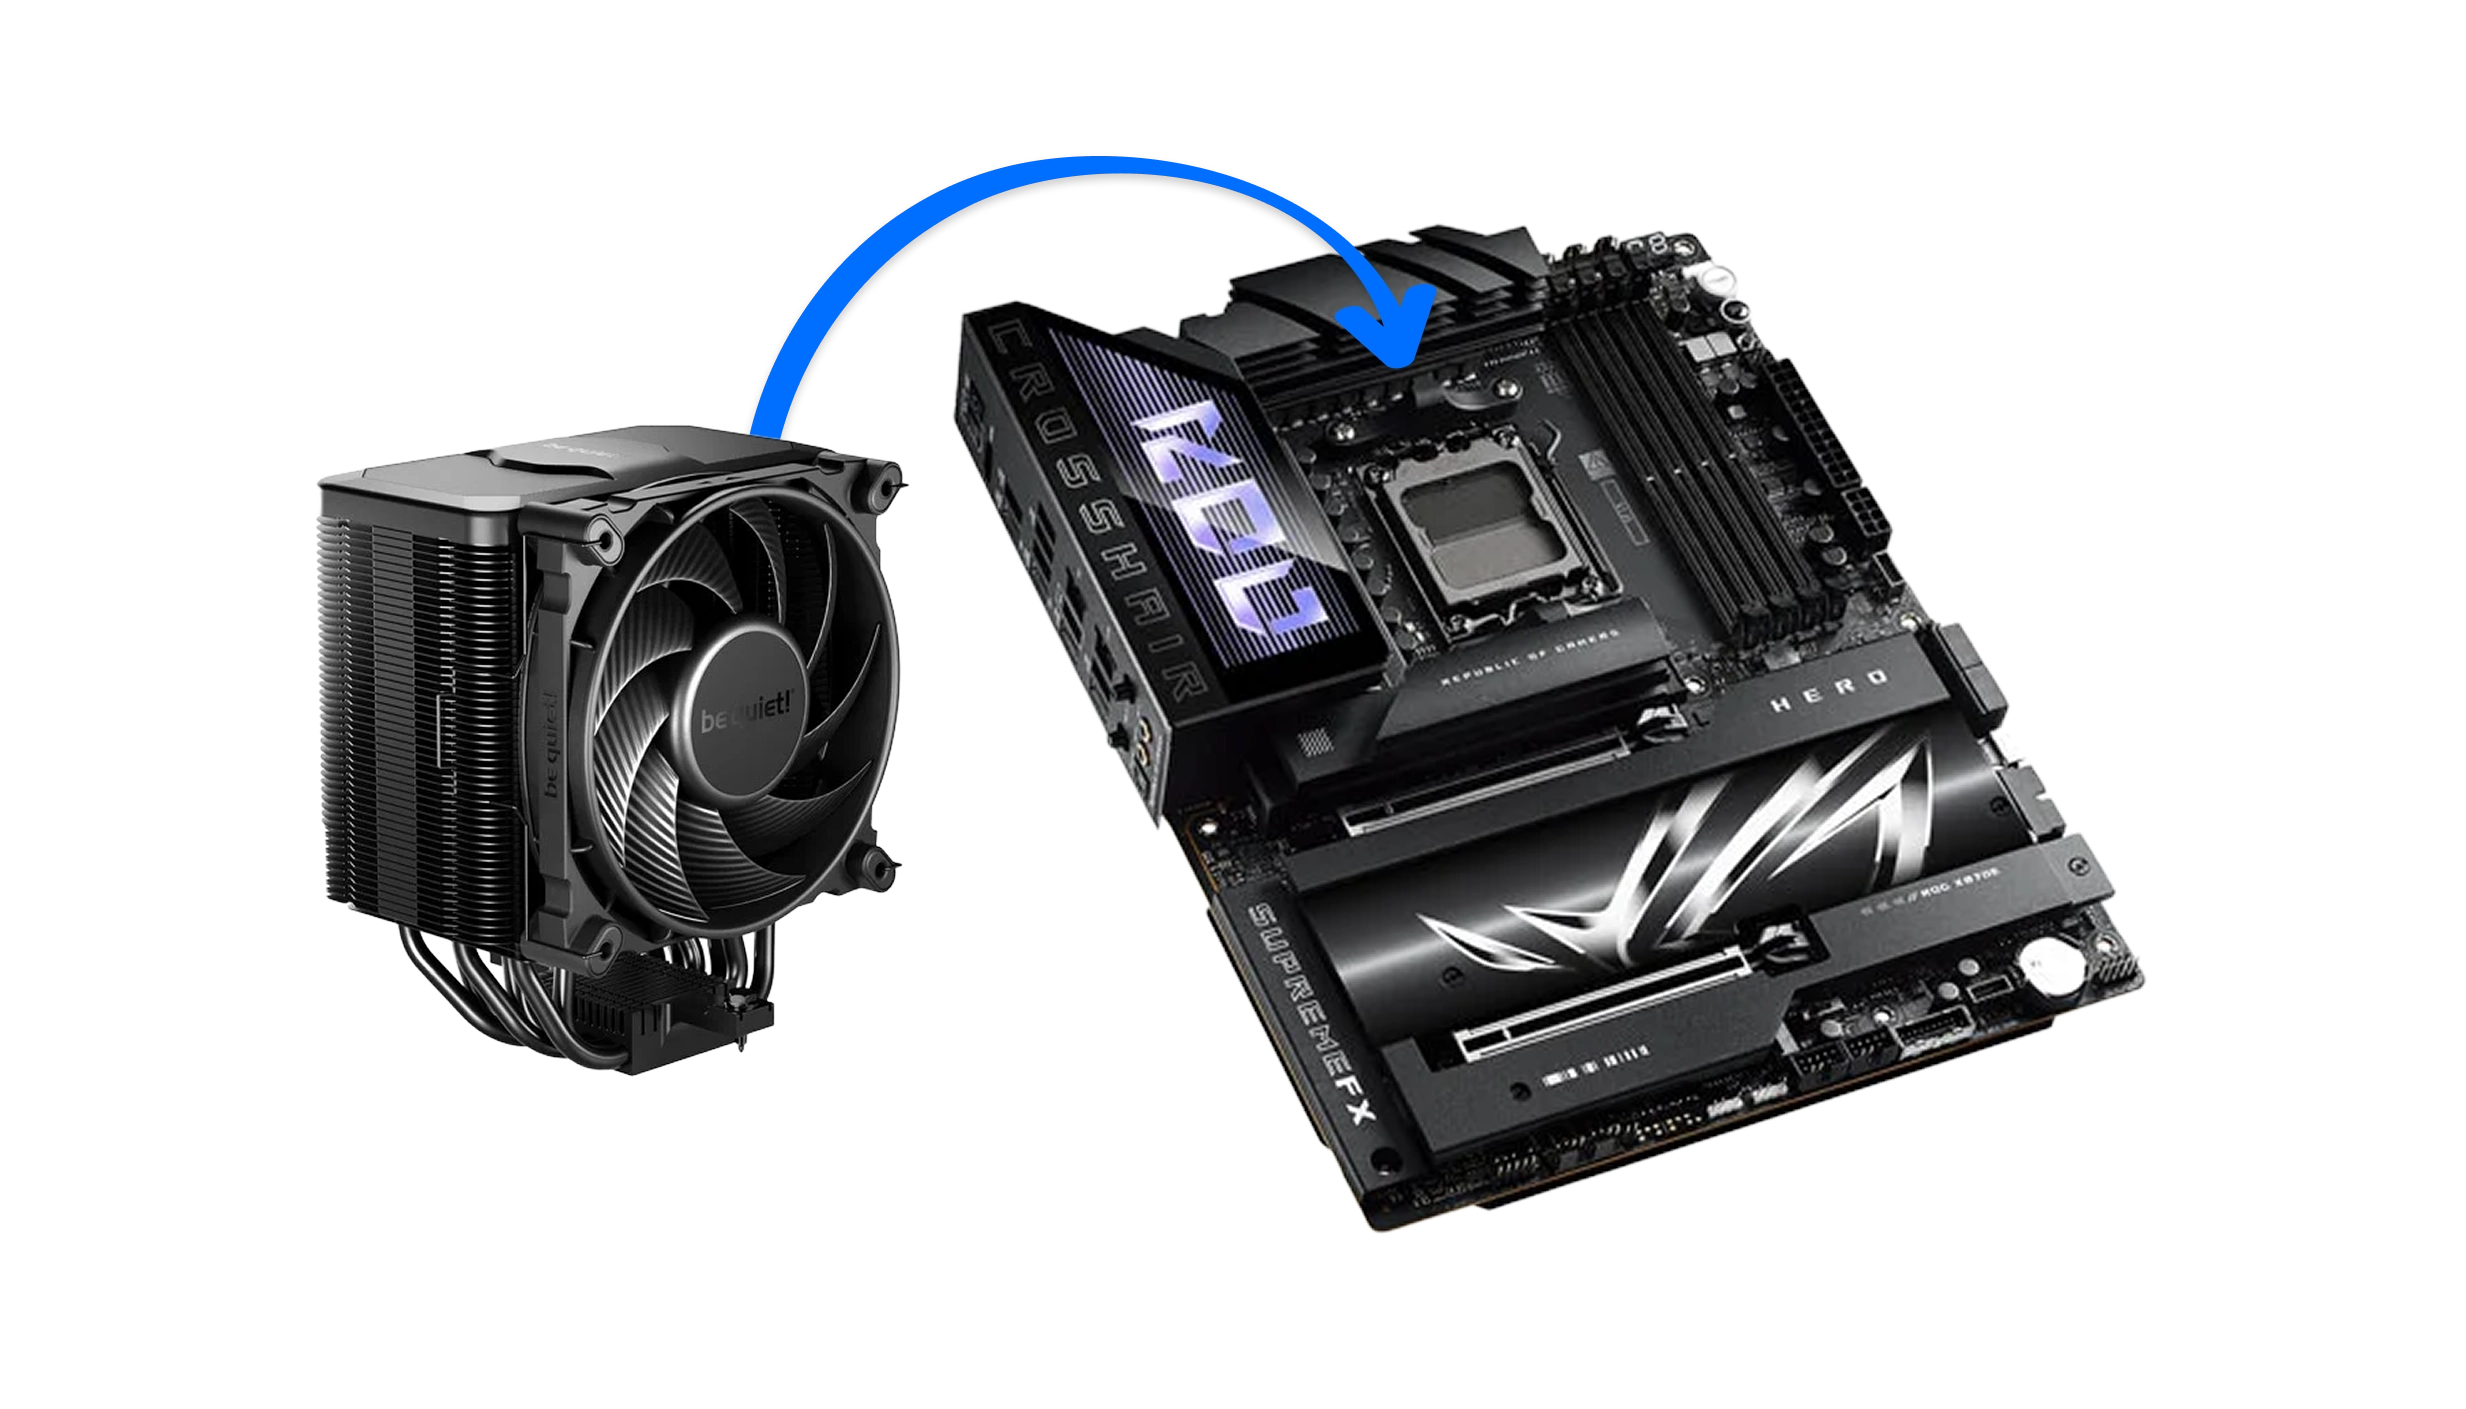
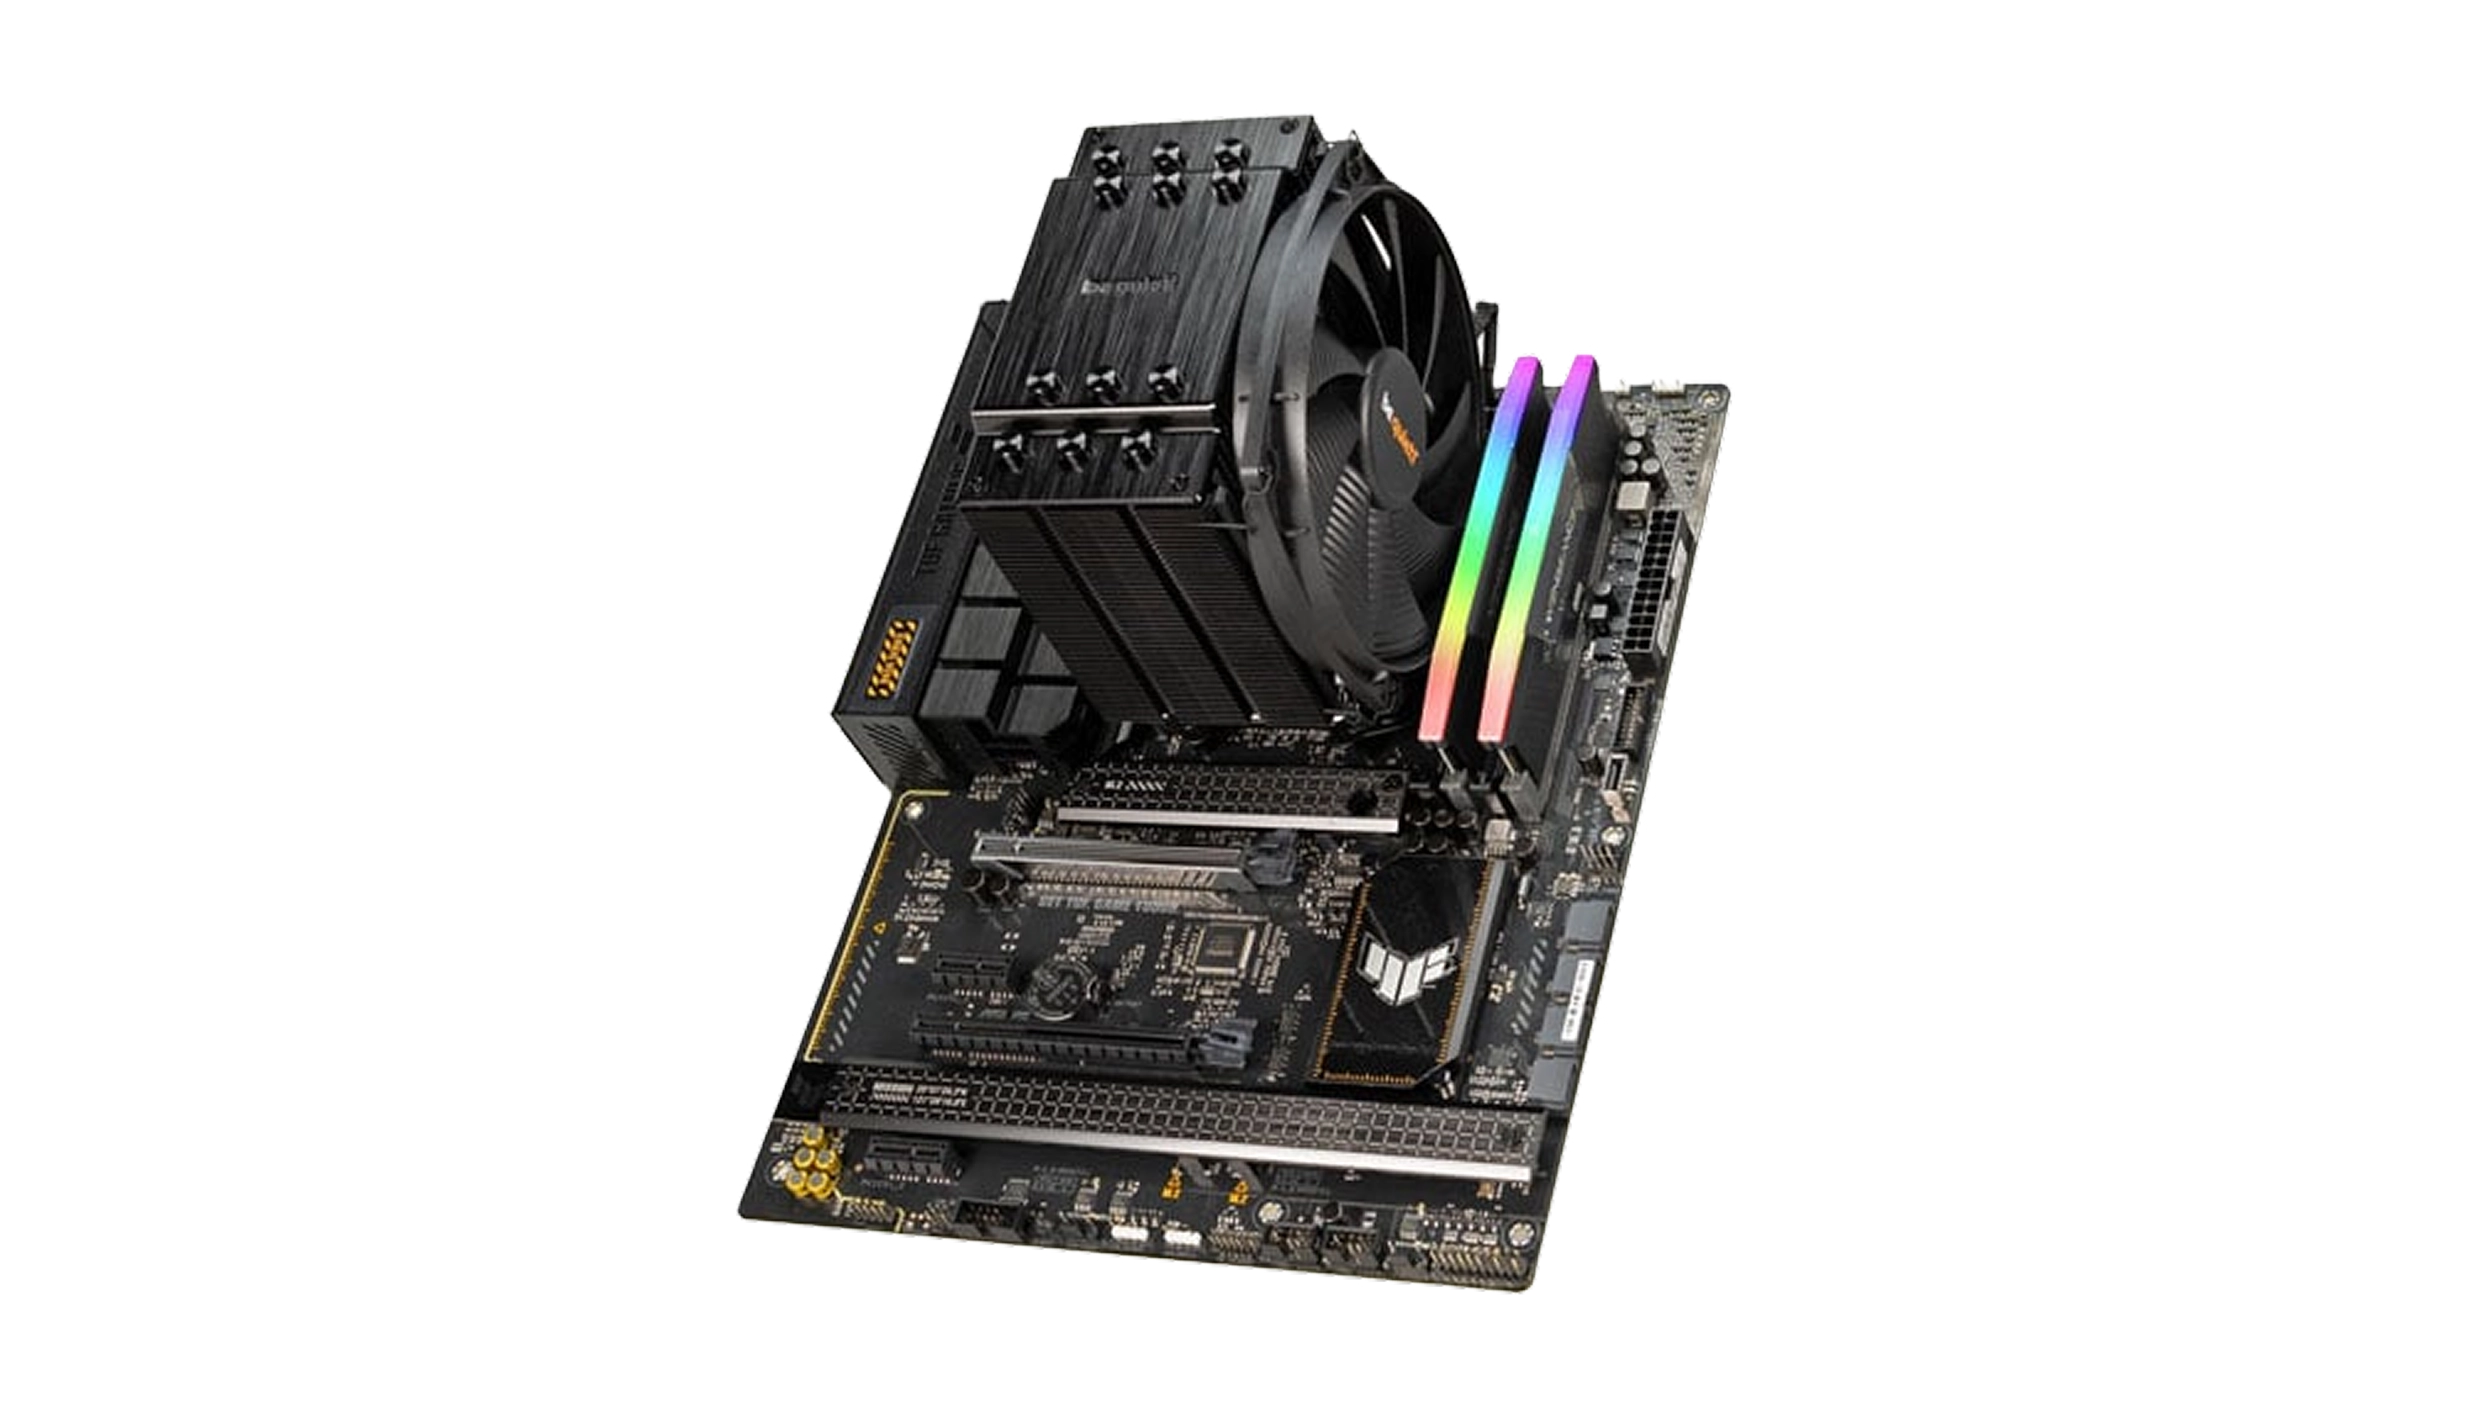
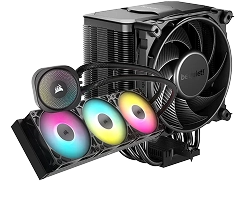
The next step is to install the CPU cooler onto the motherboard. The process is fundamentally the same whether you're using an air cooler or hydrocooler, the latter only differing in that you need to secure the radiator and fans to the case later on (see hydrocooler section).
However, for now the process is the same, the first step being to check how your chosen CPU cooler mounts to the motherboard. This varies from model to model, and also whether you have an AMD or Intel CPU, so make sure to check the manual of your CPU cooler carefully.
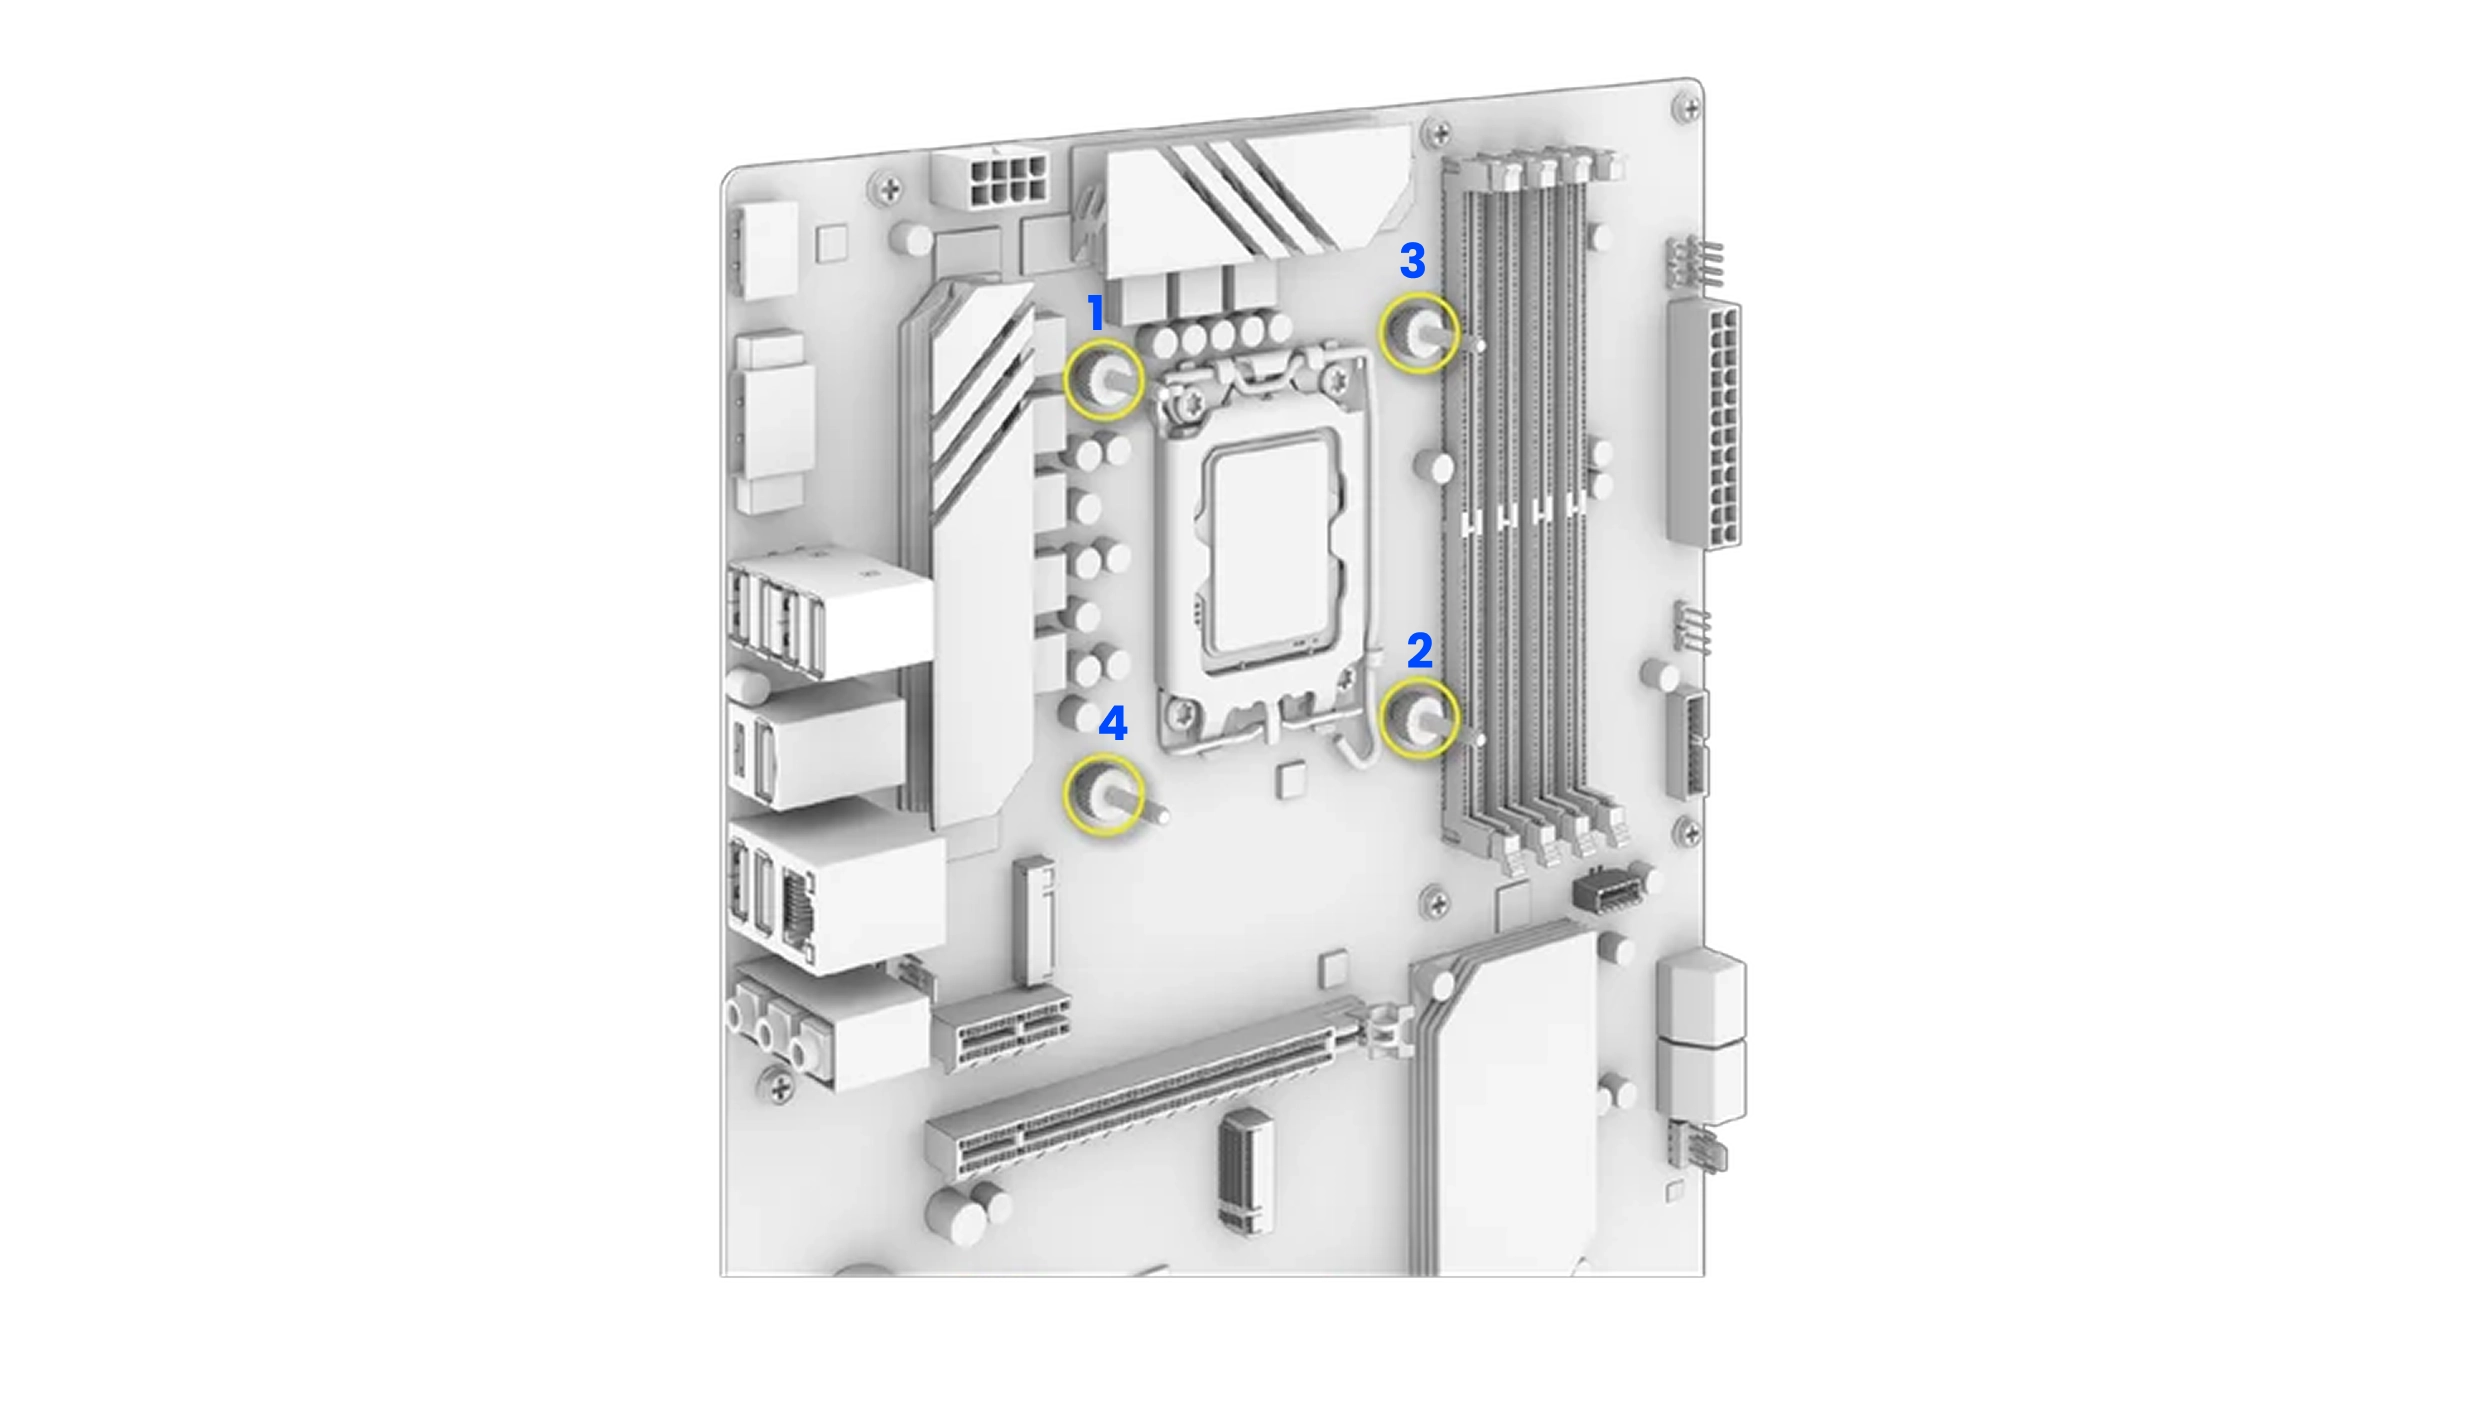
Essentially, you’ll be securing the cooler to the motherboard, and hence also the CPU, via a combination of clips, brackets, screws and stand-offs. One important trick to get right that isn’t always mentioned in cooler manuals is to tighten the screws equally to ensure a good flat fit between the cooler and CPU. For instance, if there are four screws, tighten them equally in diagonal pairs (1 and 2, then 3 and 4) to apply an even amount of pressure.
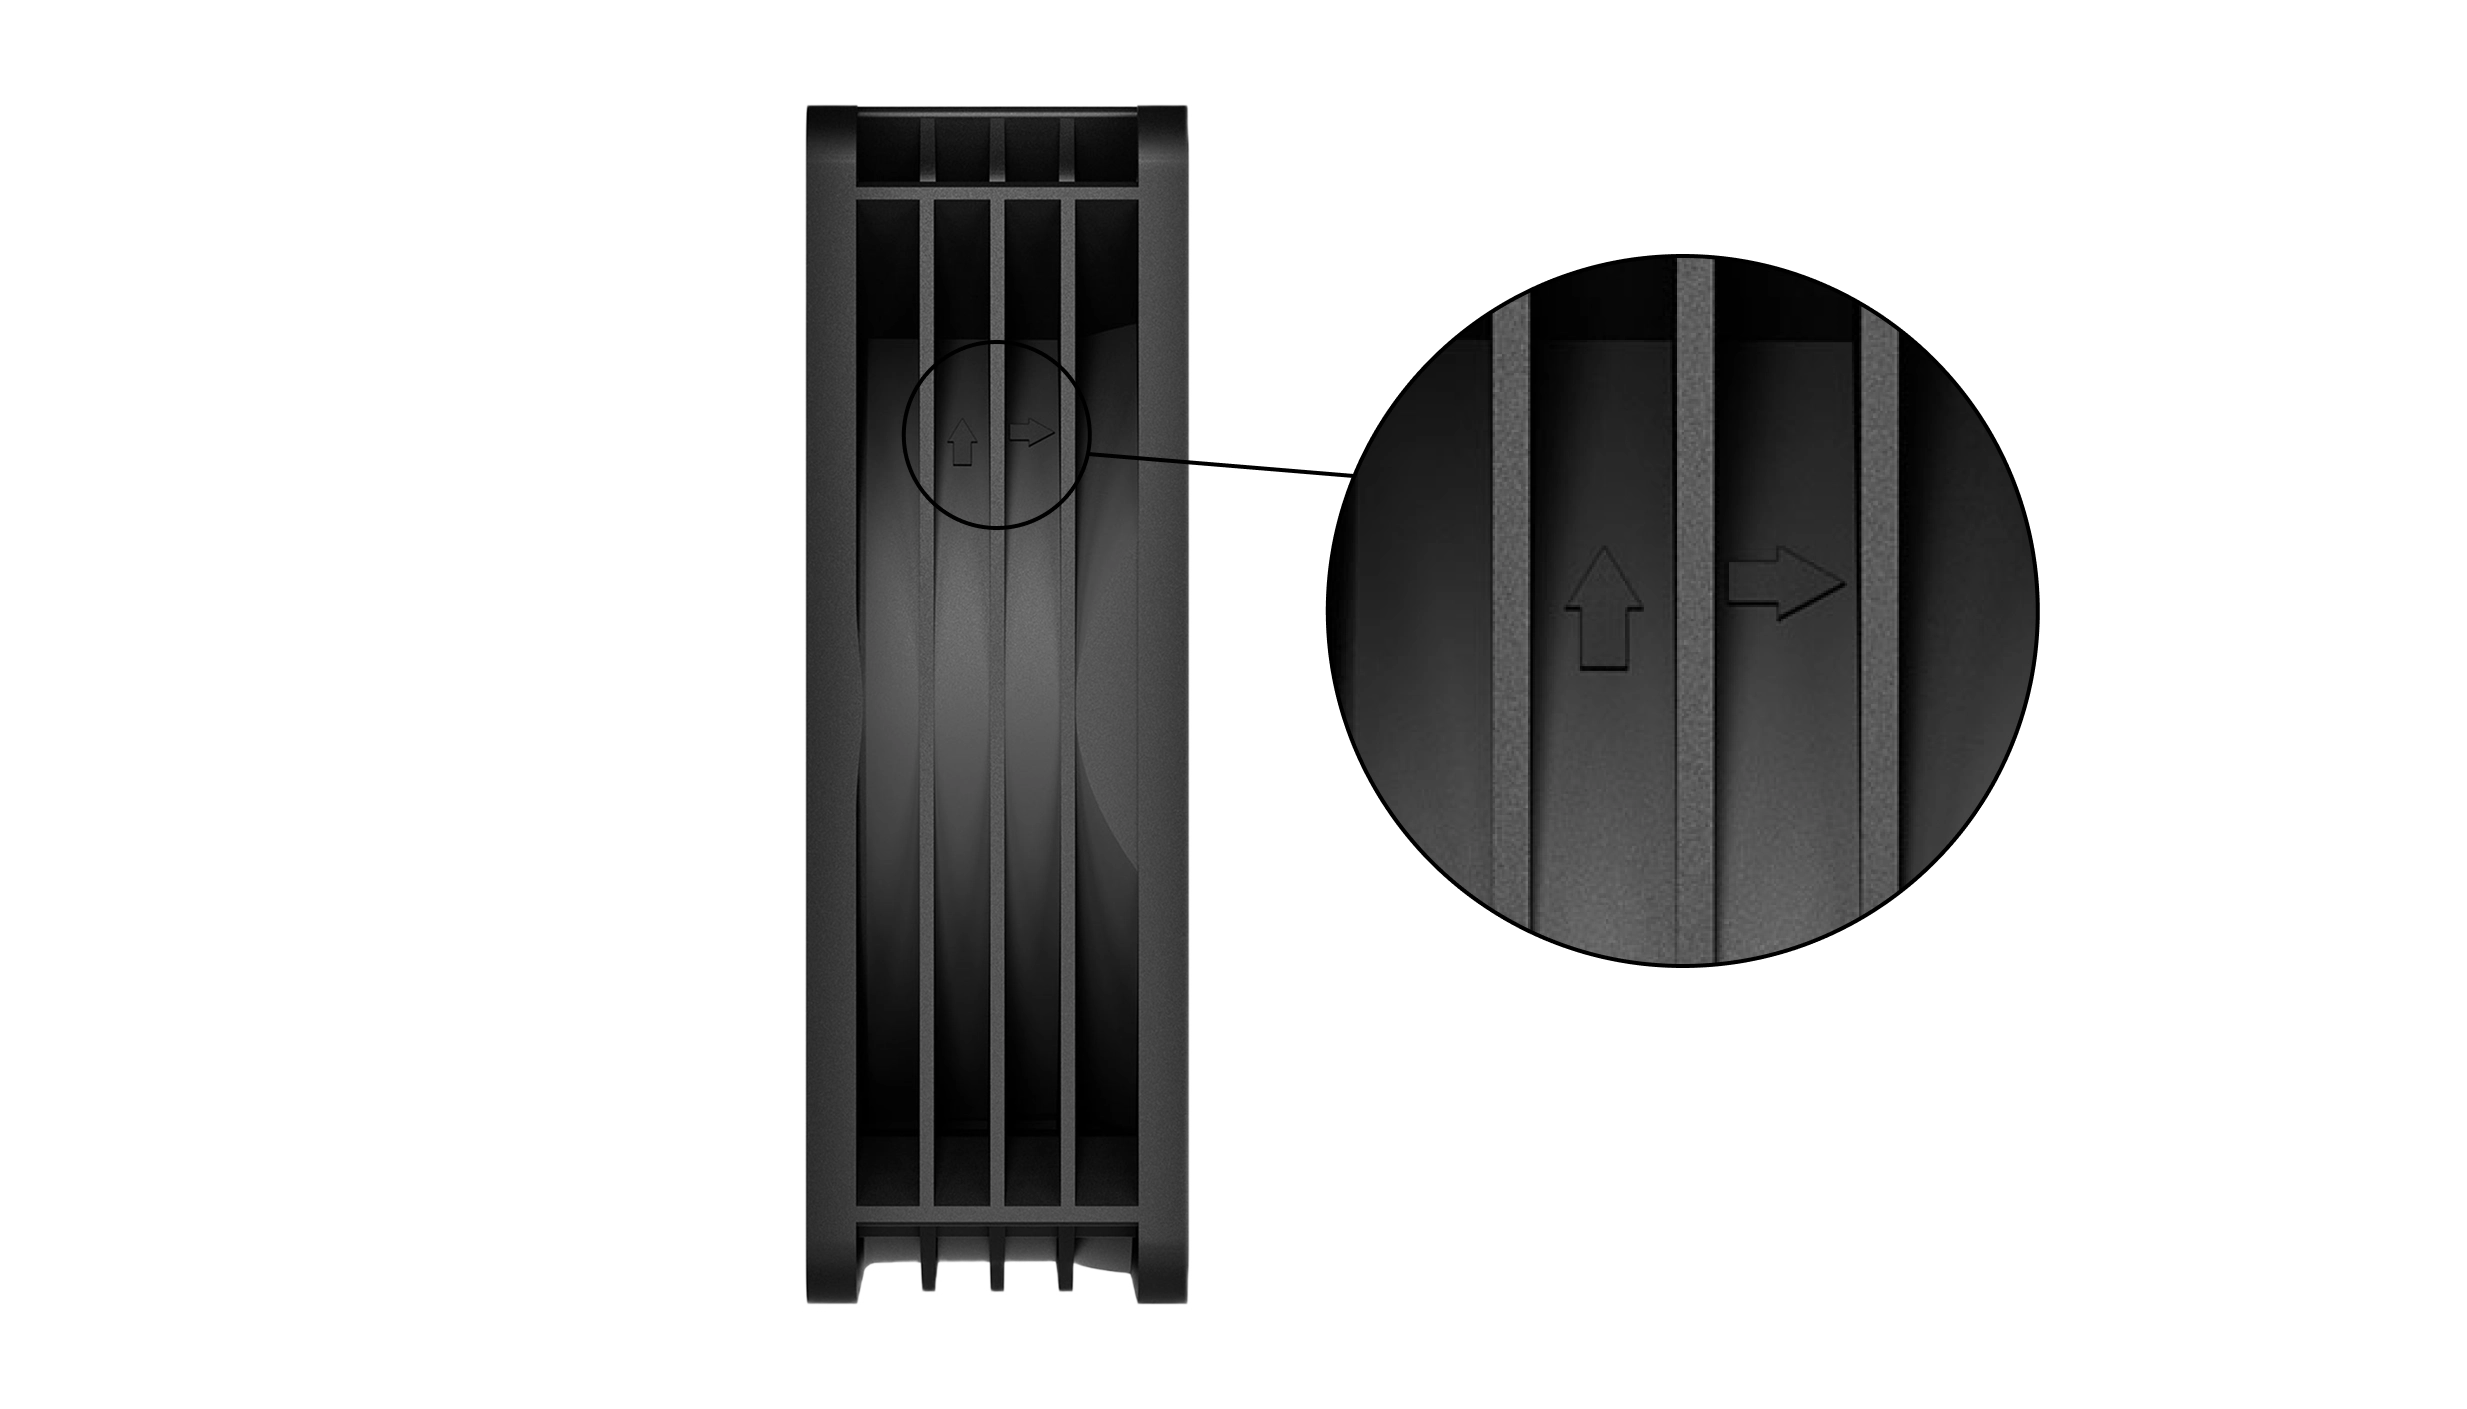
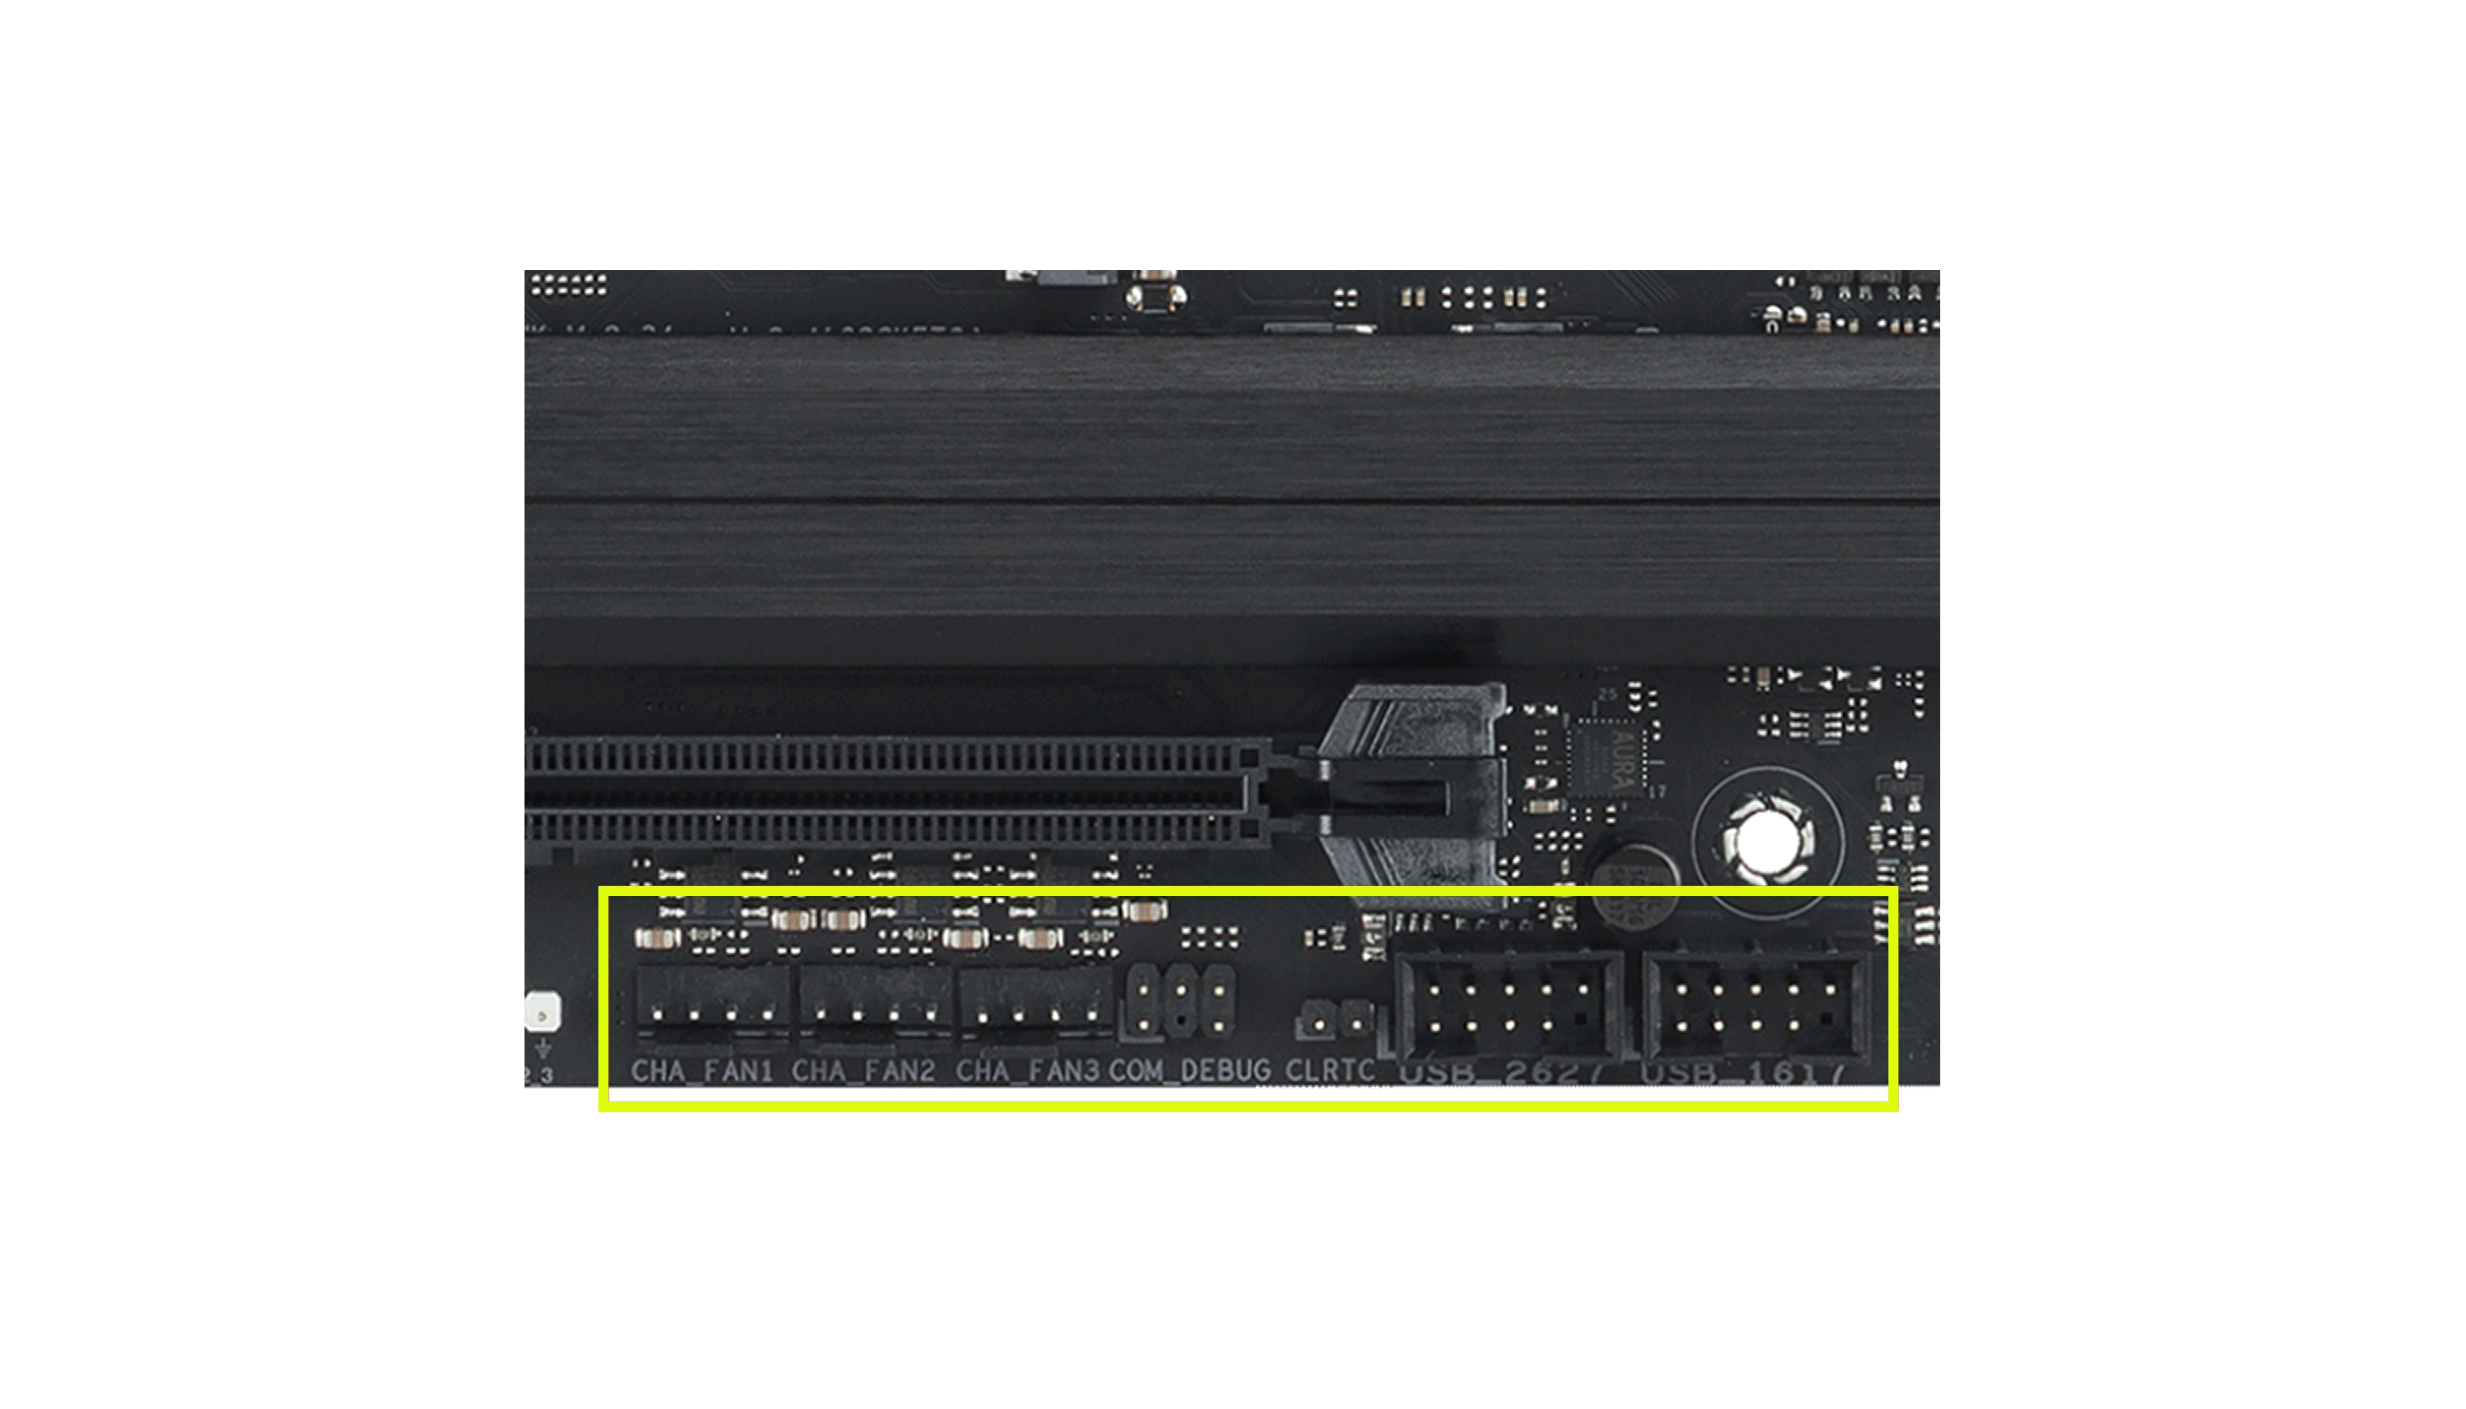
Once the cooler itself is installed it’s also crucial to install any fans, making sure they are positioned the right way around for the airflow in your case. Typically, this means the fans should suck in cool air from the front and push hot air out the rear – most fans normally have the direction of airflow marked with an arrow on the side of the frame.
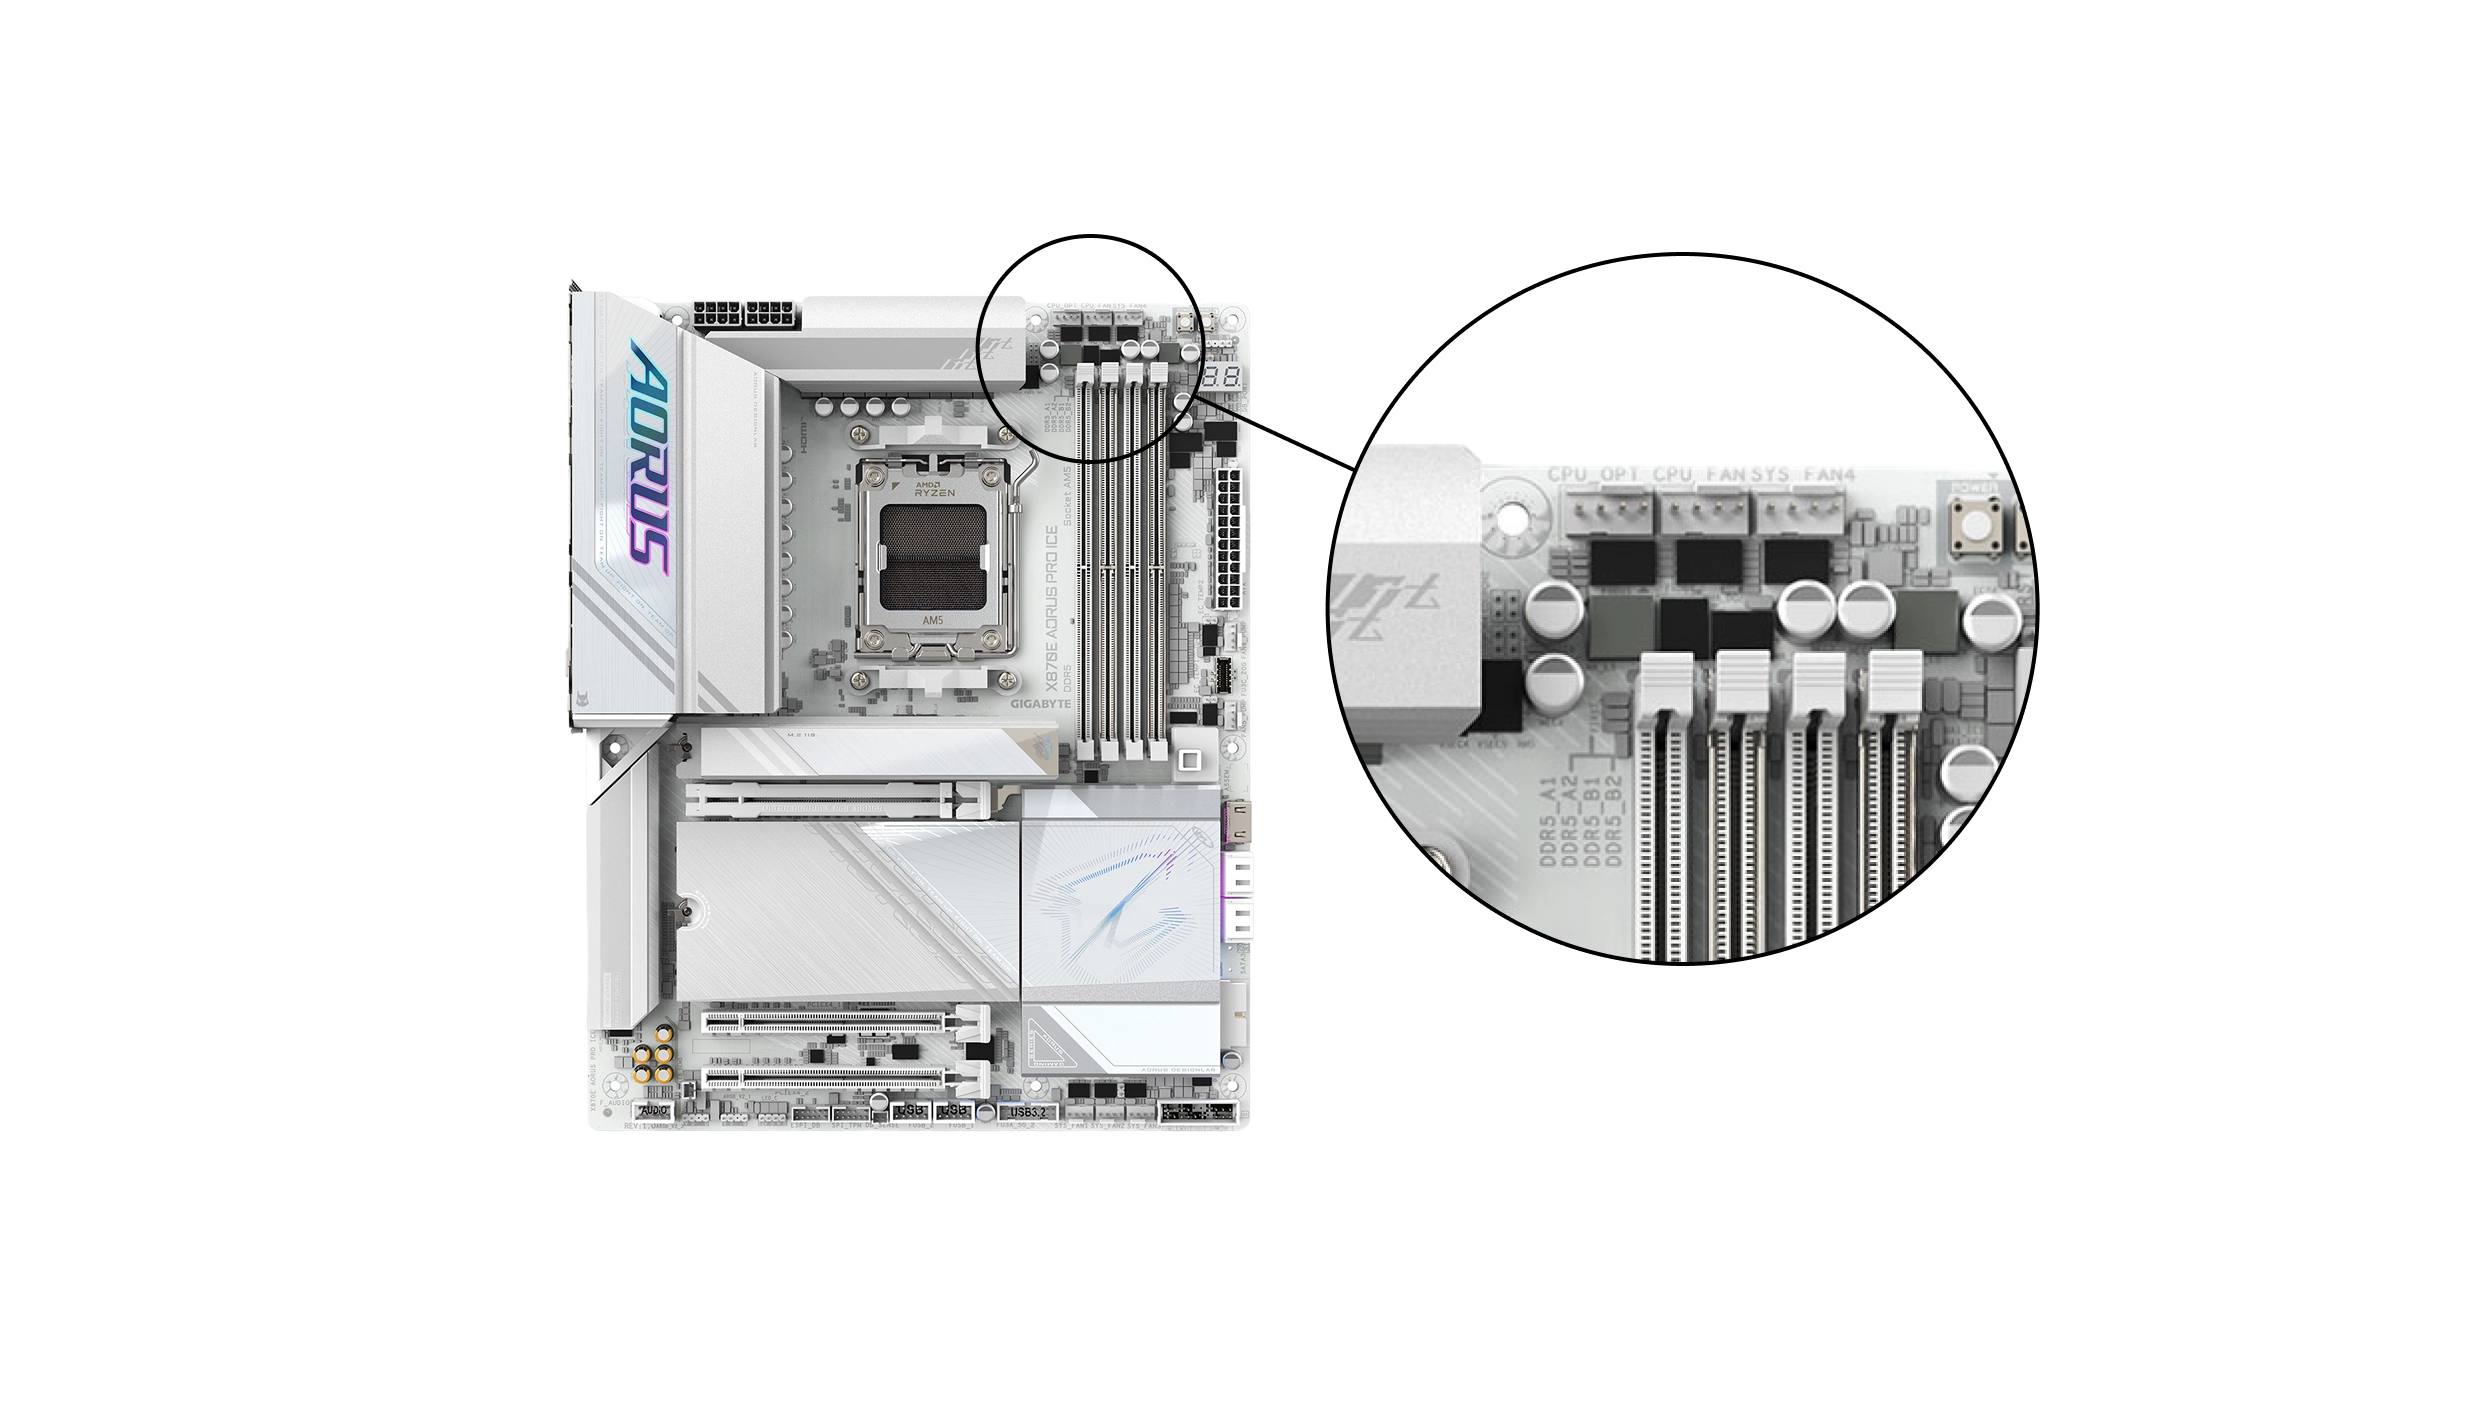
Make sure to plug in the fan cable(s) into the 4-pin fan headers on the motherboard which are normally labelled along the lines of CPU-FAN and CPU-OPT if there is more than one.
If you’re using a hydrocooler then you’ll also need to connect the pump to a dedicated 4-pin header, typically labelled AIO-PUMP. Using these headers will make it easier to identify, monitor and adjust the fans (and pump where appropriate) later in the BIOS or in Windows.
Watch our step-by-step video guide for installing the CPU Cooler.
Still undecided on what to buy?
If you're still struggling with what to buy, check out our CPU cooler buyers guide.
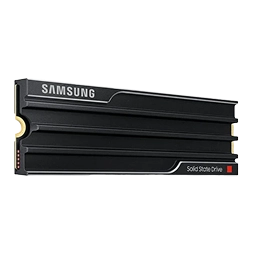
How to install M.2 SSDs
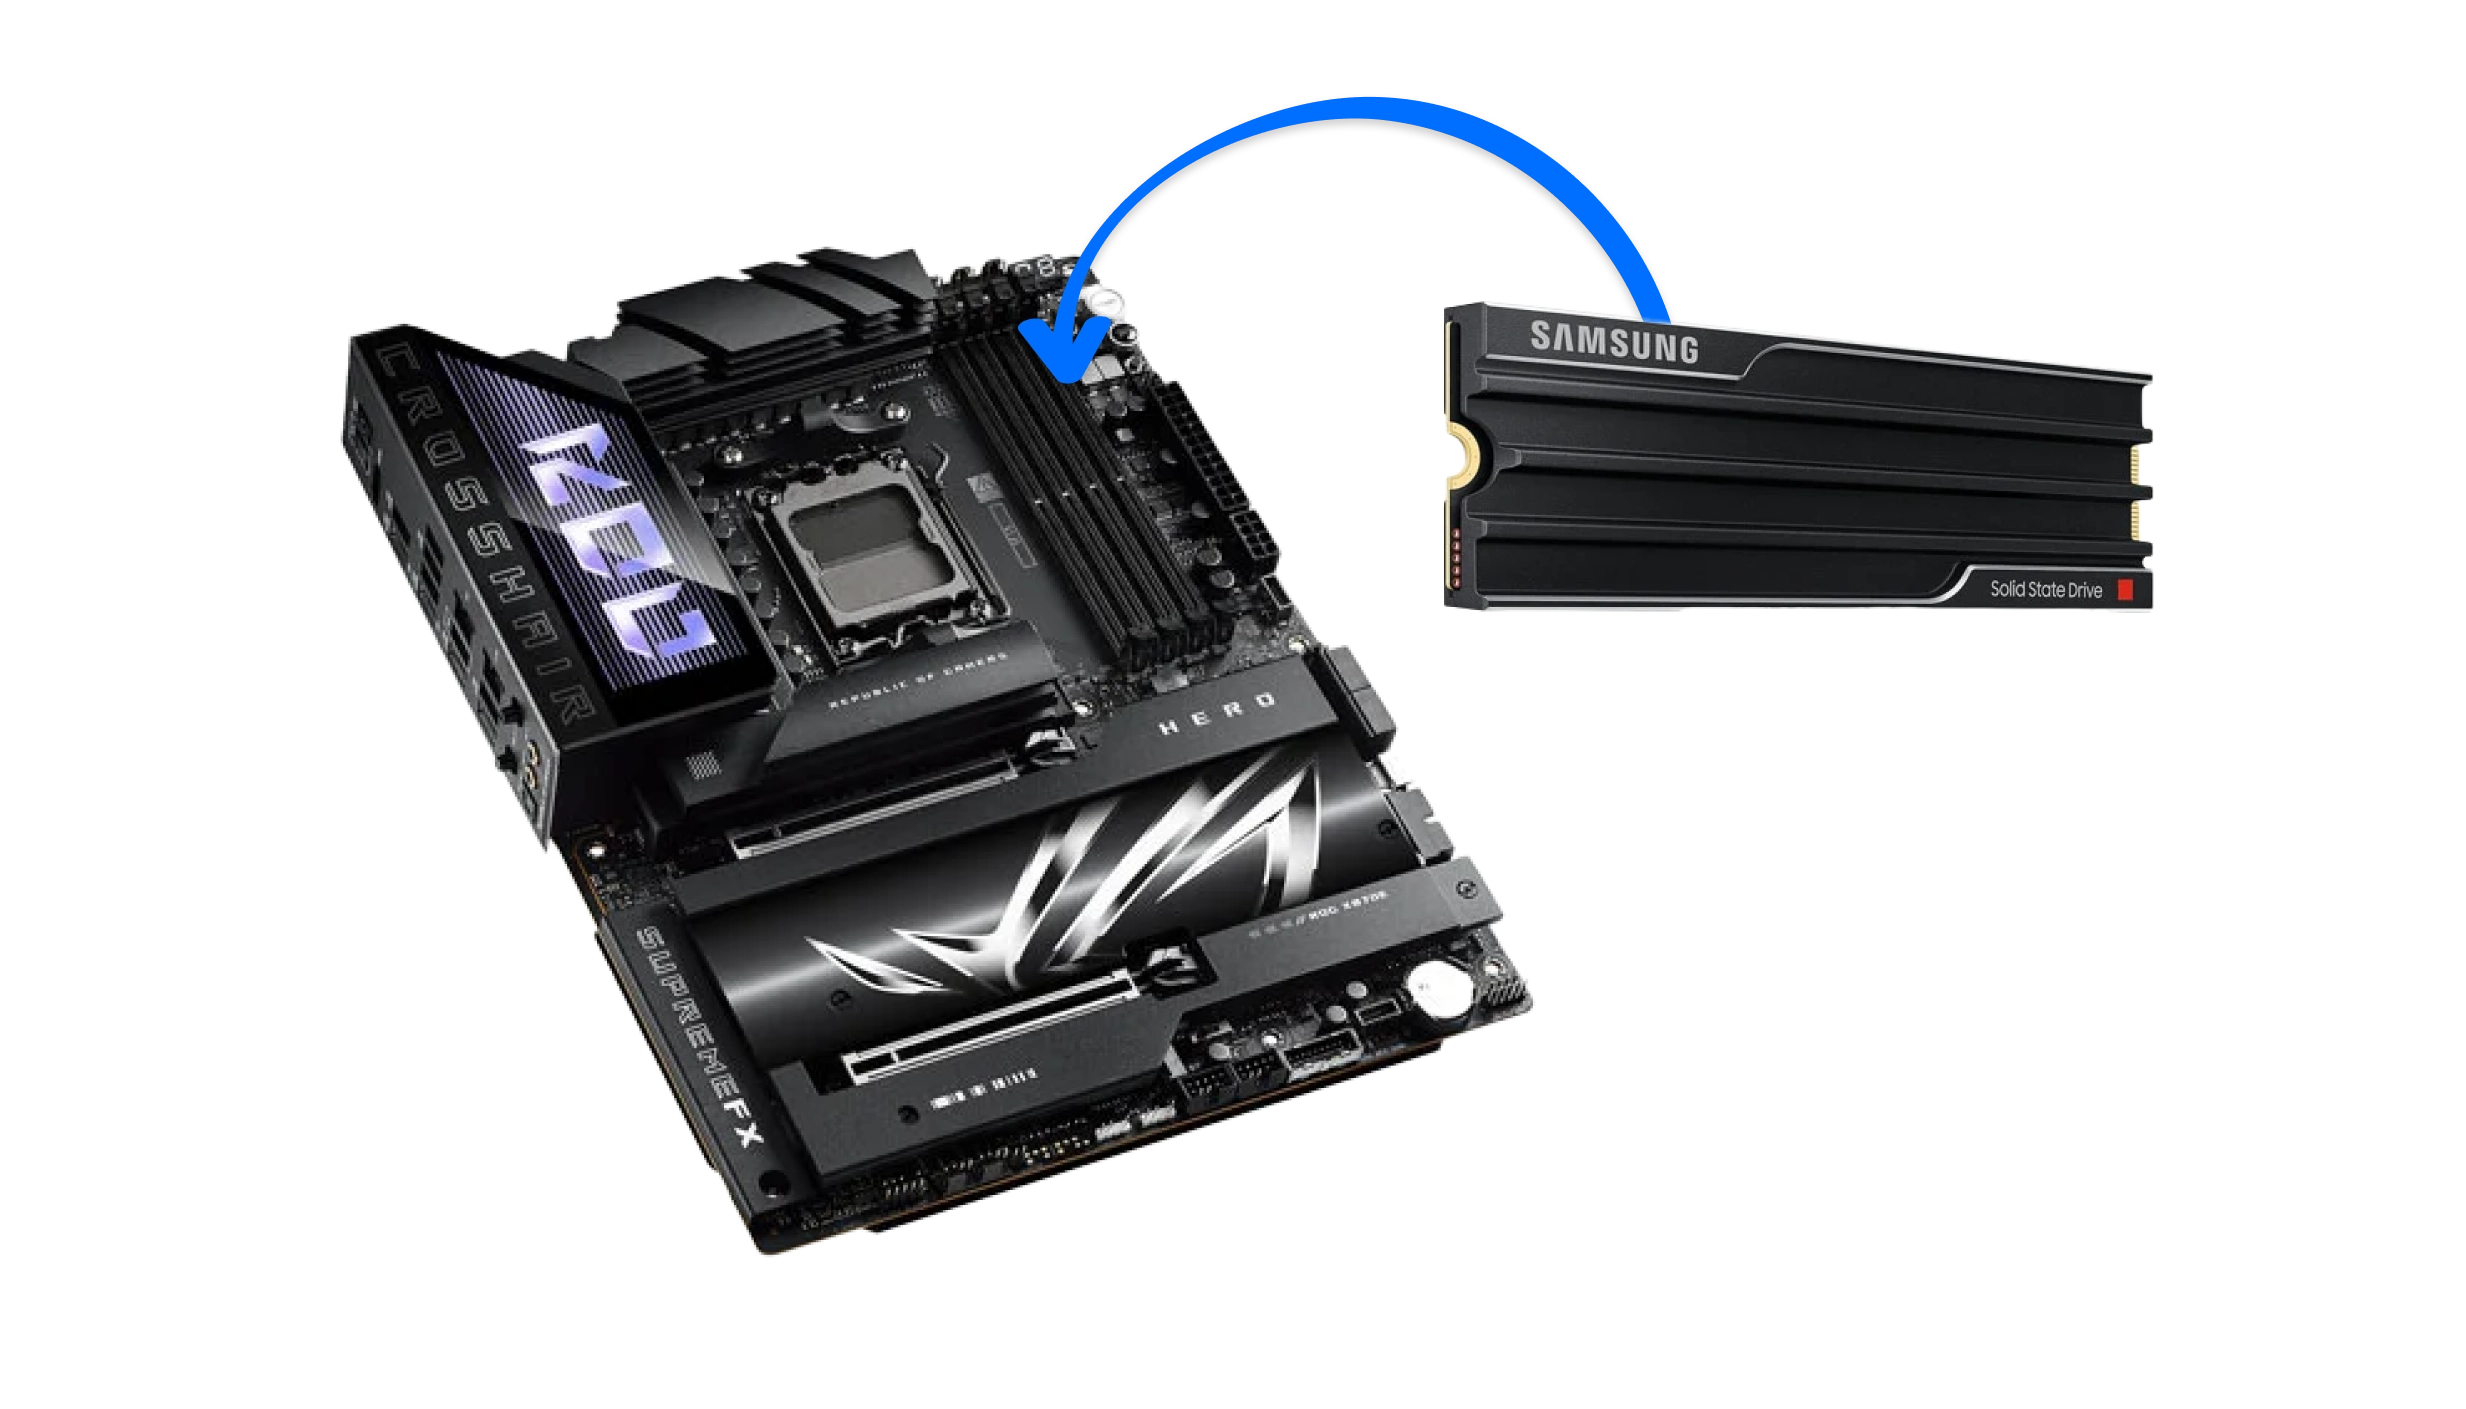
The final component to install before doing initial testing is any M.2 SSDs as these are much easier to install before you screw the motherboard into the case. If you've chosen a SATA SSD instead of an M.2 SSD then this needs to be connected via cables to the motherboard – see Step 12 for details.
The M.2 slots on some motherboards are covered by a heatsink (a cooling device for the SSD), which needs to be removed. This is usually a simple case of removing two screws and lifting the heatsink free. Holding the M.2 SSD by the edges, avoiding the contact pads on one end, firmly push it into the M.2 slot and secure it in place with the provided screws or latch, replacing the heatsink afterwards if appropriate. If in doubt check the motherboard manual for precise instructions.
Watch our step-by-step video guide for installing M.2 SSD modules into your motherboard.
Still undecided on what to buy?
If you're still struggling with what to buy, check out our SSD buyers guide.
Initial Testing
It's now a good idea to test the core components. This is so that if there are any faulty components, configuration issues or compatibility conflicts, it's much easier to replace or adjust components if they're not screwed into the case with all the cabling done. But to do this we need to temporarily install the graphics card and connect the PSU to provide power.
Place the motherboard on top of its box, this will allow you to install the graphics card with the end of its backplate hanging off the edge of the box. You could use another similar surface, but make sure it's made of a non-conductive material so you don't short circuit the motherboard.
The graphics card should be installed into a free 16x PCIe slot – the longest type of PCIe slot – typically the closest one to the CPU socket. If there’s more than one 16x PCIe slot, check the motherboard manual for which one to use.
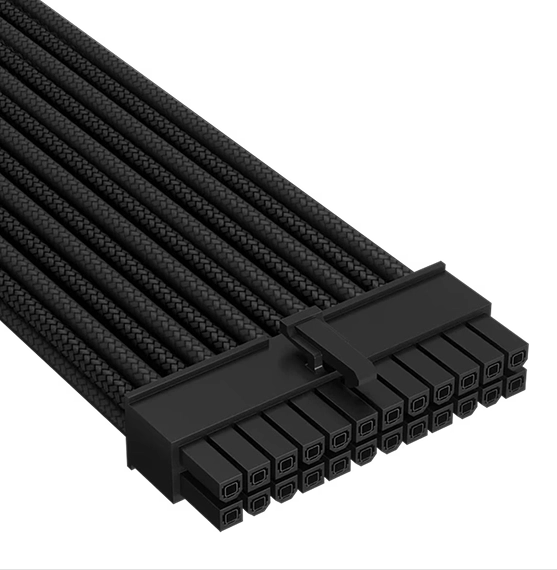
24-pin ATX
All motherboards
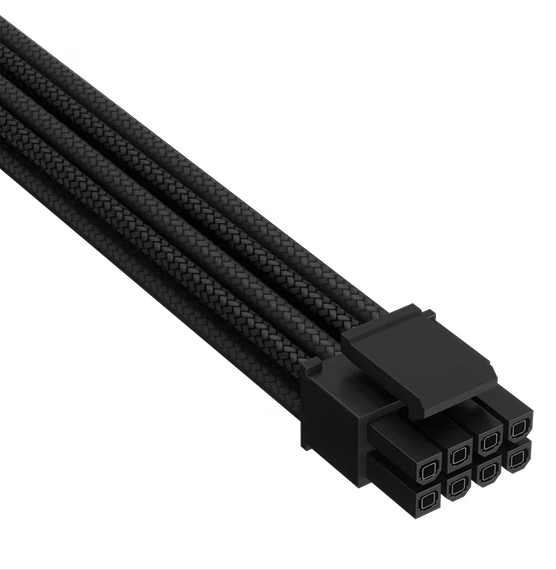
8-pin EPS 12V
Most modern motherboards
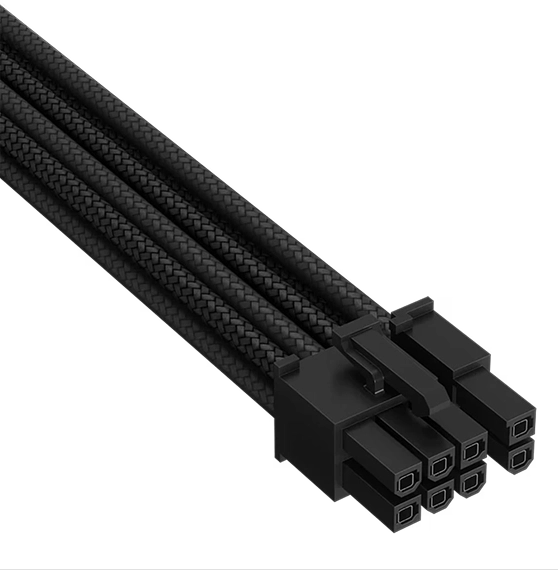
8-pin / 6+2-pin PCIe
Most graphics cards
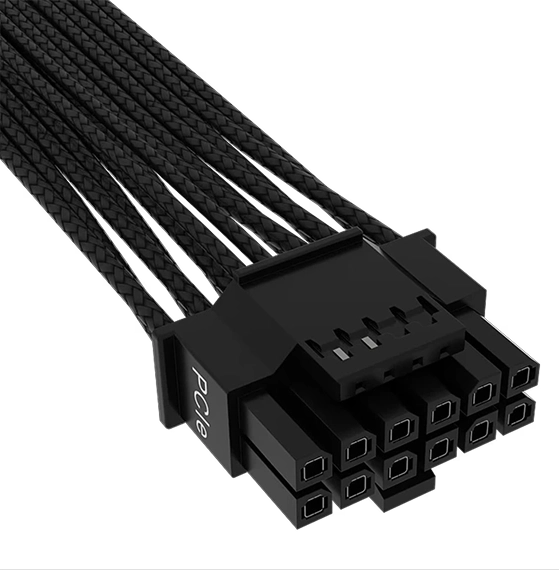
16-pin PCIe 5.0 ATX 3.0 / ATX 3.1
Select high-end graphics cards
The next step is to temporarily wire up the bare minimum number of power cables from the PSU to the motherboard and graphics card. You’ll need to connect the 24-pin ATX and 8-pin EPS 12V cables to the motherboard, and either several 8-pin / 6+2-pin PCIe cables or a single 16-pin PCIe 5.0 ATX 3.0 / ATX 3.1 cable to the graphics card. If in doubt check the graphics card manual how many power cables are required.
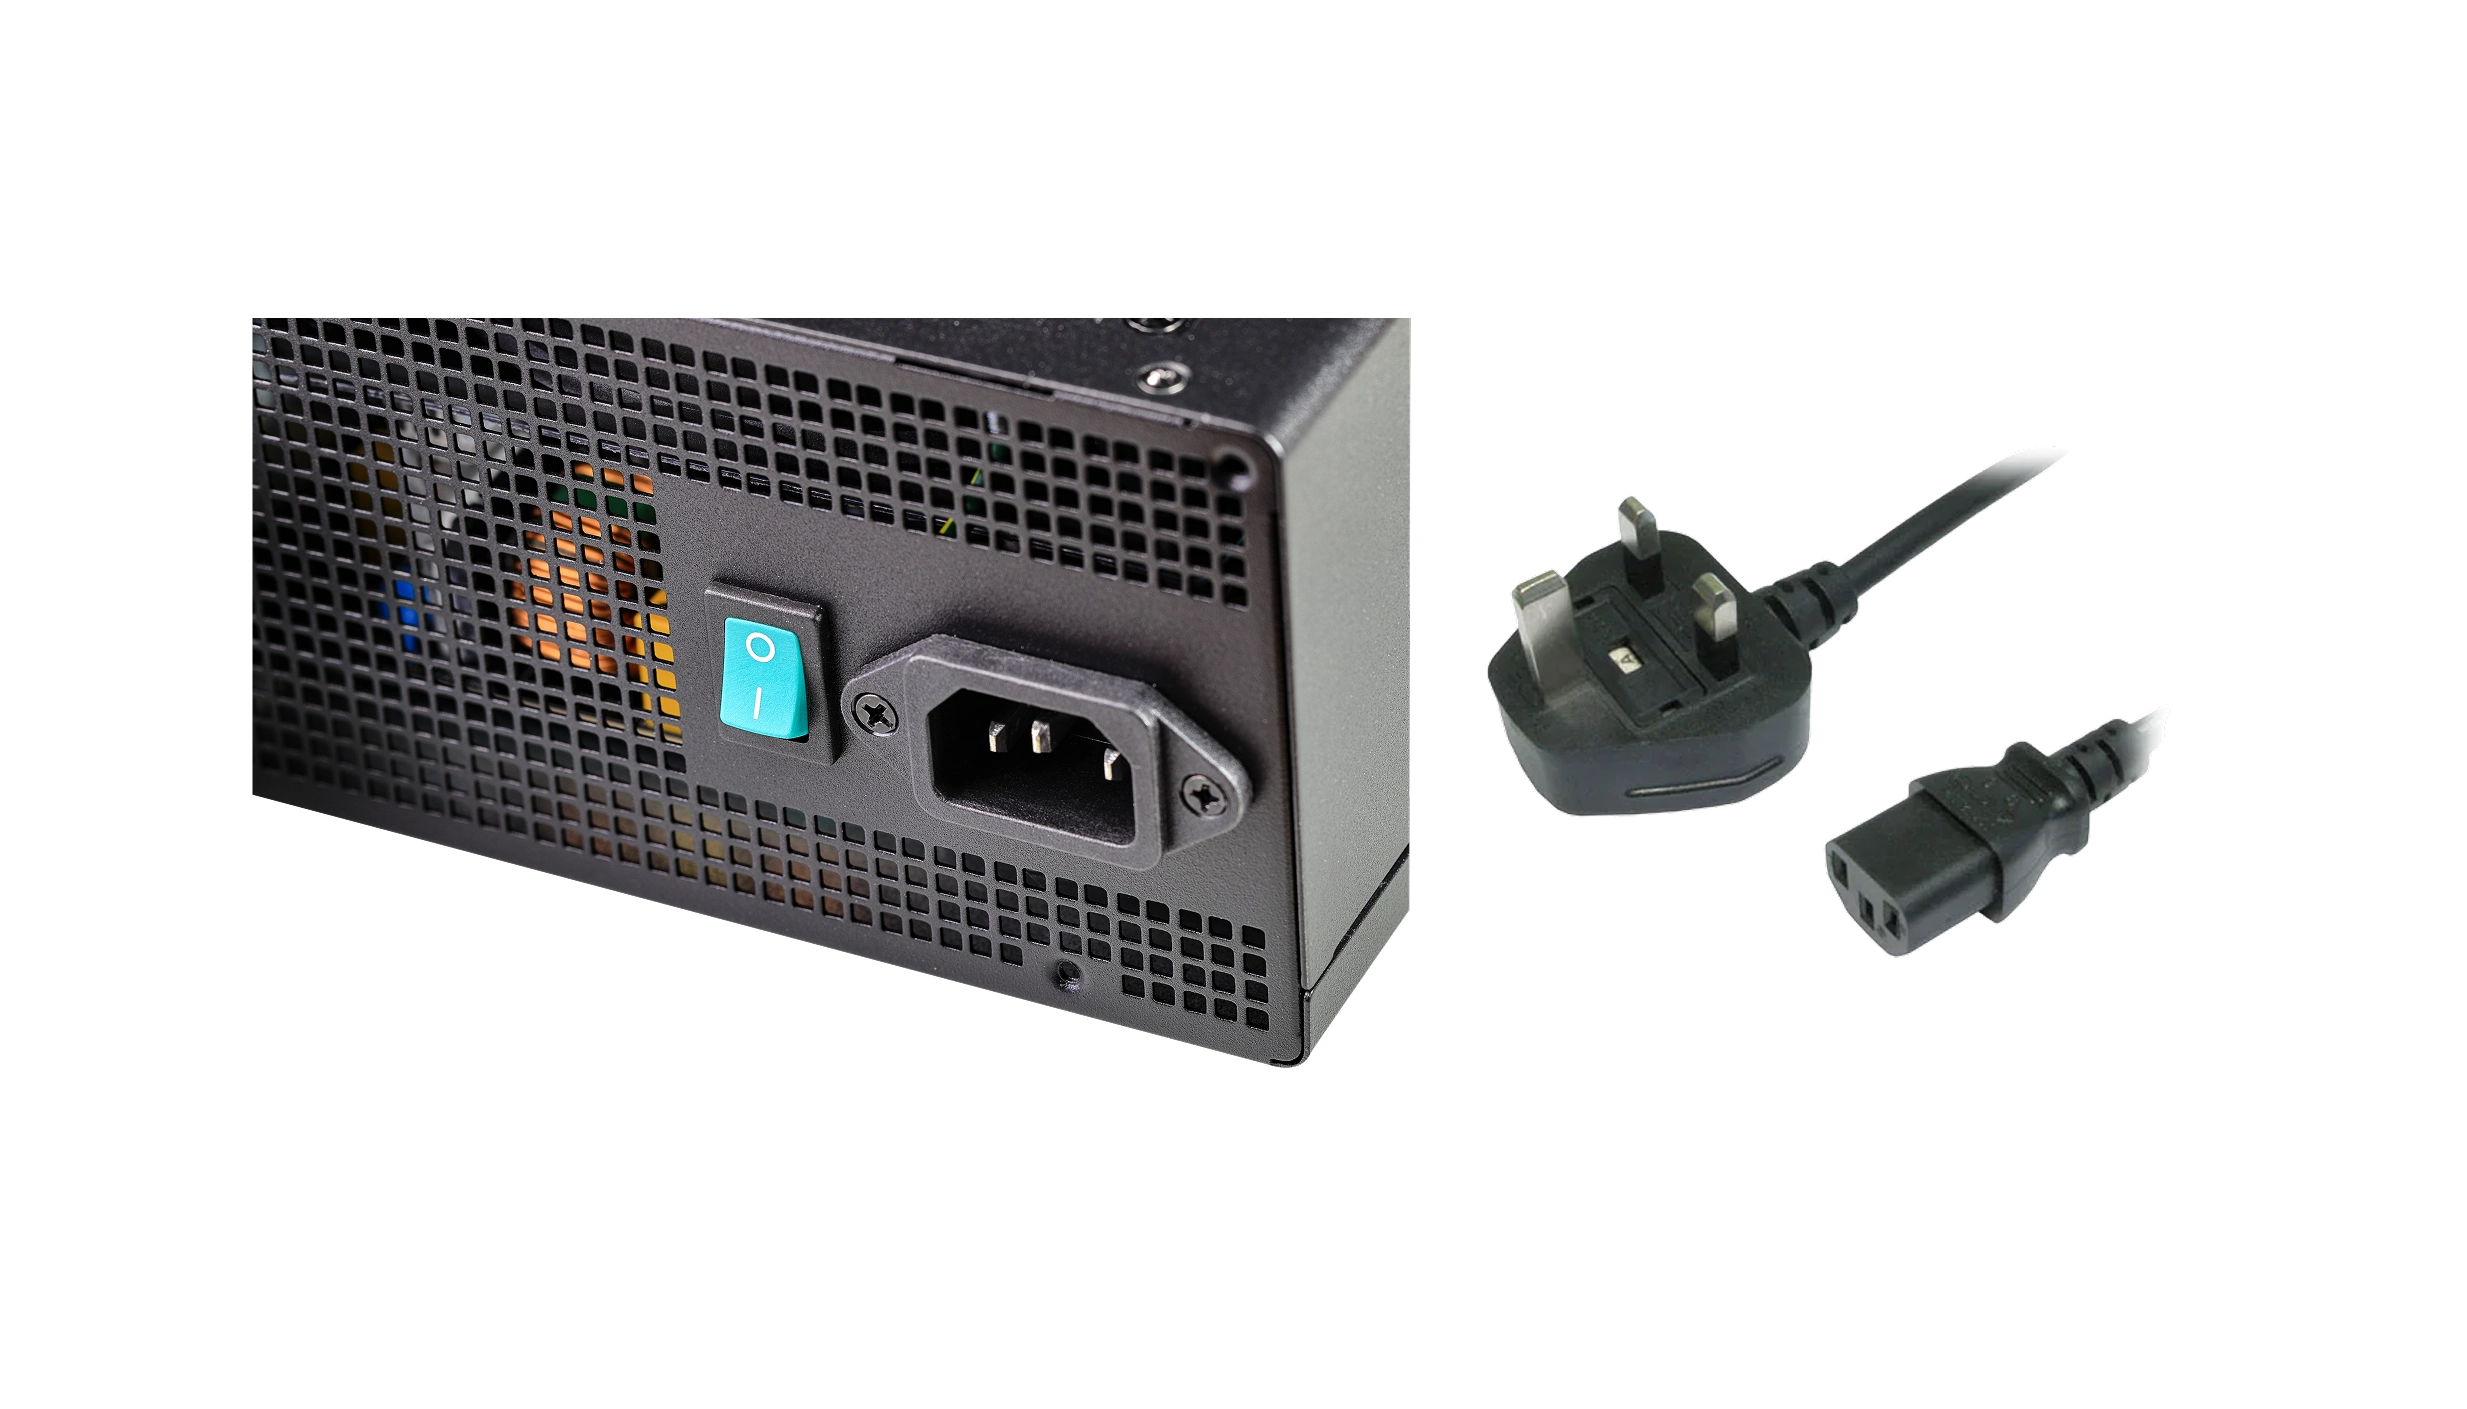
Finally, you’ll need to attach the mains power cable to the PSU itself. Make sure to turn on PSU at the back, and ensure that its facing fan side up so that it can breathe.
You’ll also need to connect the monitor to your graphics card, and keyboard and mouse to the motherboard.
Now we’re ready to start testing. As we haven’t unboxed the case yet we need to replicate the function of the power switch to power up the motherboard. Some motherboards include a power switch for this purpose, but if your motherboard doesn’t have one don’t worry, there is another way to switch the system on.
Right: Diagram of typical motherboard front-panel header, including the two power pins labelled as PWR_BTN.
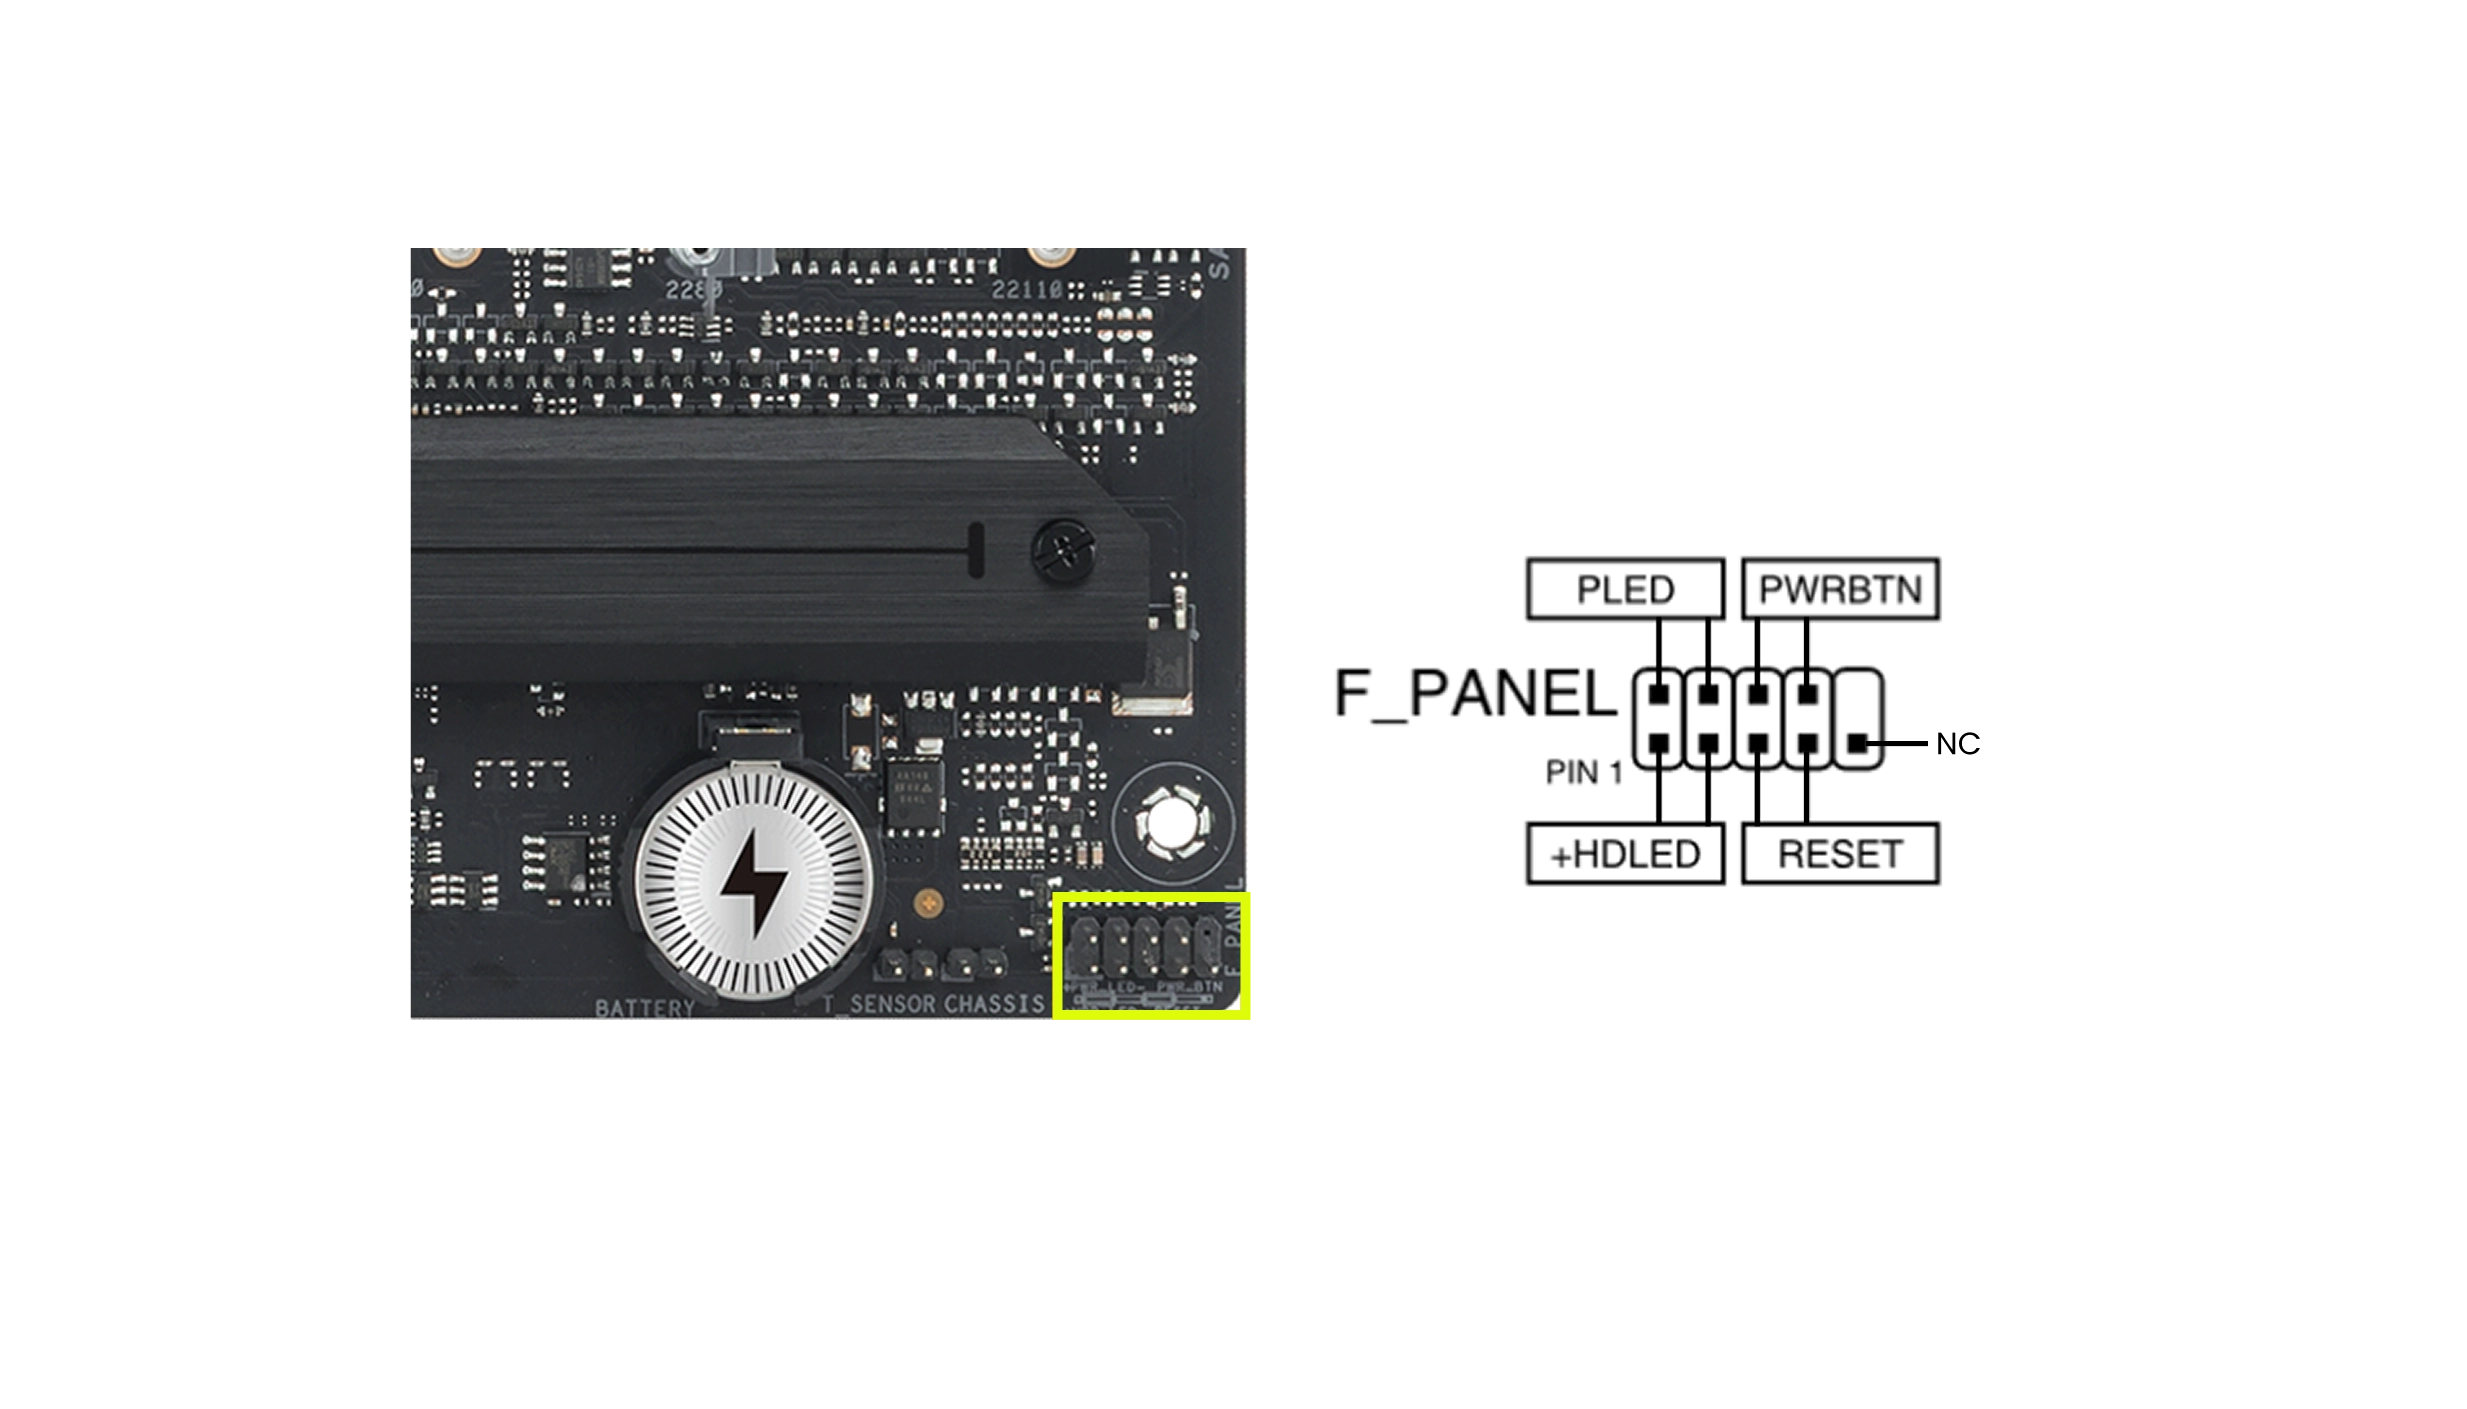
Using your motherboard manual locate the two power switch pins; you need to create a short circuit using the tip of your screwdriver to connect these two pins for two seconds. Be careful not to make contact with the screwdriver with any other pins as this could damage the motherboard.
If you’ve pushed the power button on the motherboard OR created a short circuit on the power pins and all the components are functioning properly your PC will start its POST (Power On Self Test) procedure, as evidenced by fans starting to spin, LEDs lighting up on the motherboard and the monitor coming to life.
At this first boot its worth entering the BIOS or EUFI, a management console for the motherboard. A prompt for this should appear on-screen temporarily, typically asking you to press the Delete or F2 key on the keyboard. The layout and options in different BIOS/EUFI varies enormously, so be on the lookout for something along the lines of ‘PC Health Status’ where you can view useful stats such as system temperature. A quick and simple check of the CPU temperature will tell you if you’ve installed the CPU cooler properly, as it should be lower than 500C. If its higher than this you may have applied too much or too little TIM or miss-mounted the cooler; shutdown the system and check the dedicated stages in this guide again.
If the system POSTs successfully, all the fans are spinning and the CPU temperature is acceptable, then switch off the system on the PSU or at the mains. Remove the power cables between the PSU and motherboard and graphics card, and then remove the graphics card from the motherboard.
You’re now ready to continue on with the build. If you do have any problems then check out the Troubleshooting section at the end of this guide.
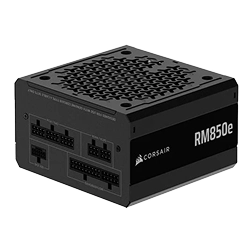
How to install the PSU
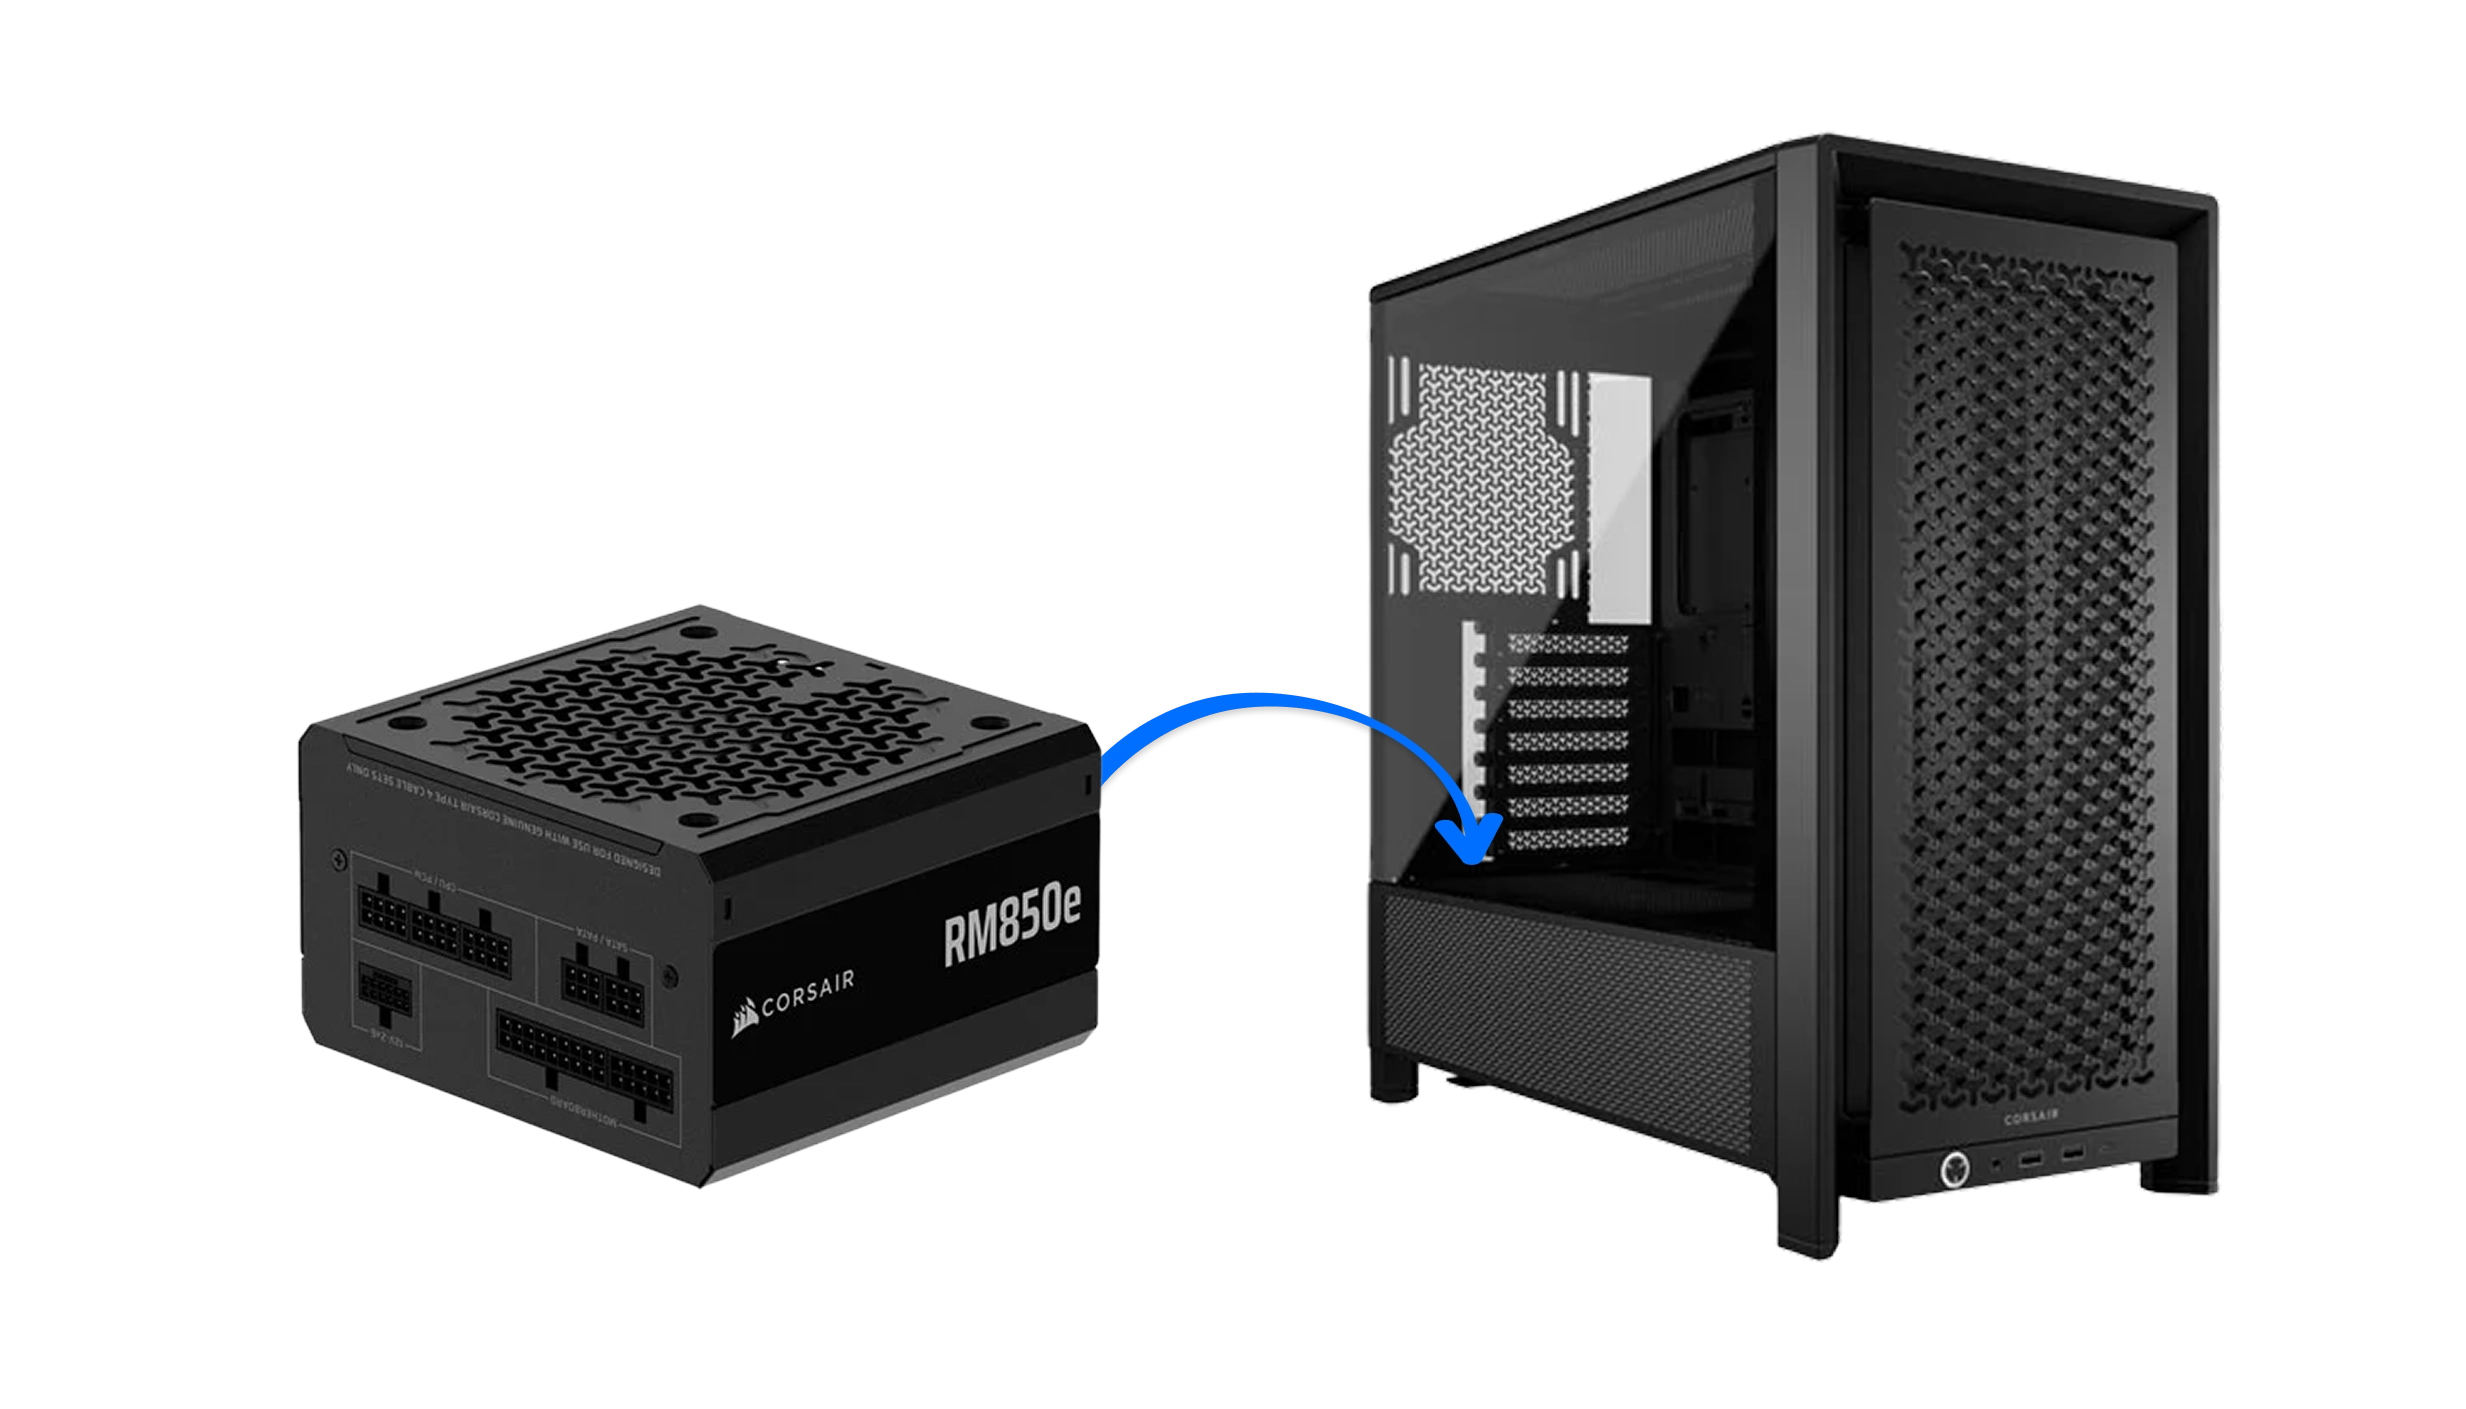
Now you know that your core components are working you can start building your gaming PC into the case. Start by removing both side panels of the case, these are typically secured in place with two screws/thumbscrews at the back. We recommend installing the PSU, aka power supply, first as this leaves as much space as possible free for cable routing. The PSU will mount using four screws/thumbscrews into a specific bay in the case, typically at the bottom rear or top rear depending on the design. The narrow end of the PSU with the mains socket and exhaust needs to be pointed towards the rear, with the fan on the wide surface positioned so it can suck cool into the PSU, often through a dust filter built into the case. If in doubt, check the case manual for how to orientate the PSU.
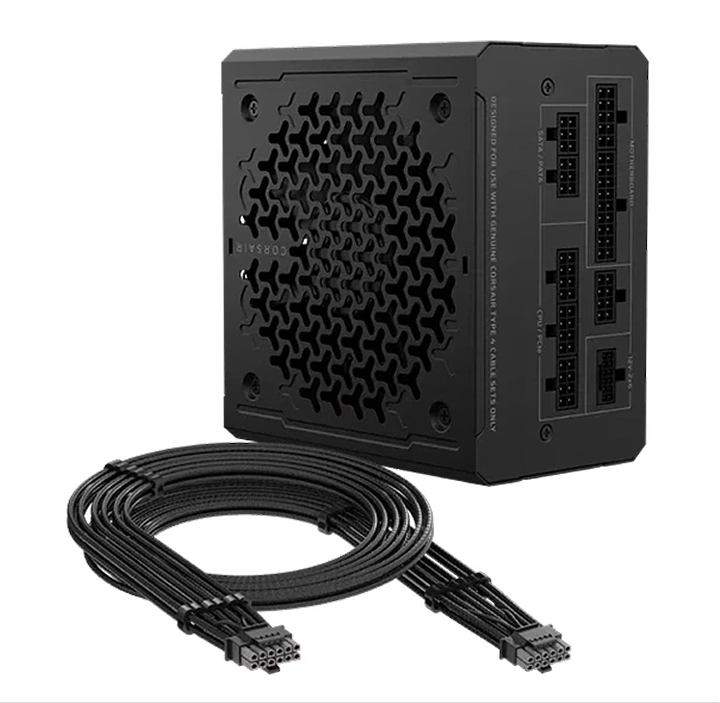
Fully Modular
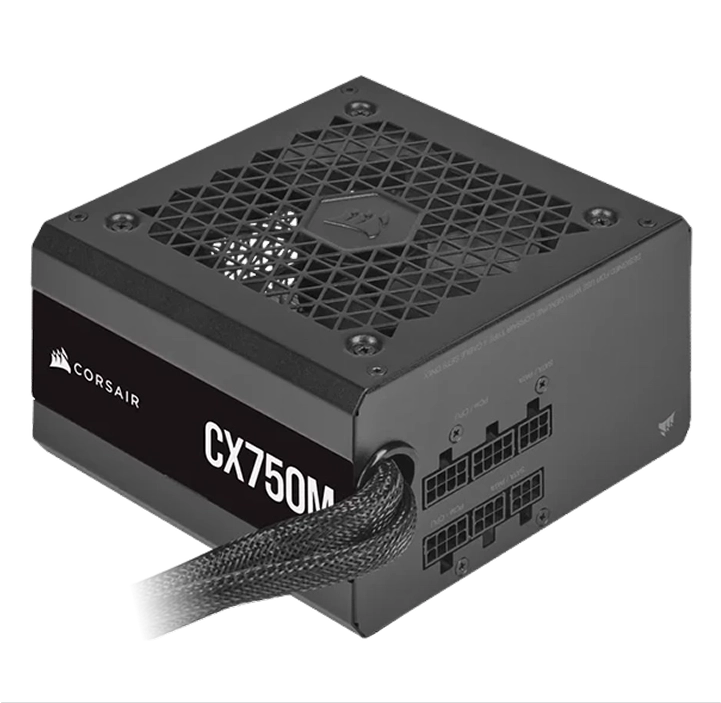
Semi Modular
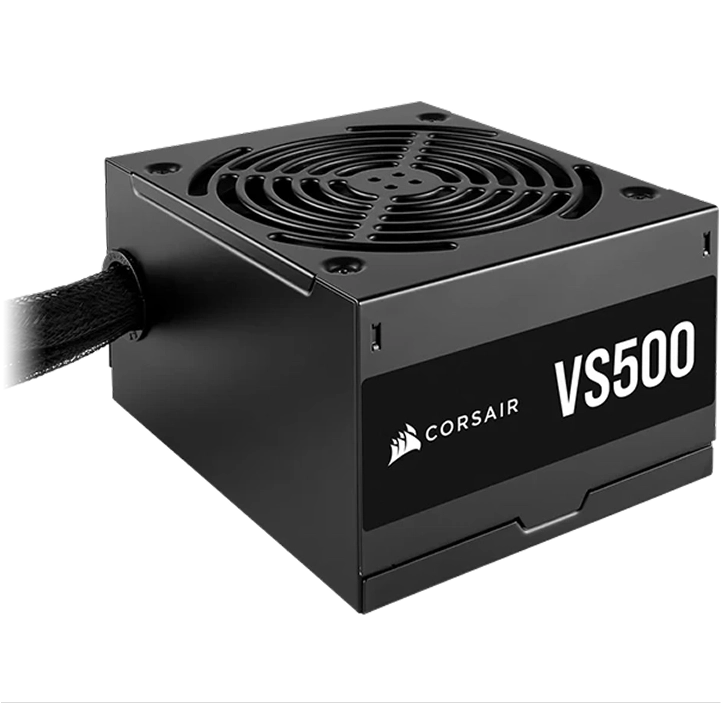
Non Modular
If you have a modular PSU it can installed without any cables, but if it's a semi-modular, or non-modular PSU its best to leave the cables hanging loose for now so you can route them towards their respective components later.
Still undecided on what to buy?
If you're still struggling with what to buy, check out our case buyers guide and PSU buyers guide.
How to Install the Motherboard
The next component to be fitted is the motherboard, which is much easier to do with the case on its side so the motherboard is orientated horizontally during installation.
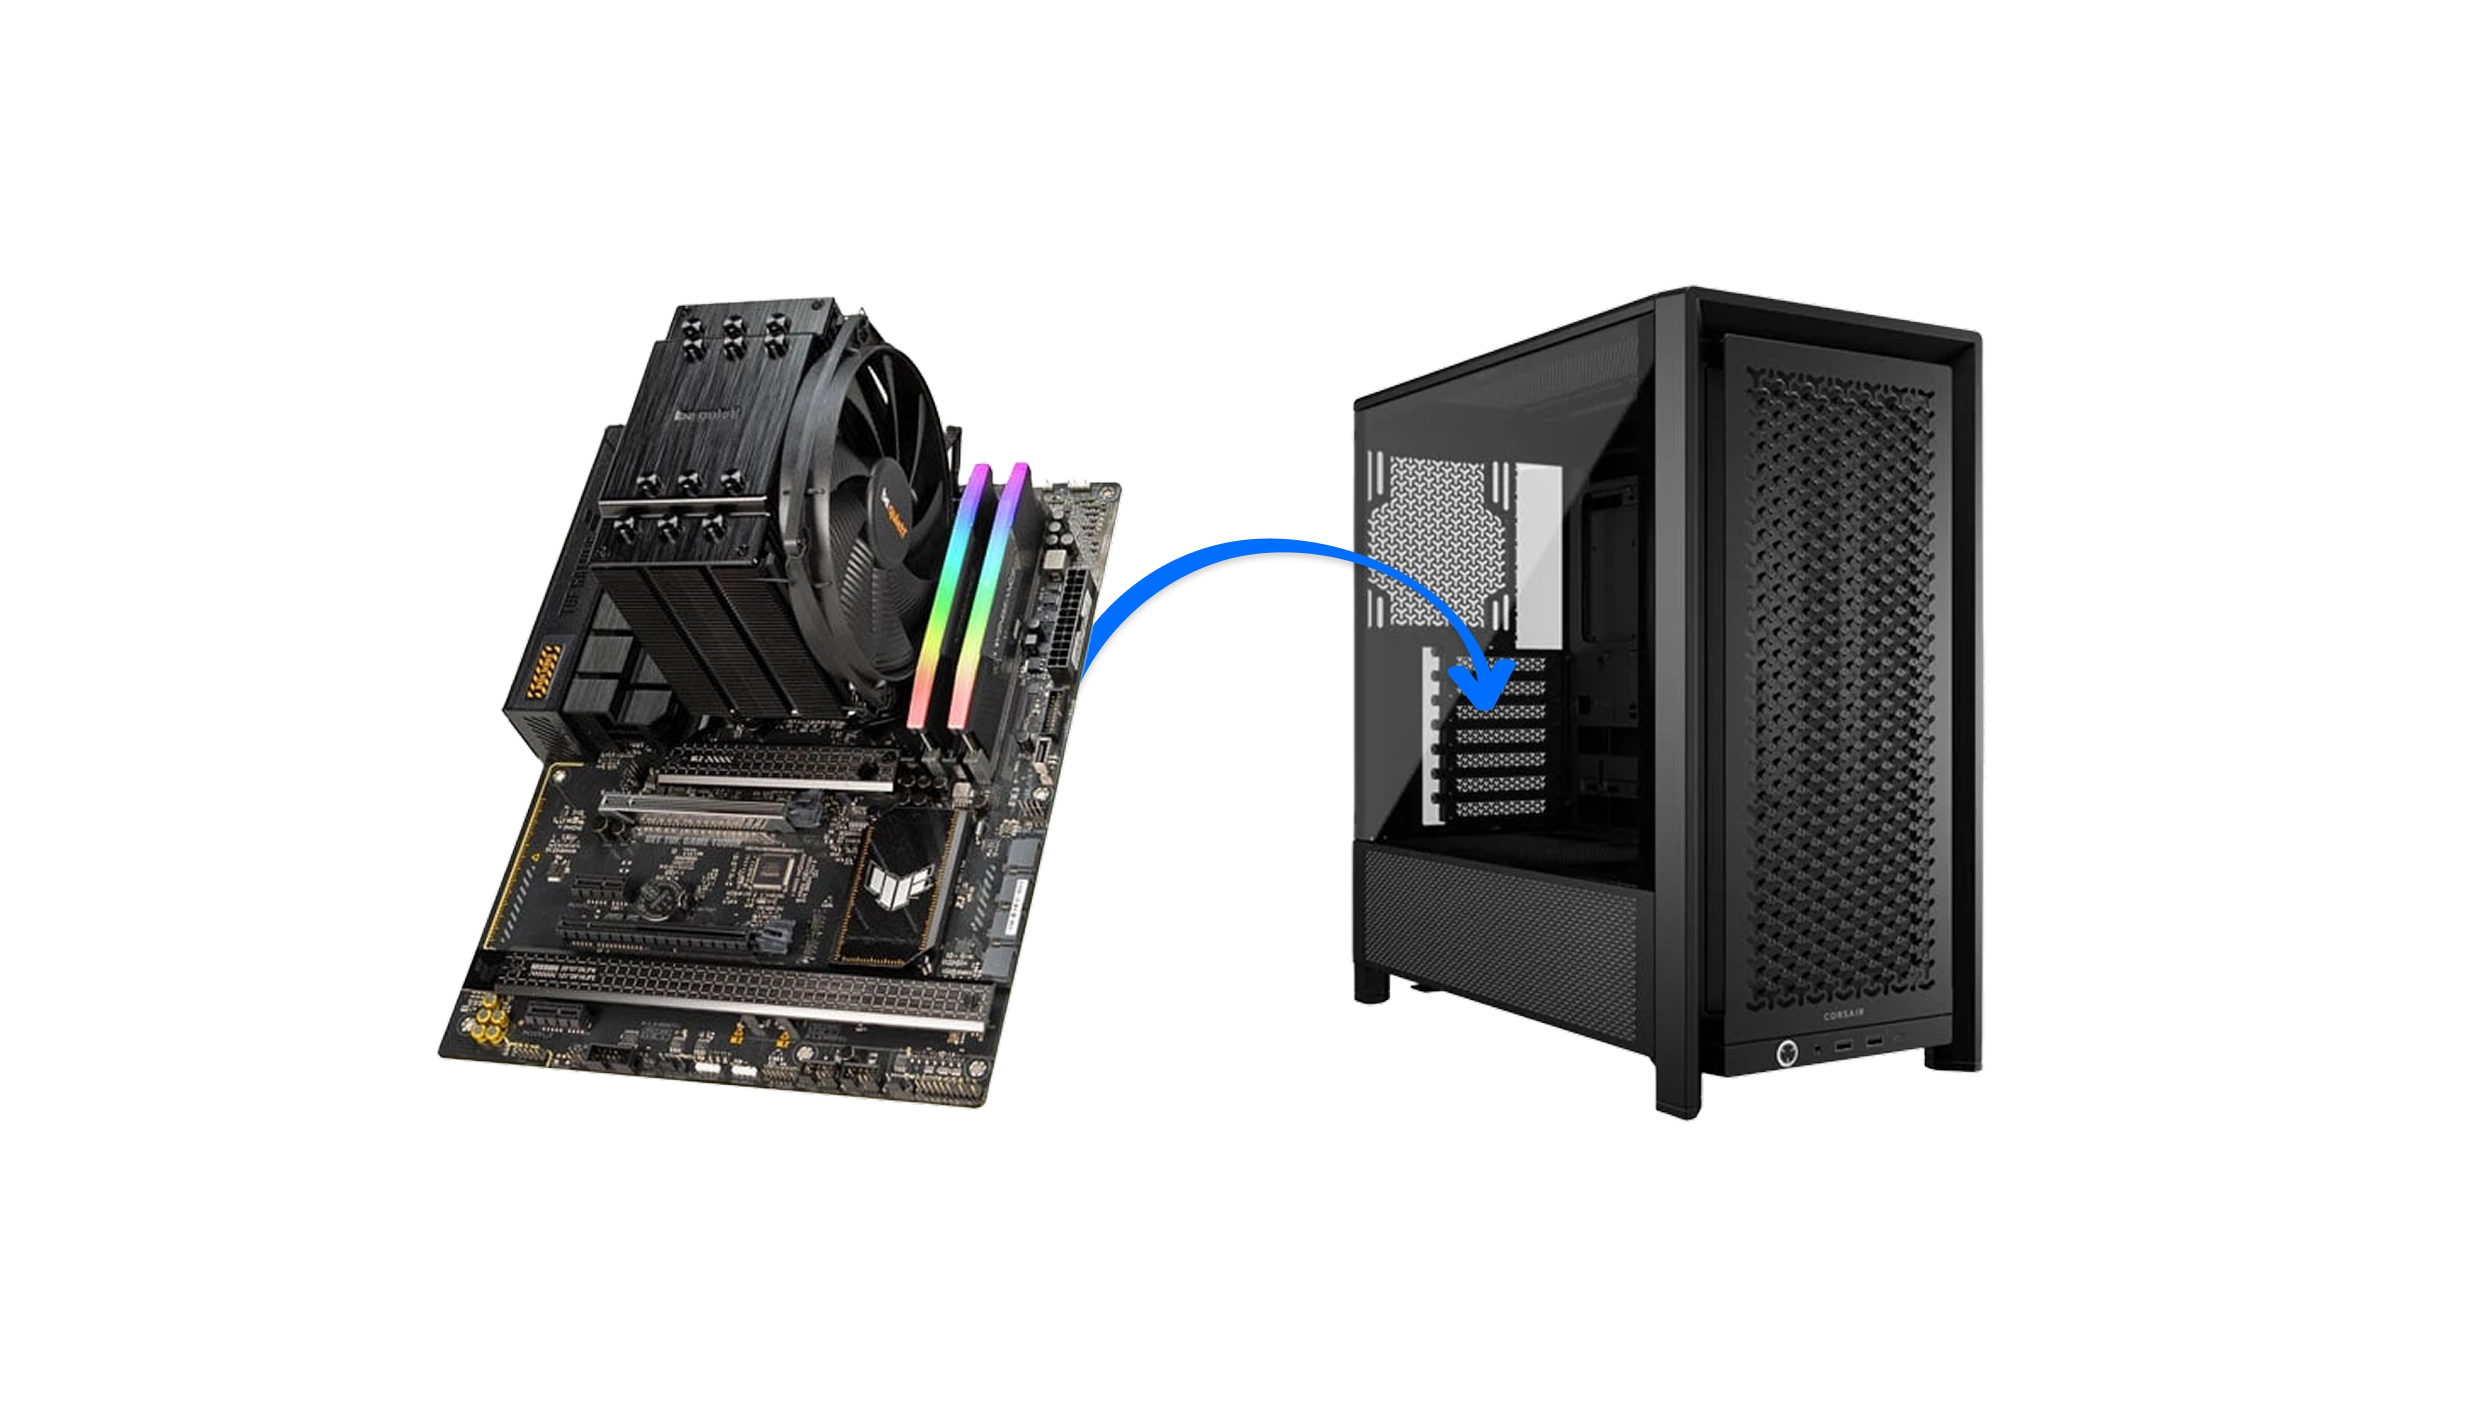
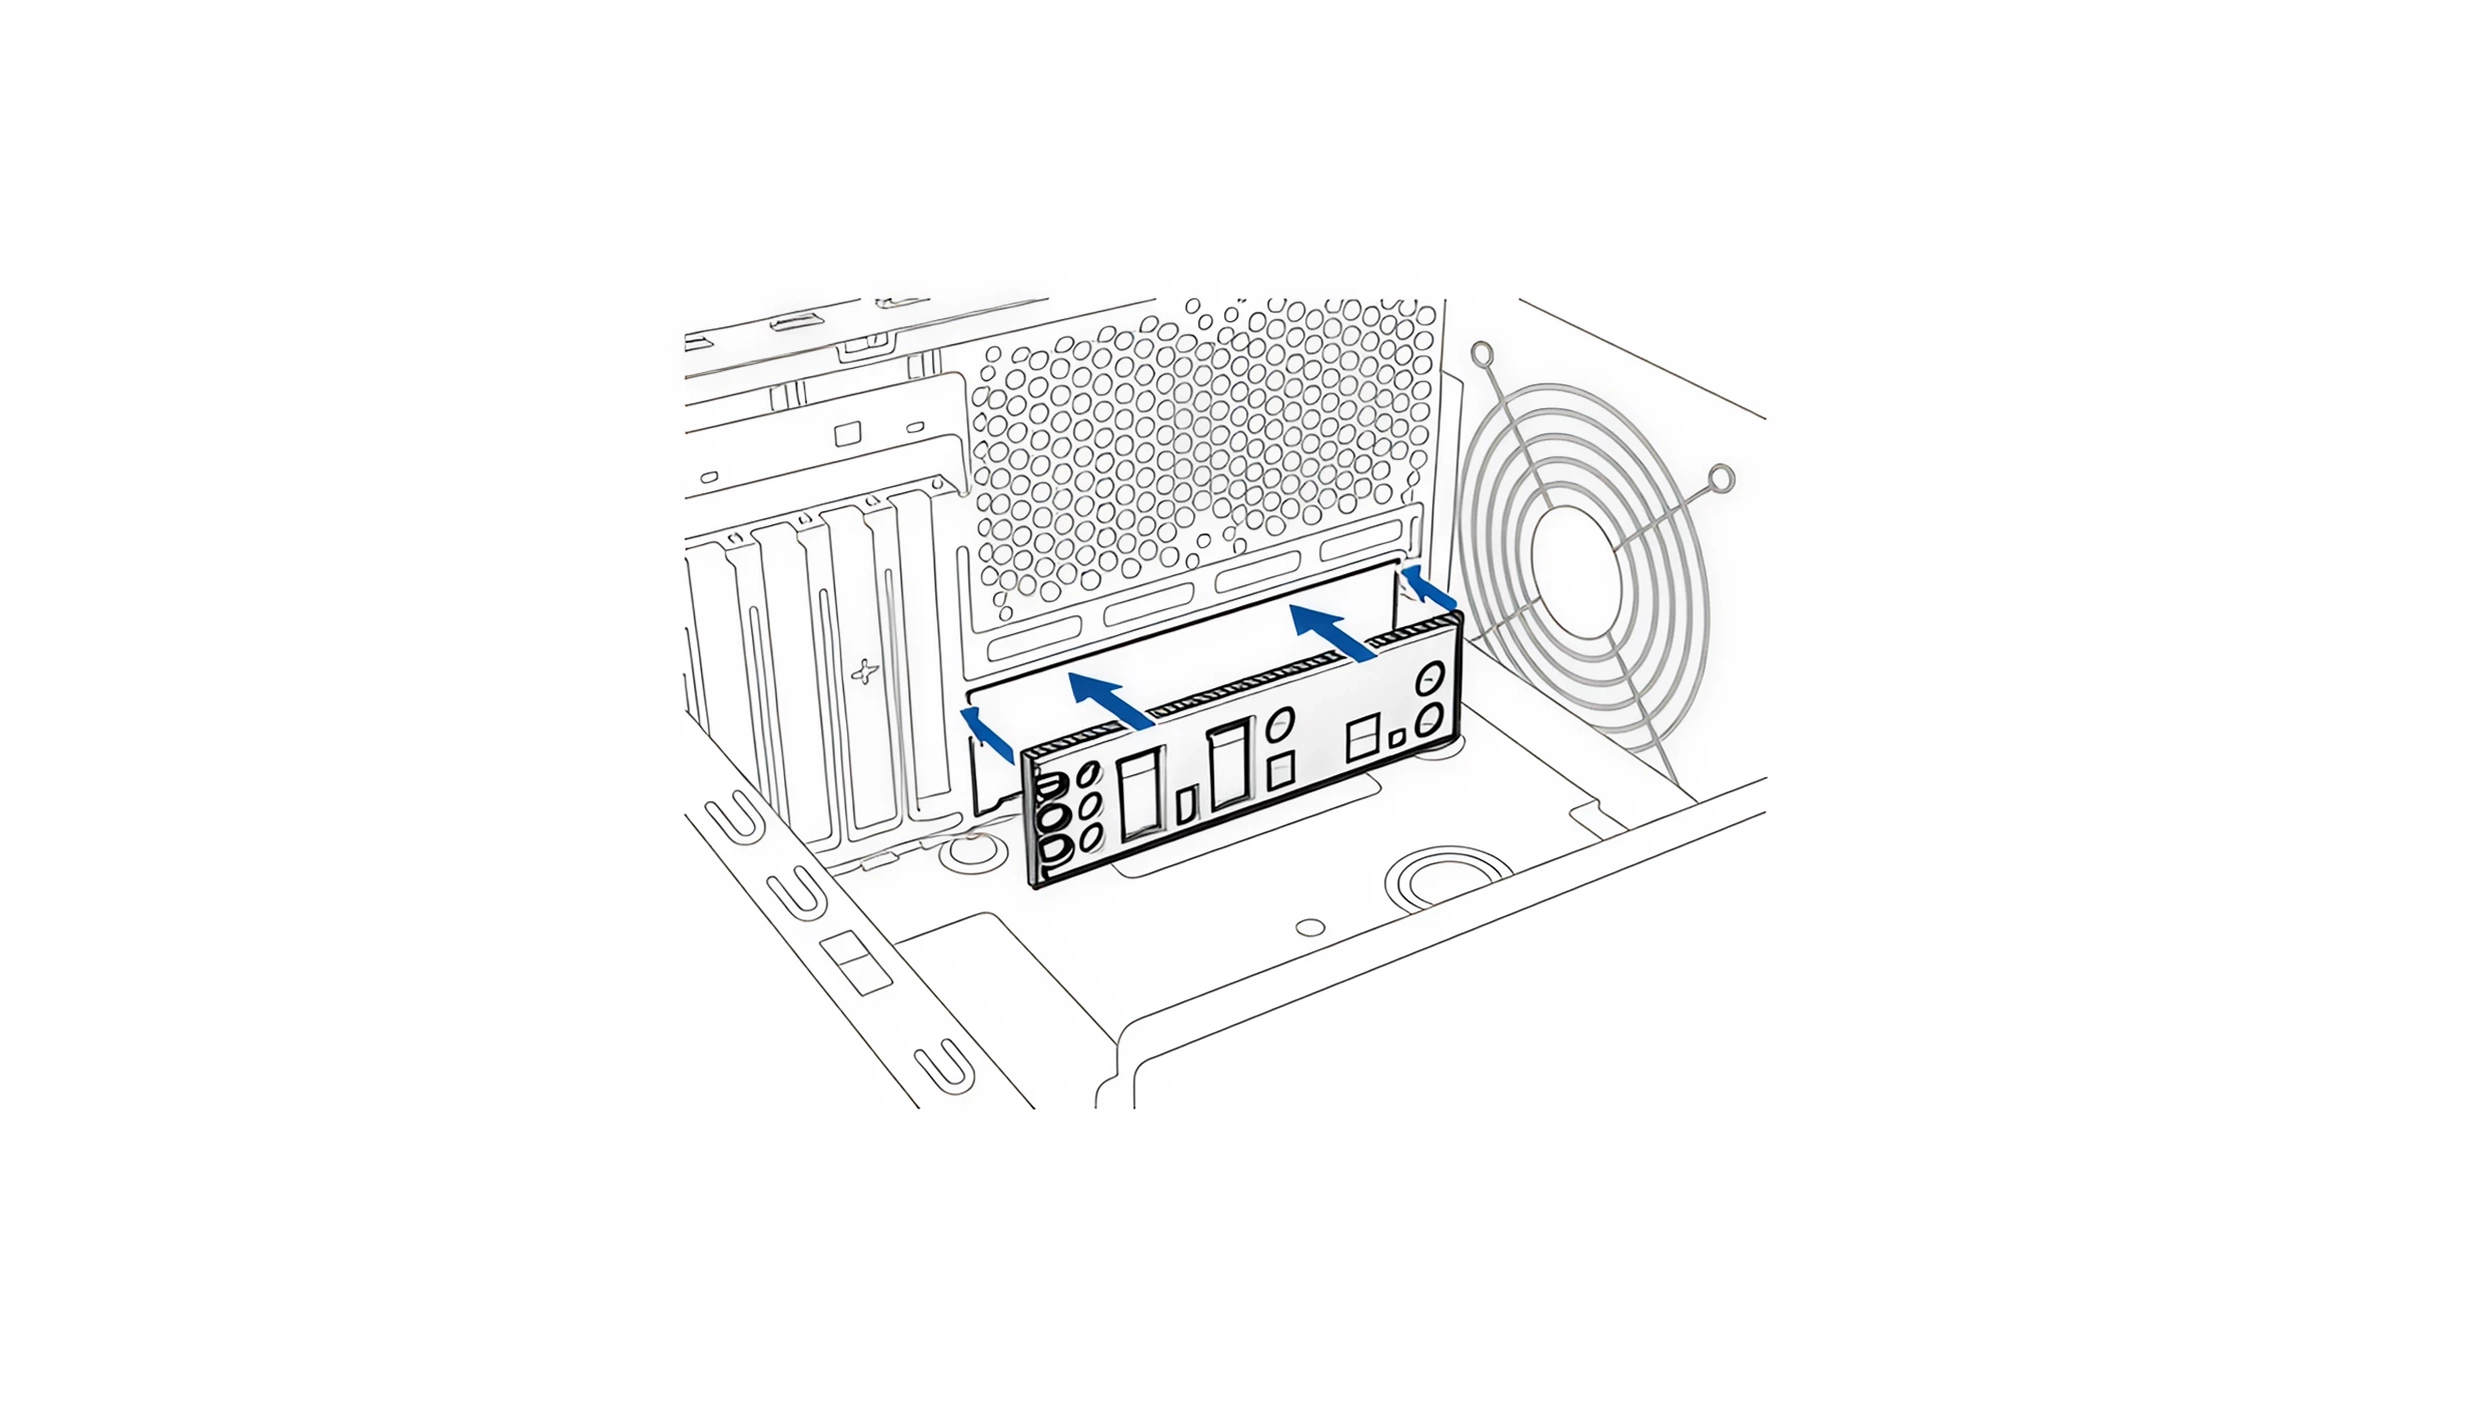
Before you get started, check if you need to install an I/O Shield into the case, if it’s not already preinstalled on the motherboard. If not, you’ll find it in the motherboard box.
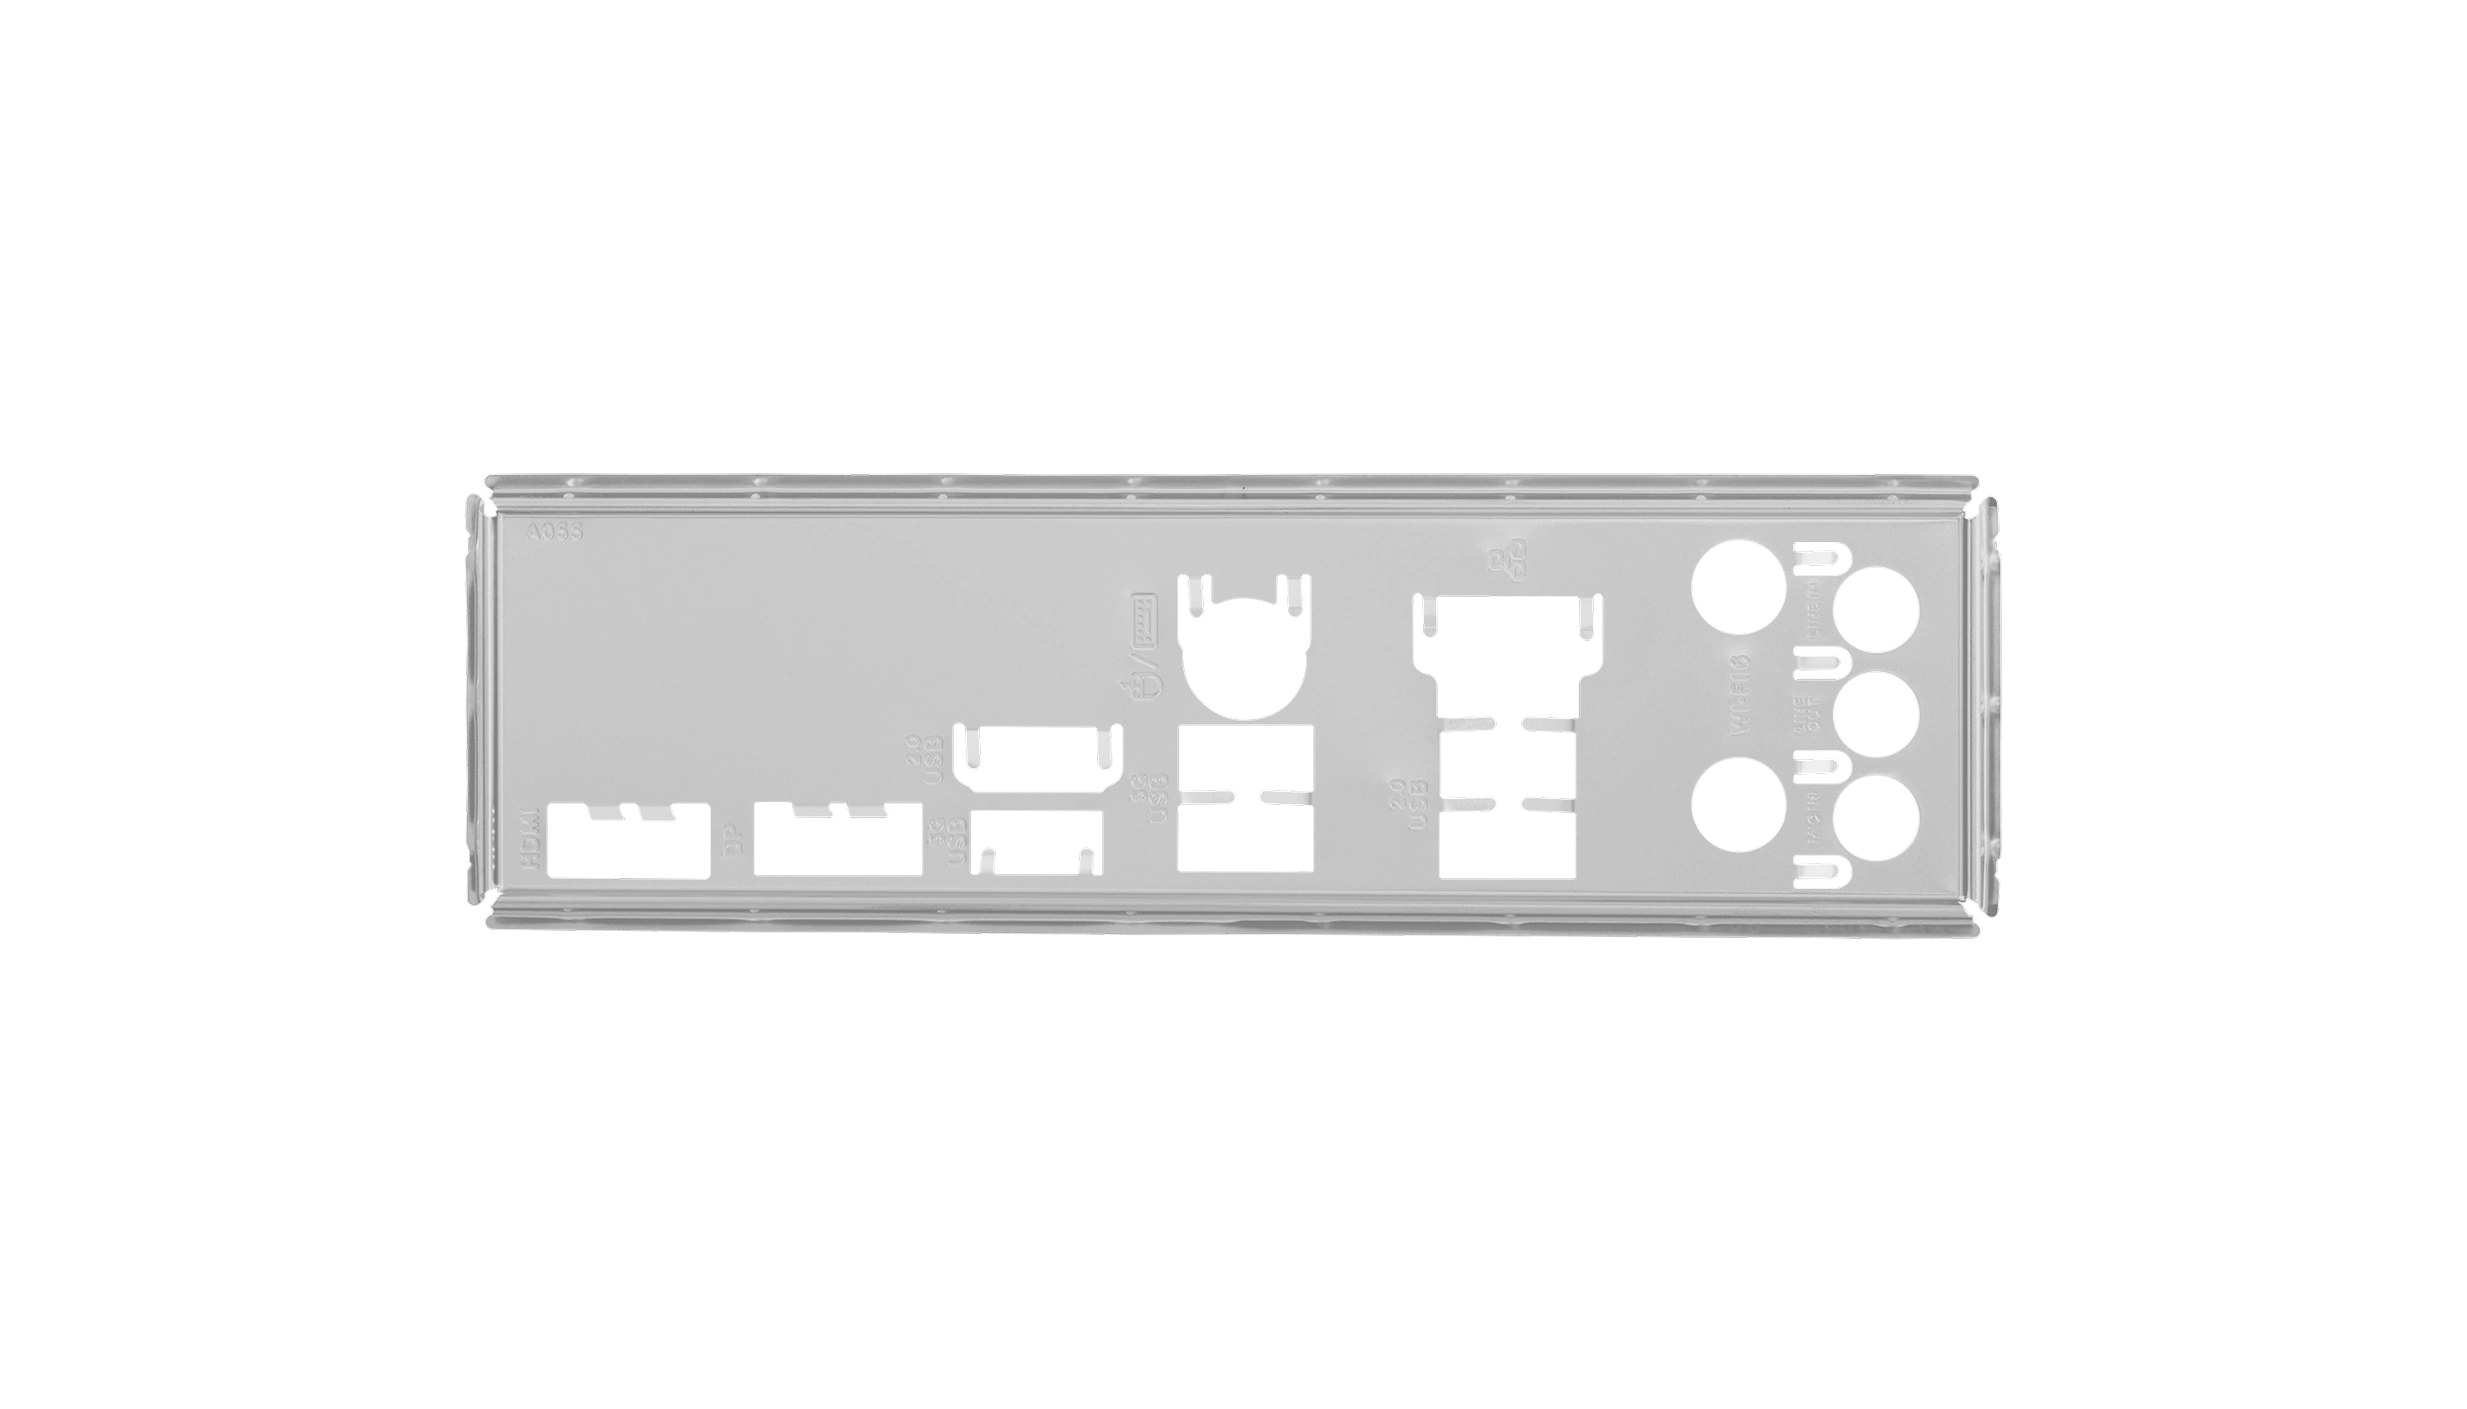
To install the Shield, slot it into the case as shown below, making sure it’s lined up with the various I/O ports on the motherboard.
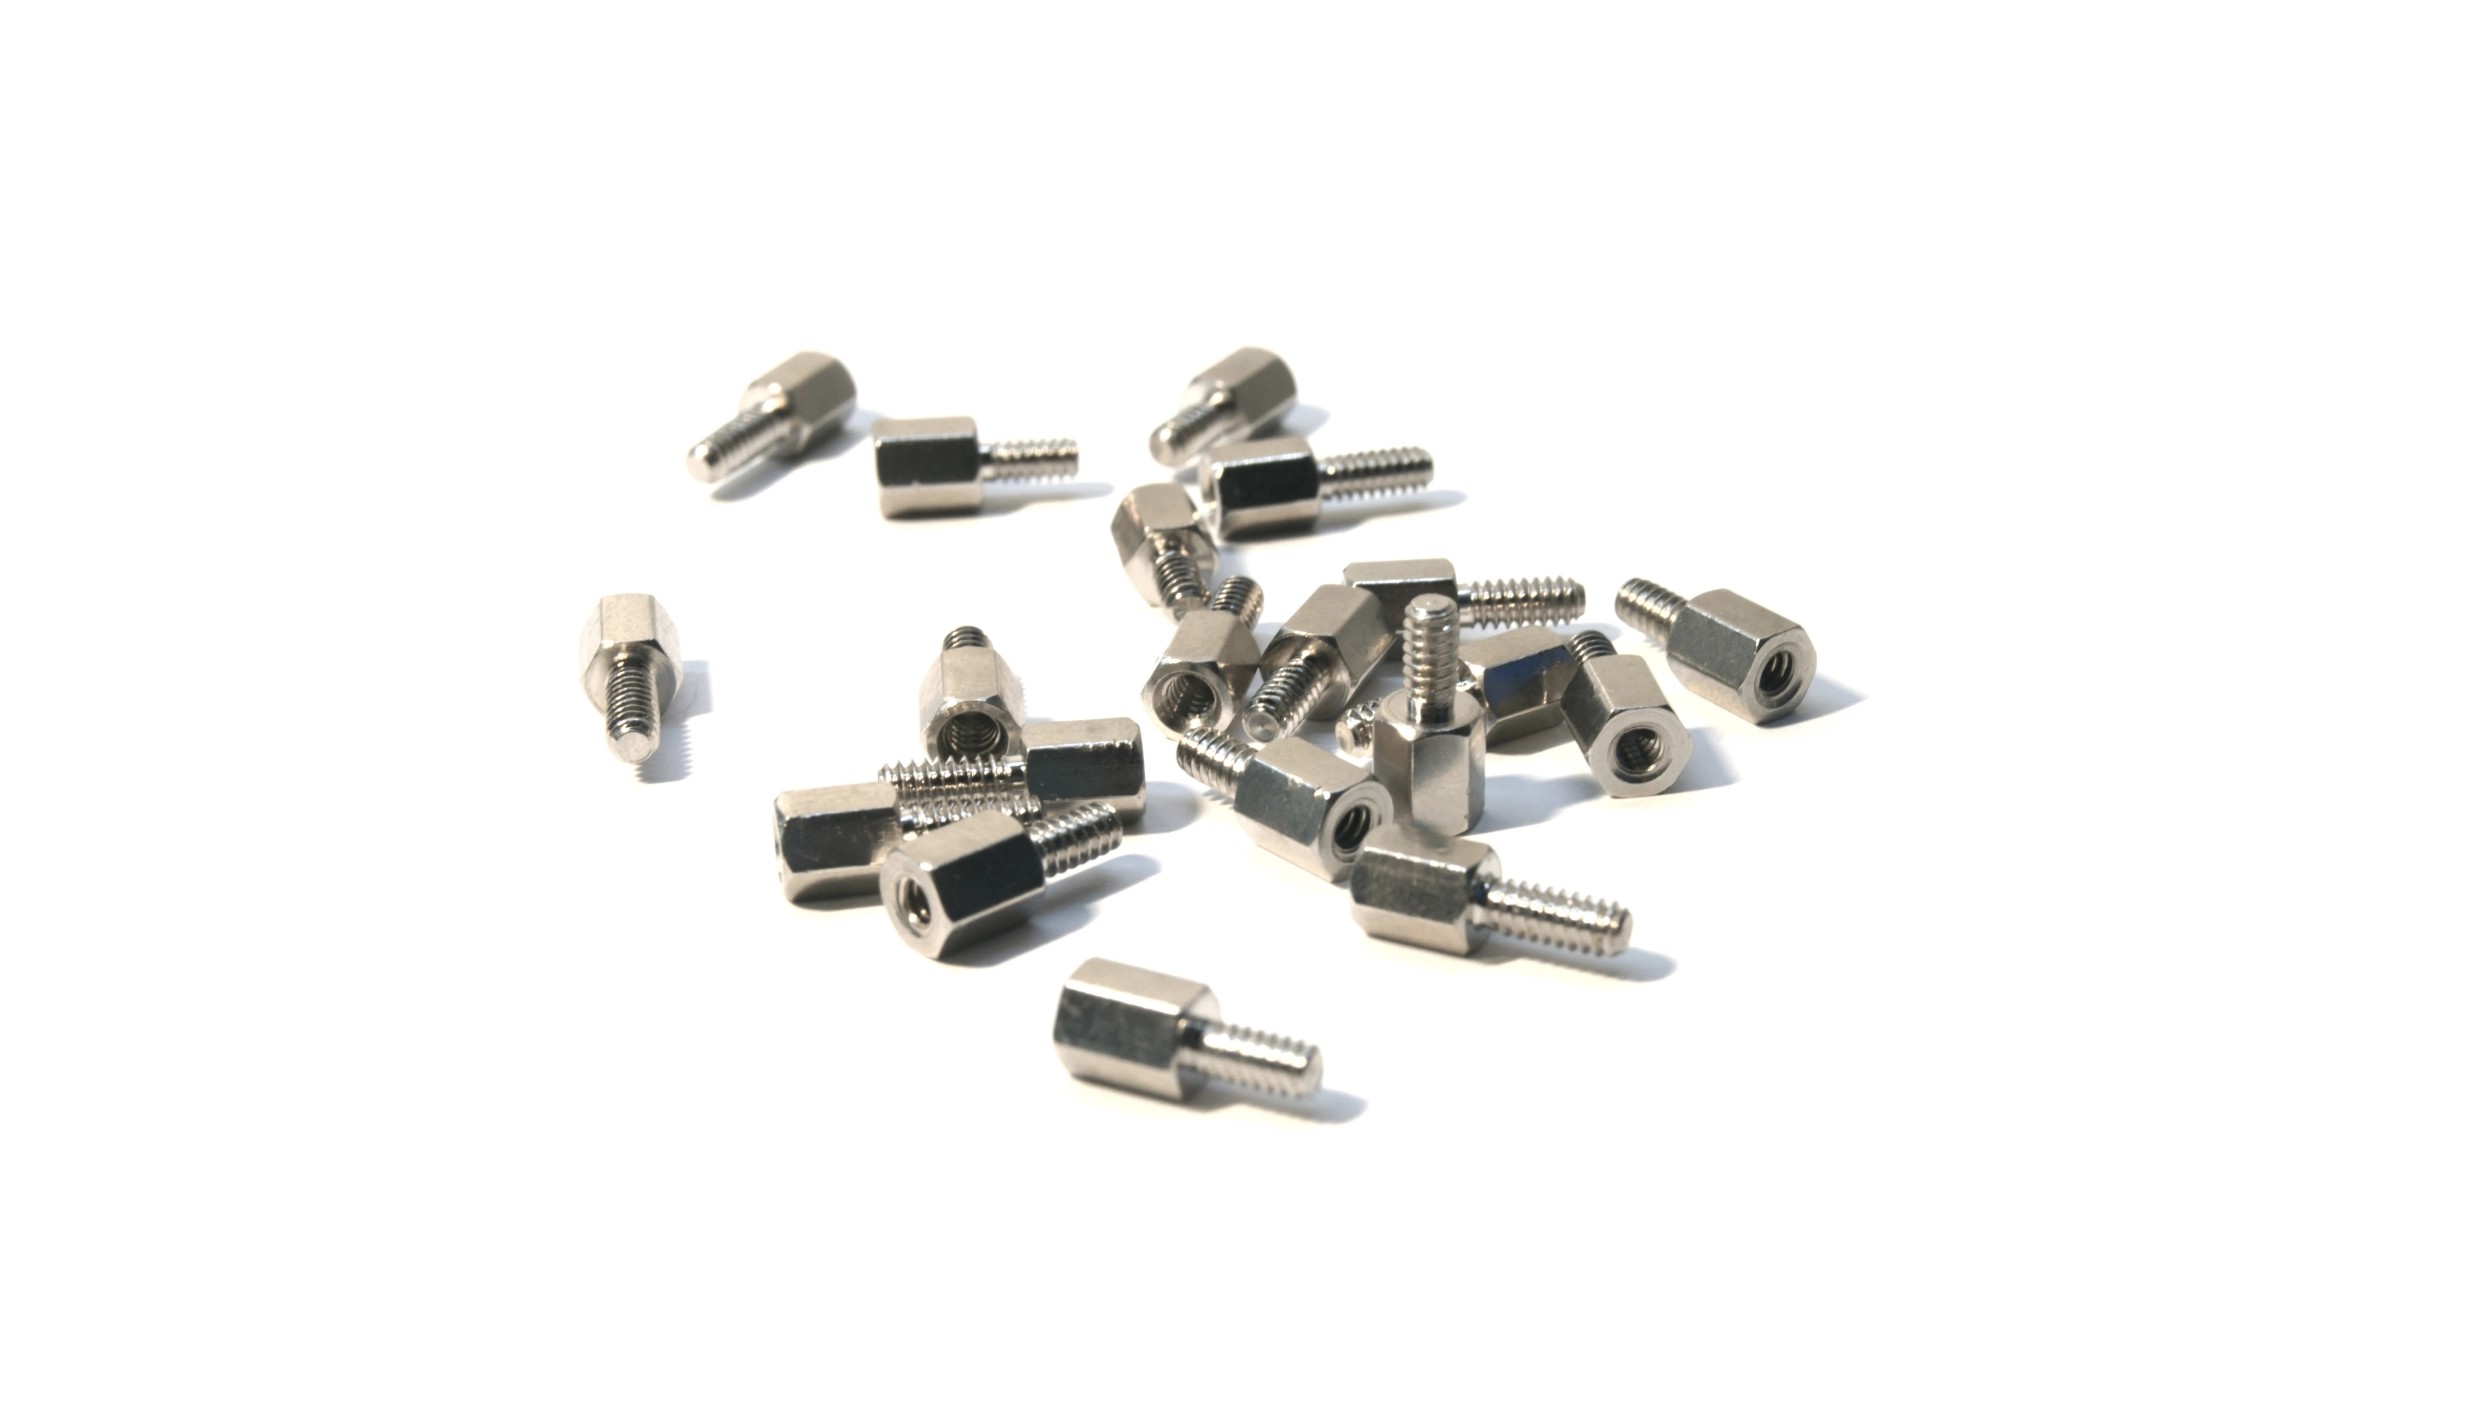
Next comes the motherboard itself. This would short circuit and be damaged if screwed directly into the metal of the case, so needs to be raised up several millimetres on stand-offs (screws with holes in the top). Some cases have stand-offs already installed, but you may need to do this yourself, in which case they’ll be supplied lose in the box.
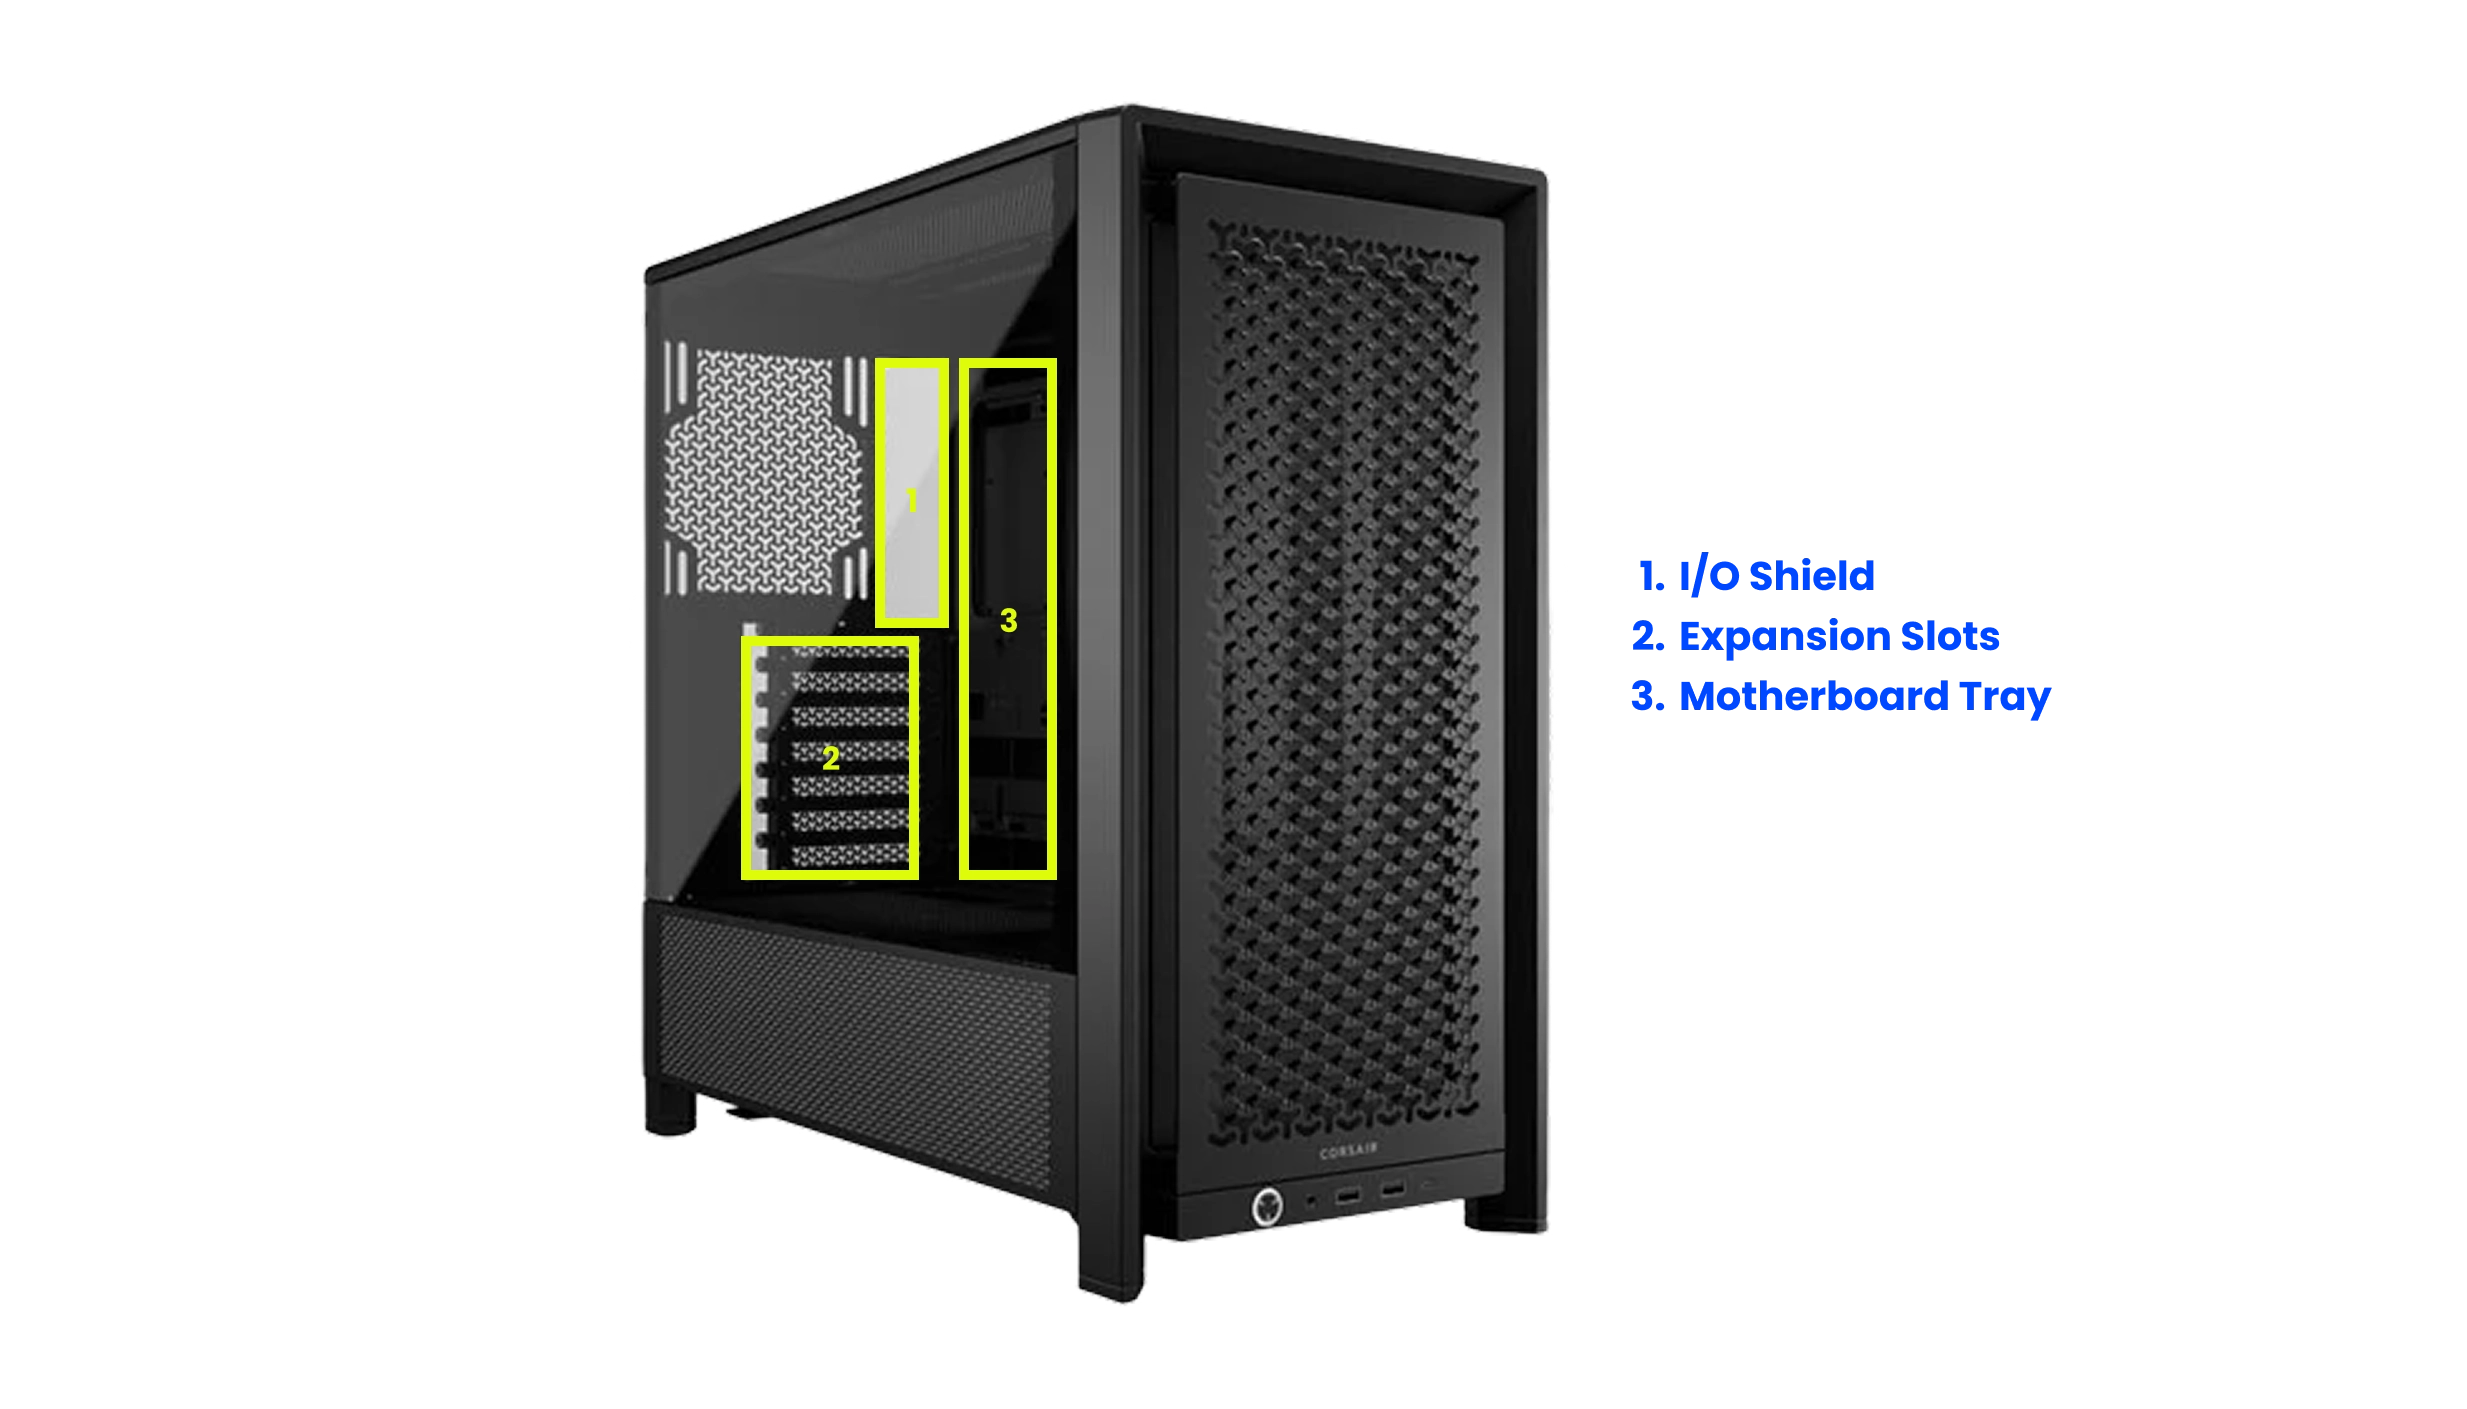
Either way, you need to line up each stand-off you just installed in the case with the appropriate hole on the motherboard. The easiest way to do this is to gently rest the motherboard in the motherboard tray of the case, making sure that the I/O Shield and expansion slots (where you secure graphics cards etc) are correctly aligned.
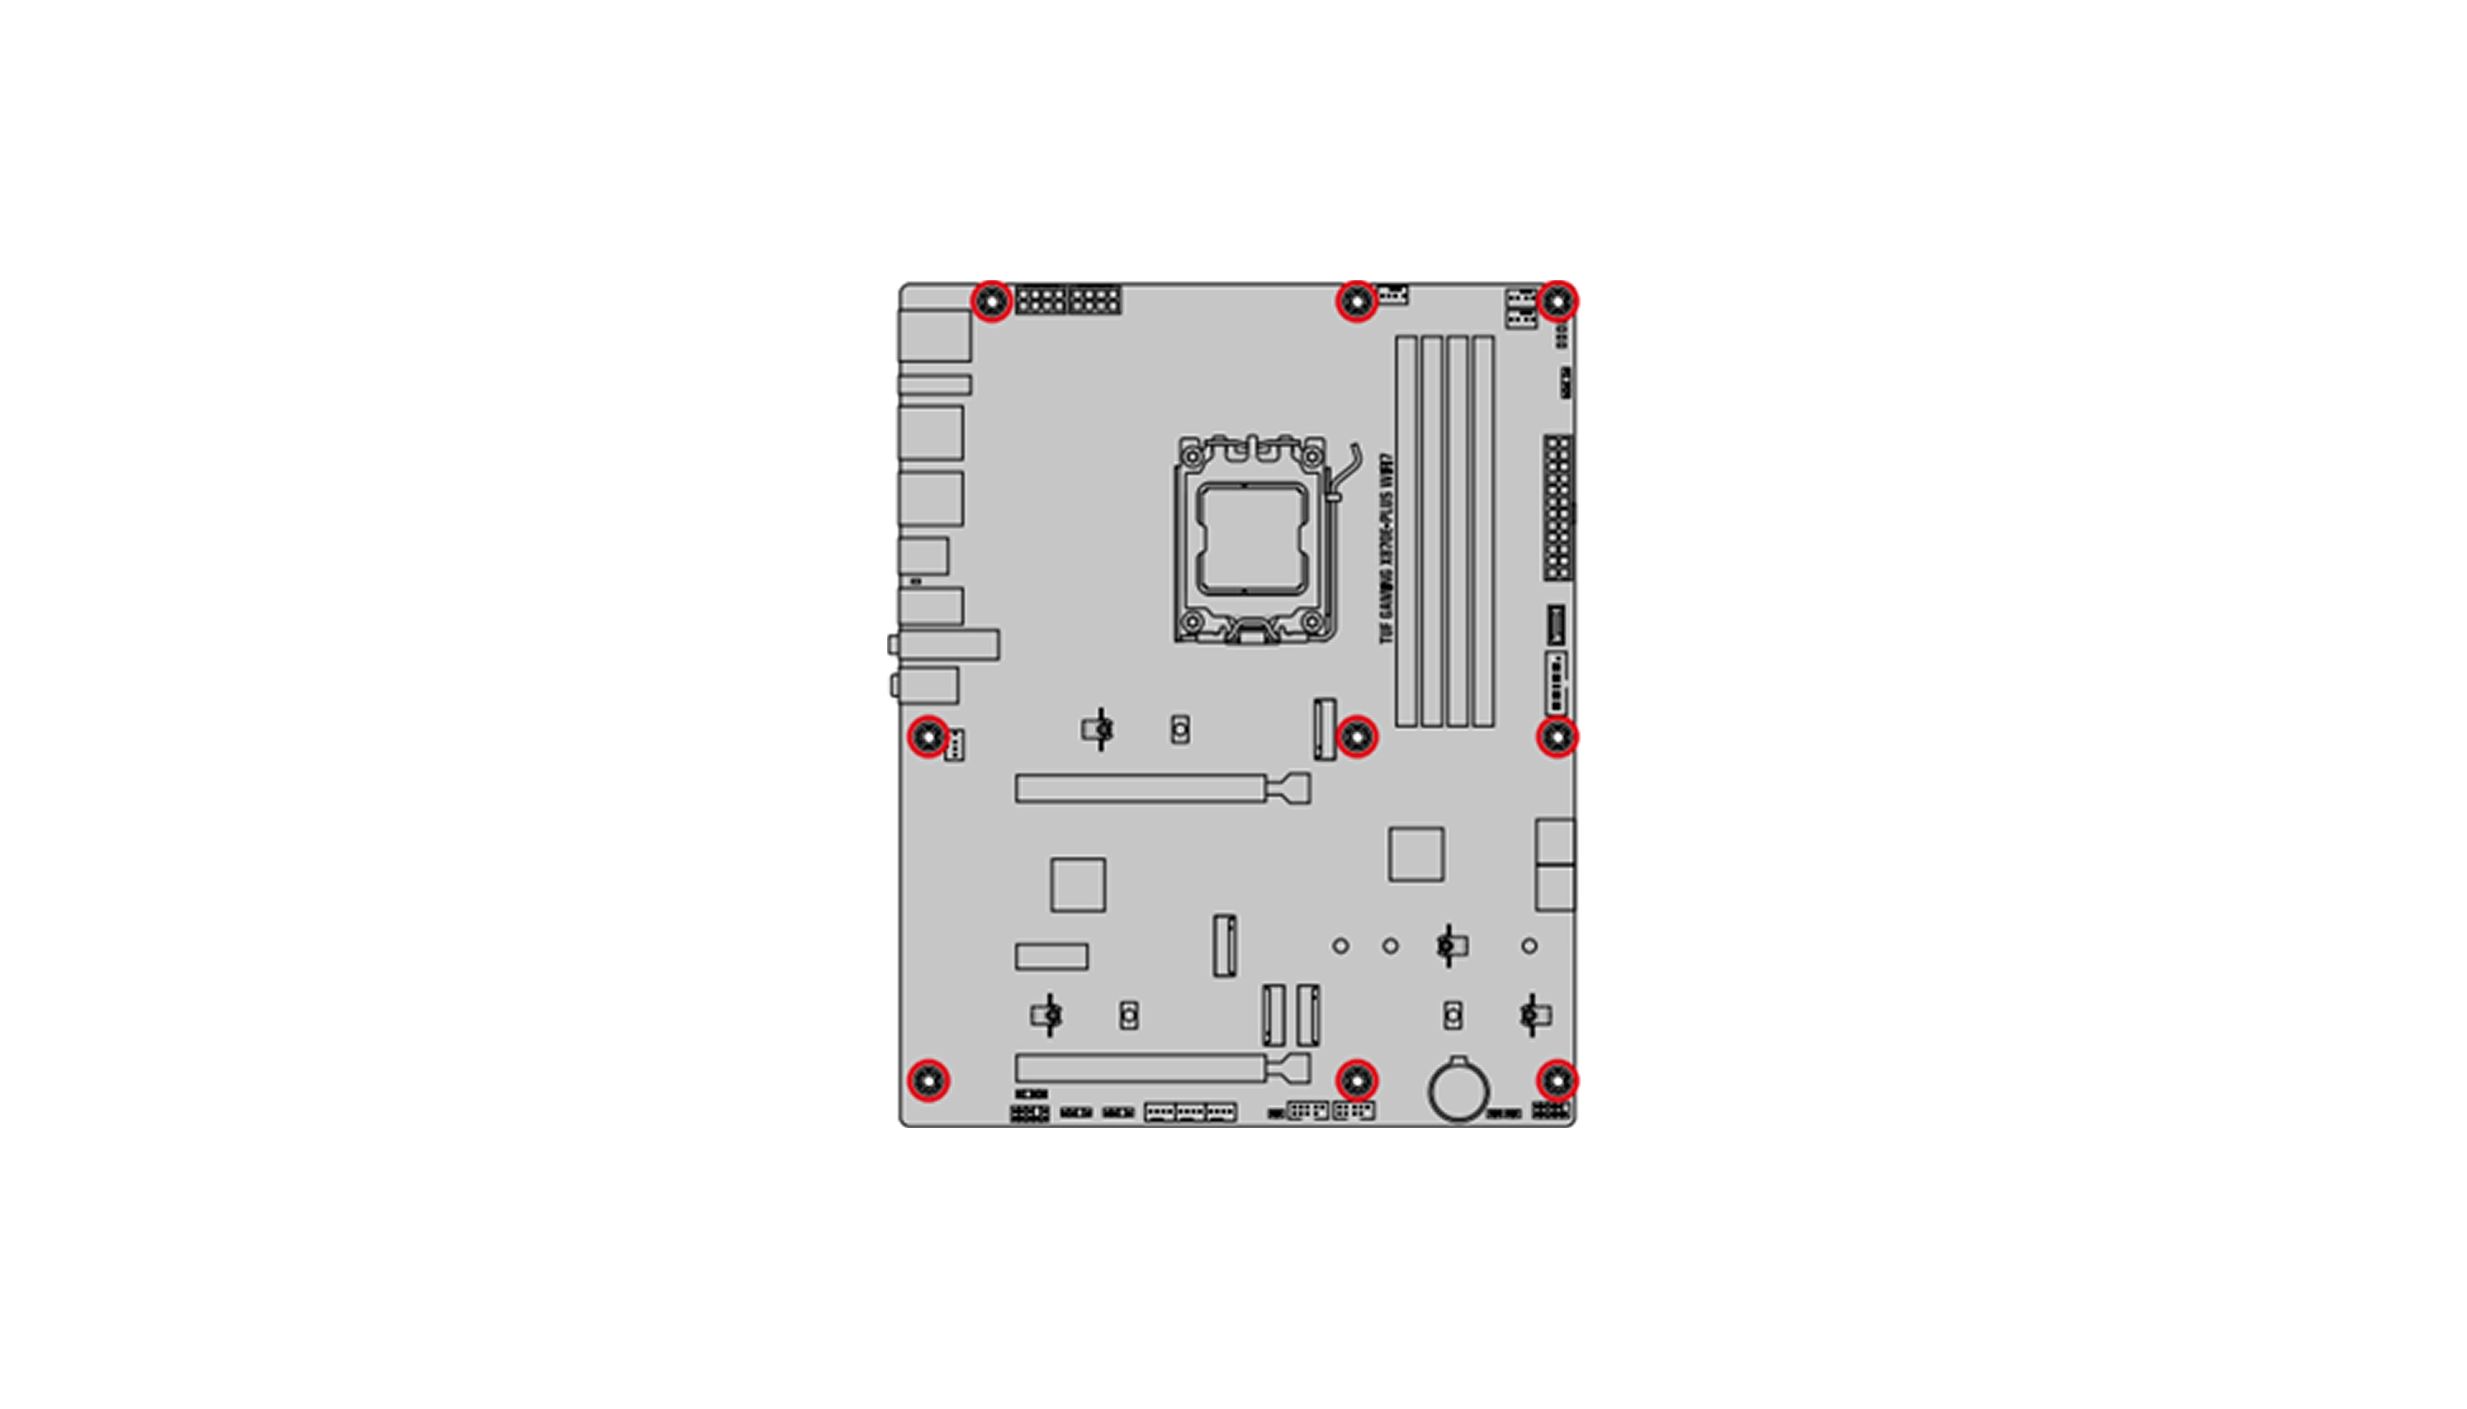
Look through the screw holes (as illustrated left) for where you’ll need to install stand-offs. Please note the number and location of screw holes will vary from motherboard to motherboard, check the manual for their location if you’re having trouble spotting them. With everything aligned and the stand-offs installed, you can start screwing the motherboard into the stands-offs, alternating between corners like you did with the CPU cooler to ensure a flat fit.
Finally, you can reconnect the PSU to the motherboard using the aforementioned 24-pin ATX and 8-pin EPS 12V connectors.
Connect Front Panel
You can now hook up the front panel cables (power switch, reset switch, USB etc) of the case to the motherboard, it being easier to do this now before you start installing a bulky graphics card and its cables. Some of the front panel connections (power LED and HDD/SSD LED) have two pins, positive (+) and negative (-), so make sure you plug in the connectors the right way around.
If you're struggling to read the tiny print on the surface of the motherboard or find the headers, check the motherboard manual, it should have a diagram along these lines.
You'll also need to install any USB connections as well as case fans. Again, if you're struggling to find these on the motherboard, check the manual for their location as they may be spread out all across the PCB.
A good way to keep these cables tidy is to tuck them behind the motherboard tray where possible.
Install the Hydrocooler (optional)
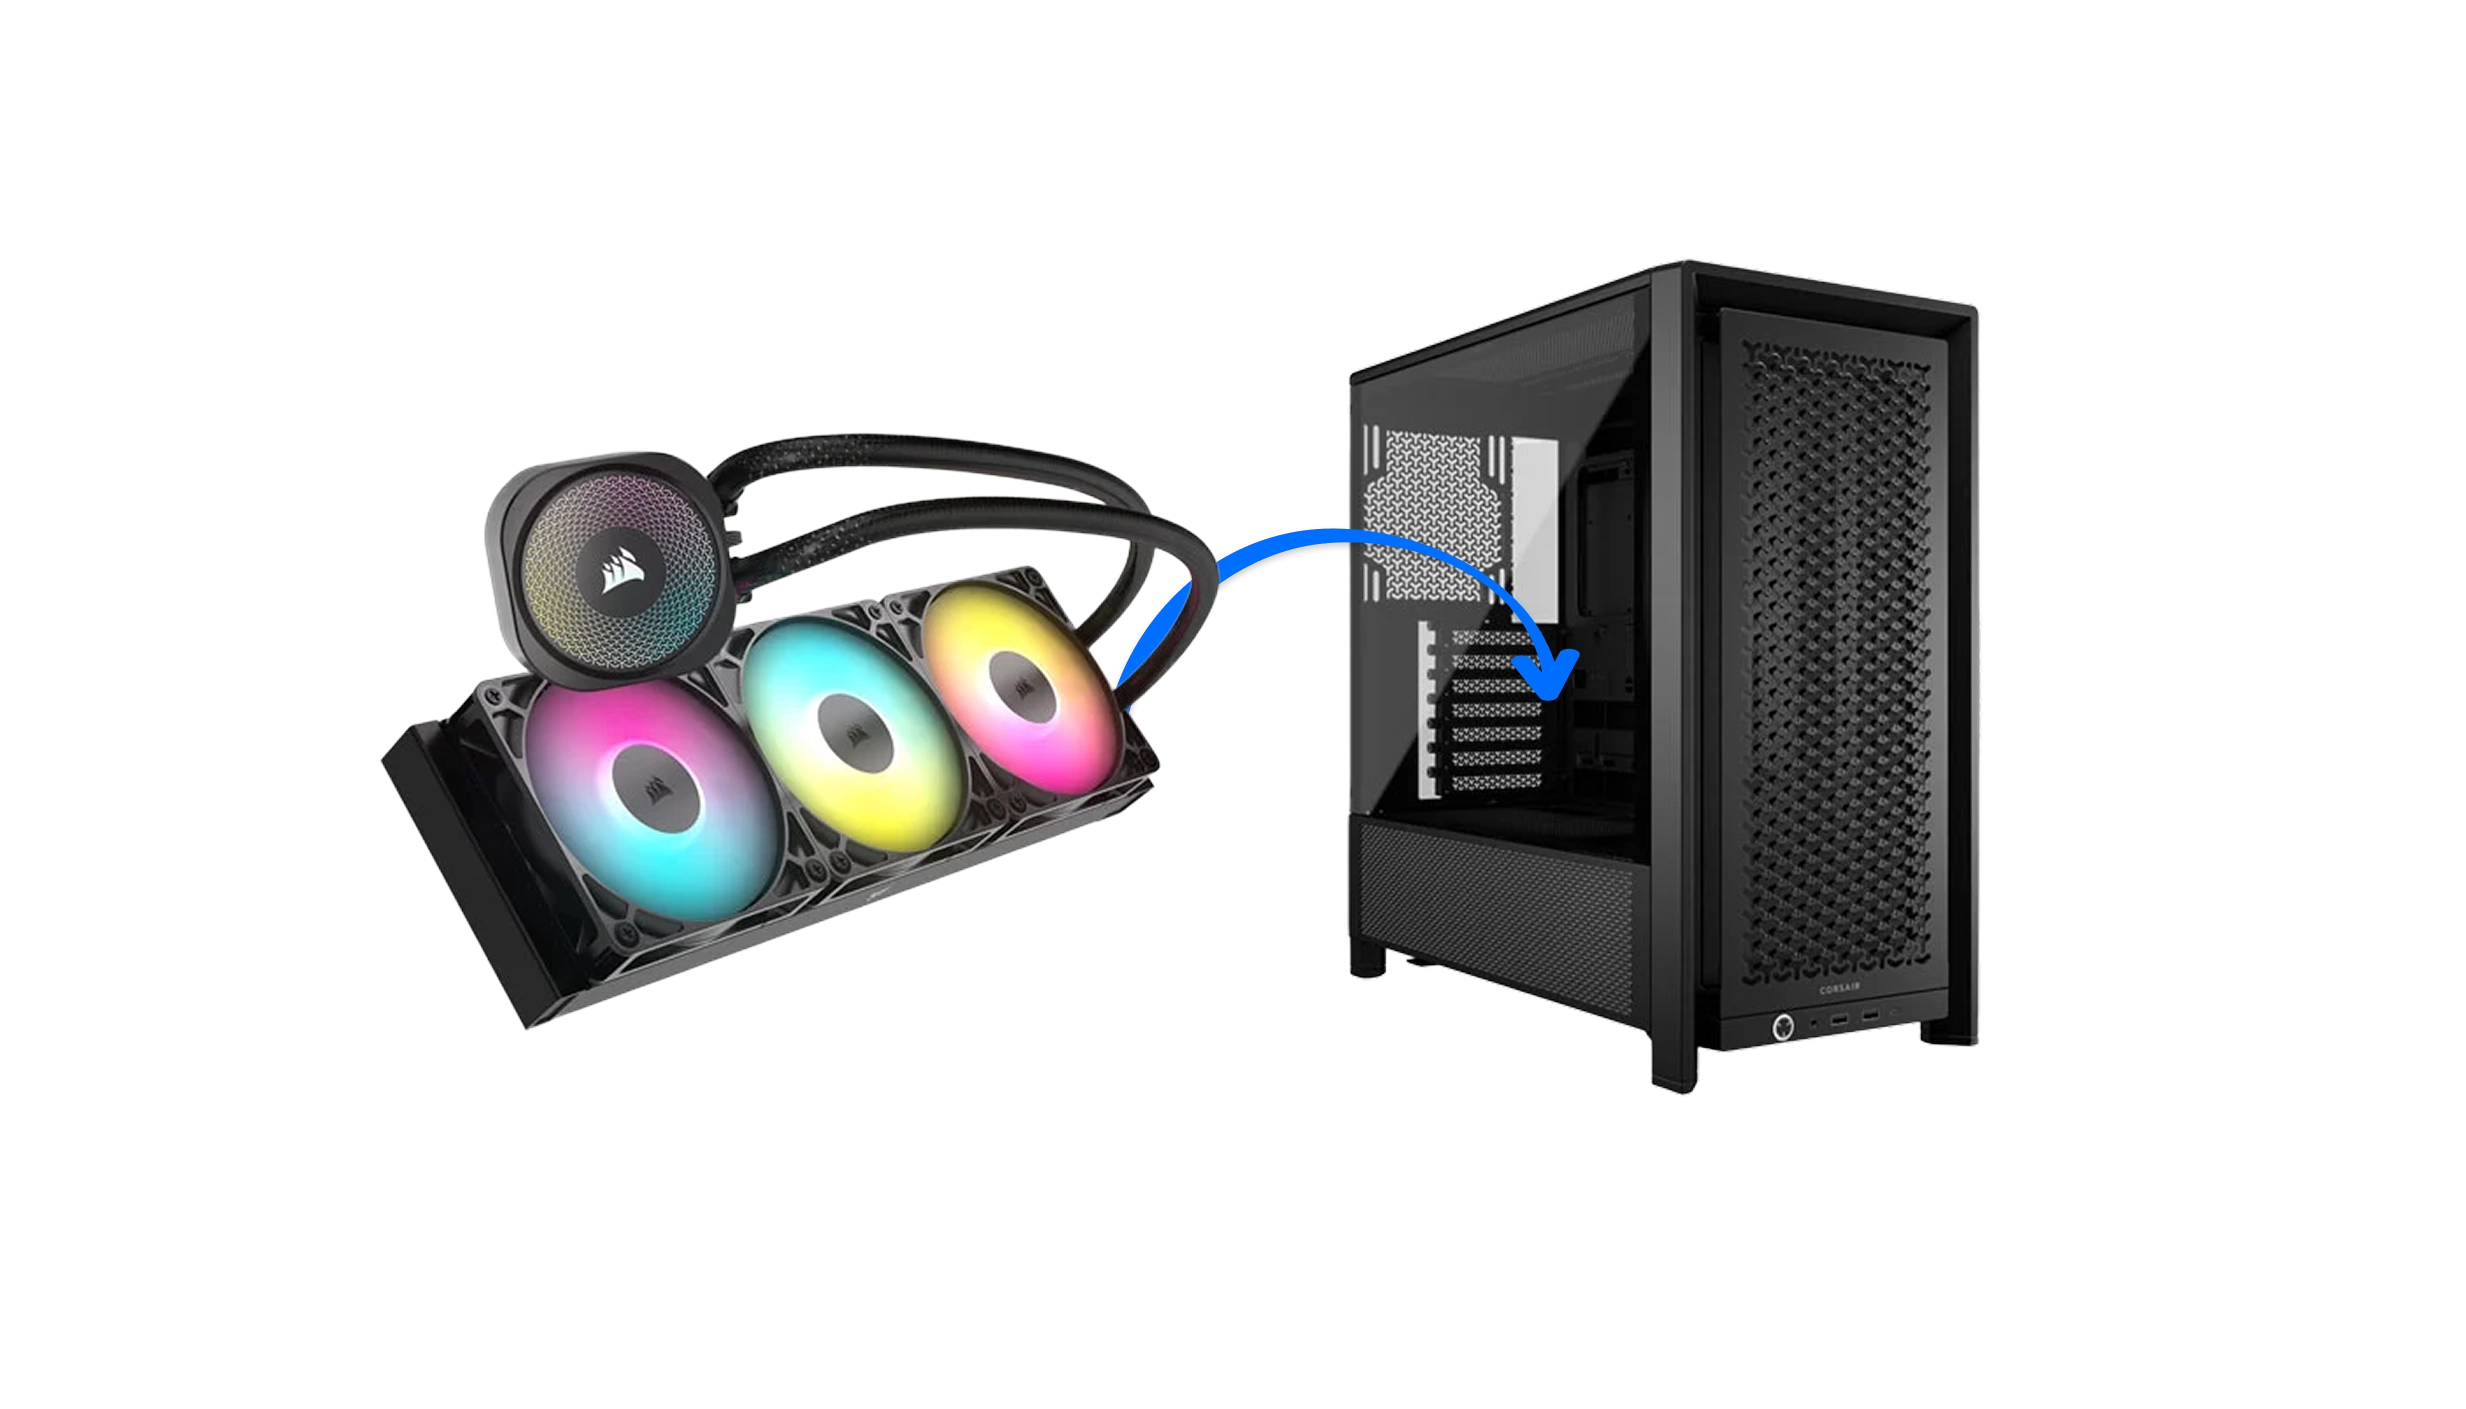
If you opted for an air cooler then you can skip straight to the next step. If you chose a hydrocooler instead of an air cooler then now's the time to mount its radiator in the case. The install location is determined by the size and number of fans of the hydrocooler, so you'll need to compare this versus the specs of your case.
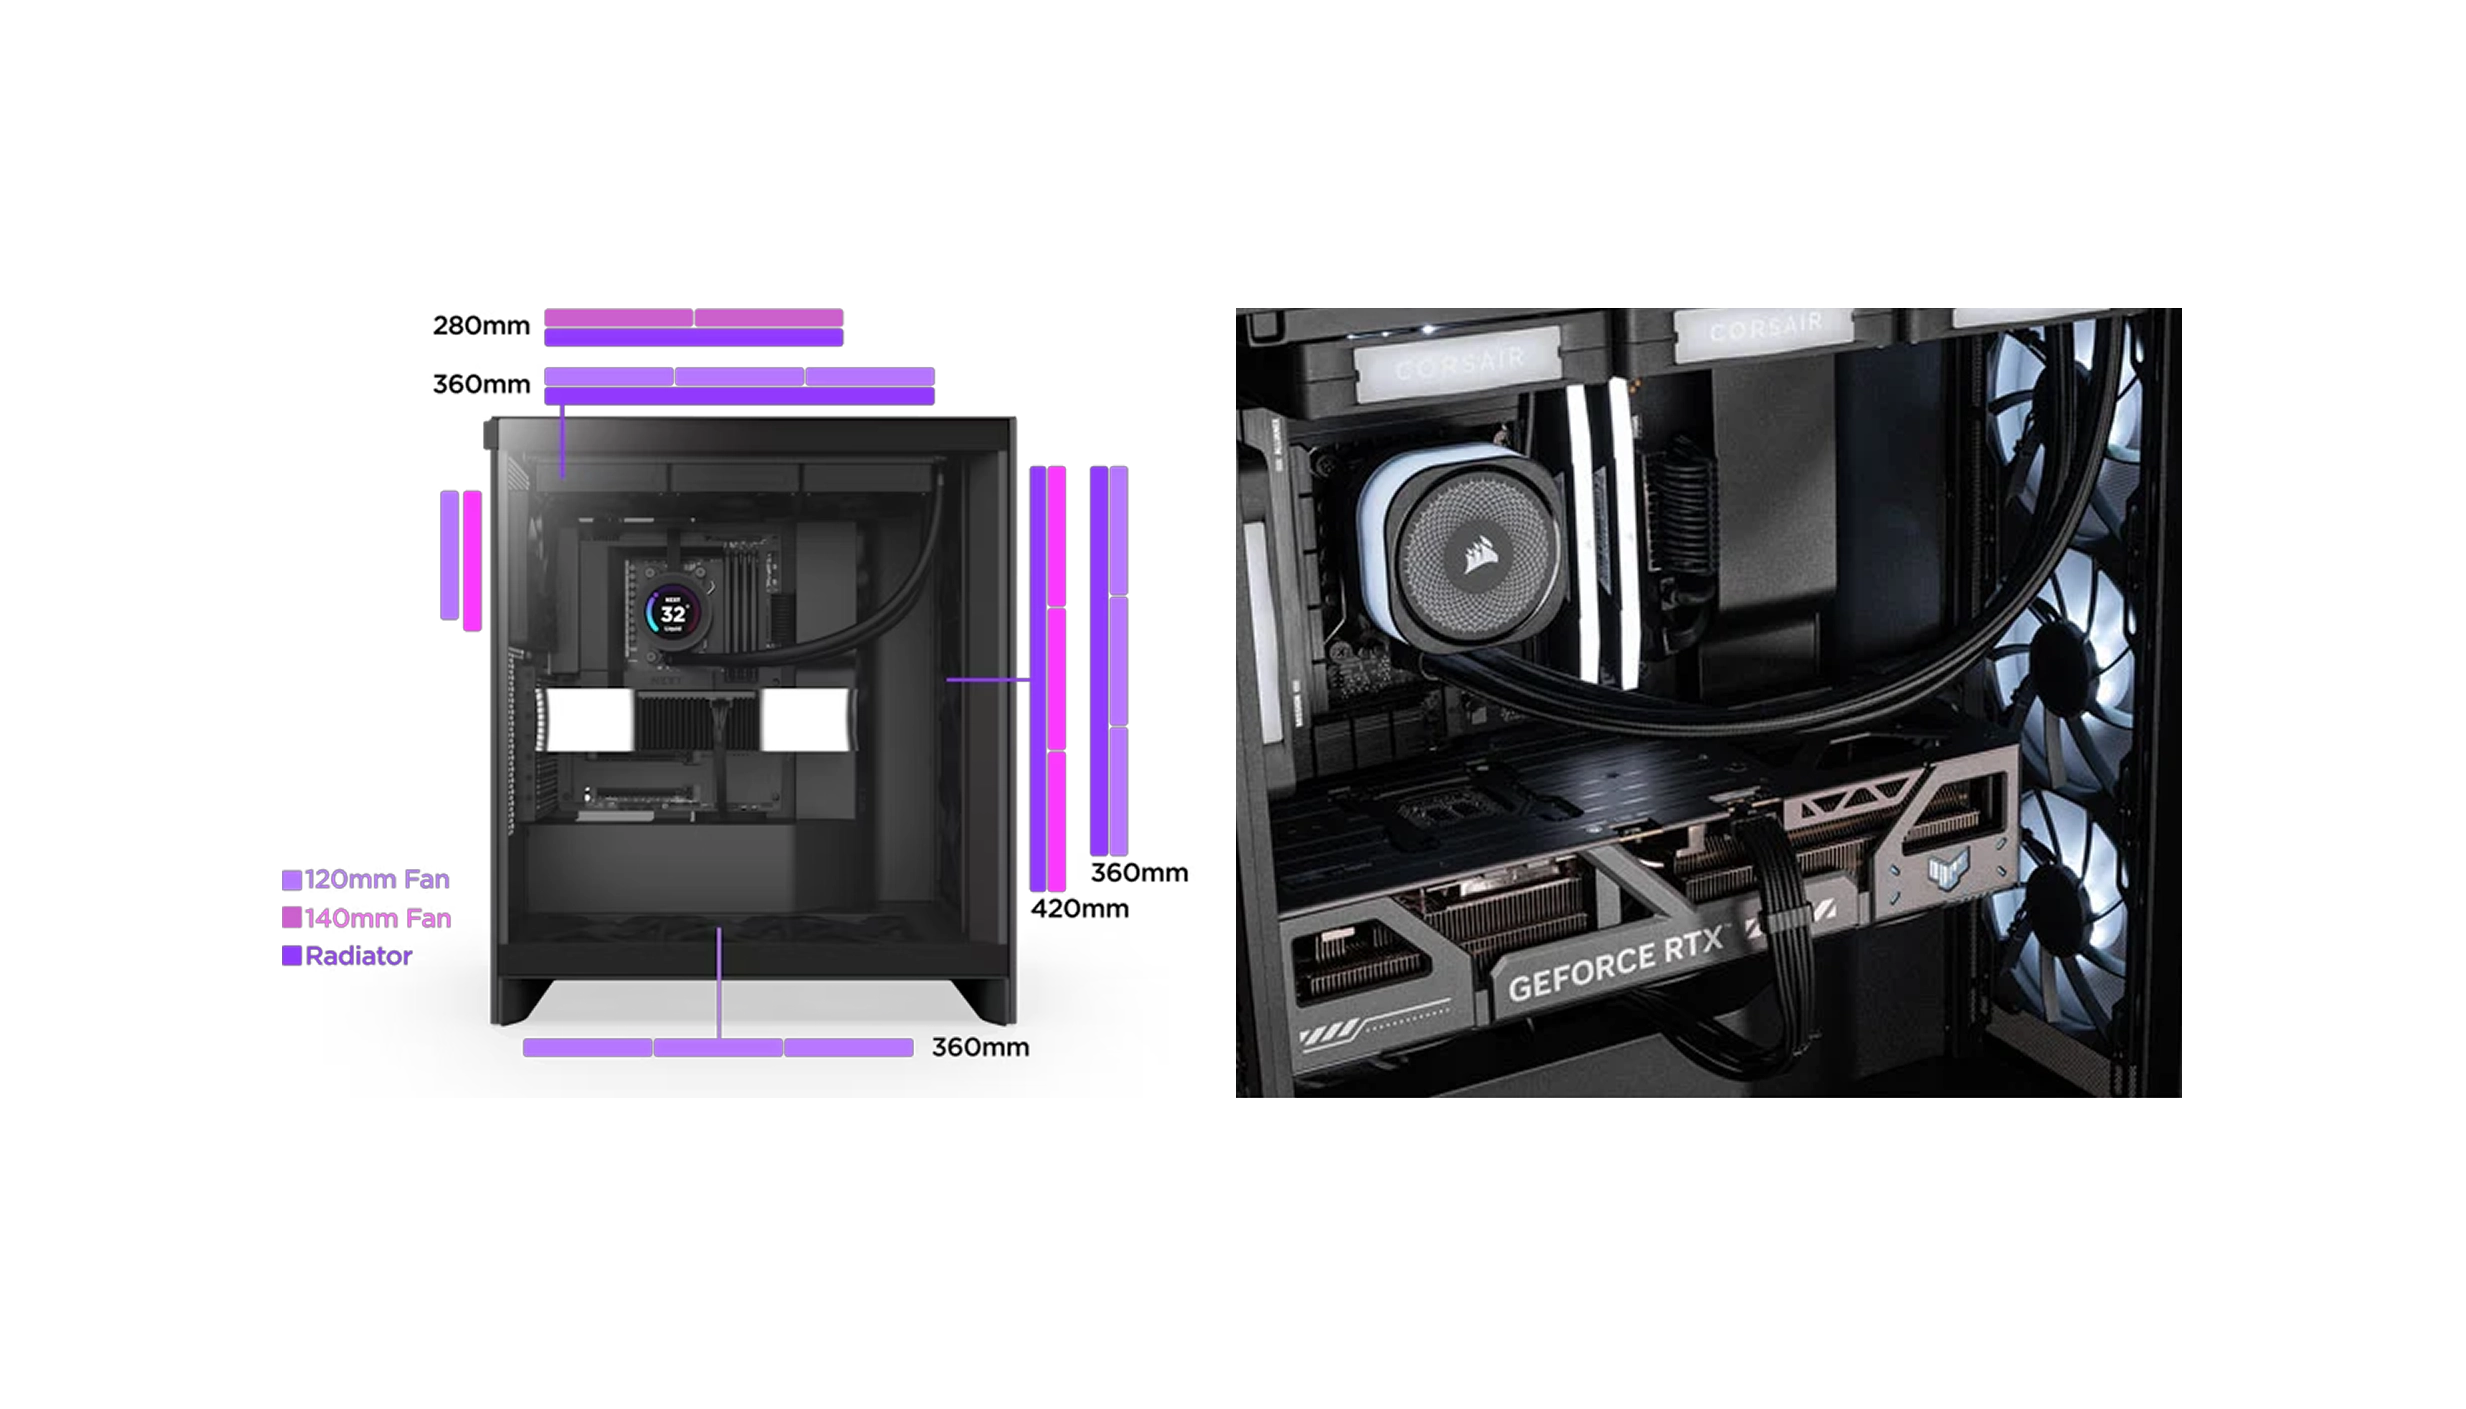
Hydrocooler radiators come in three main size groups - either 120/140mm hydrocoolers featuring a single fan, 240/280mm hydrocoolers with two fans and 360/420mm hydrocoolers that have three fans. Recommended locations to mount the radiator are in order of suitability: front, top and bottom. However, where you can mount the radiator will ultimately be determined by how large it is and the design of your case, so check the manuals of both components if unsure.
Left: Diagram showing radiator support.
Right: The same case with a 420mm radiator installed at the front.
Once you've decided where you're going to mount the radiator in the case, you need to screw the fans onto the radiator if they aren't already installed. The fans need mounting so they blow air through the radiator, see the cooler section for further details on fan orientation if unsure. Each fan will need four screws (one in each corner) to hold it in place. You then need to screw the whole assembly (radiator plus fans) into the case. Finally, don't forget to connect the fans to 4-pin fan headers on the motherboard so they receive power.
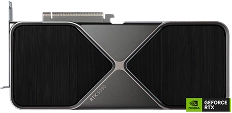
How to Install the Graphics Card
The last major component that needs installing is the graphics card. Depending on the make and model this might take up as many as four expansion slots, so start by removing the appropriate number of plates covering the expansion slots on the rear of the case. These are typically secured in place with screws/thumbscrews. Many graphics cards are now so heavy they also require a bracket to help secure them in place, preventing them from sagging and damaging the motherboard. Check if your graphics card is supplied with a bracket, then follow the instructions in the manual on how to install it. If there isn't a bracket included, we stock some third-party graphics card brackets.
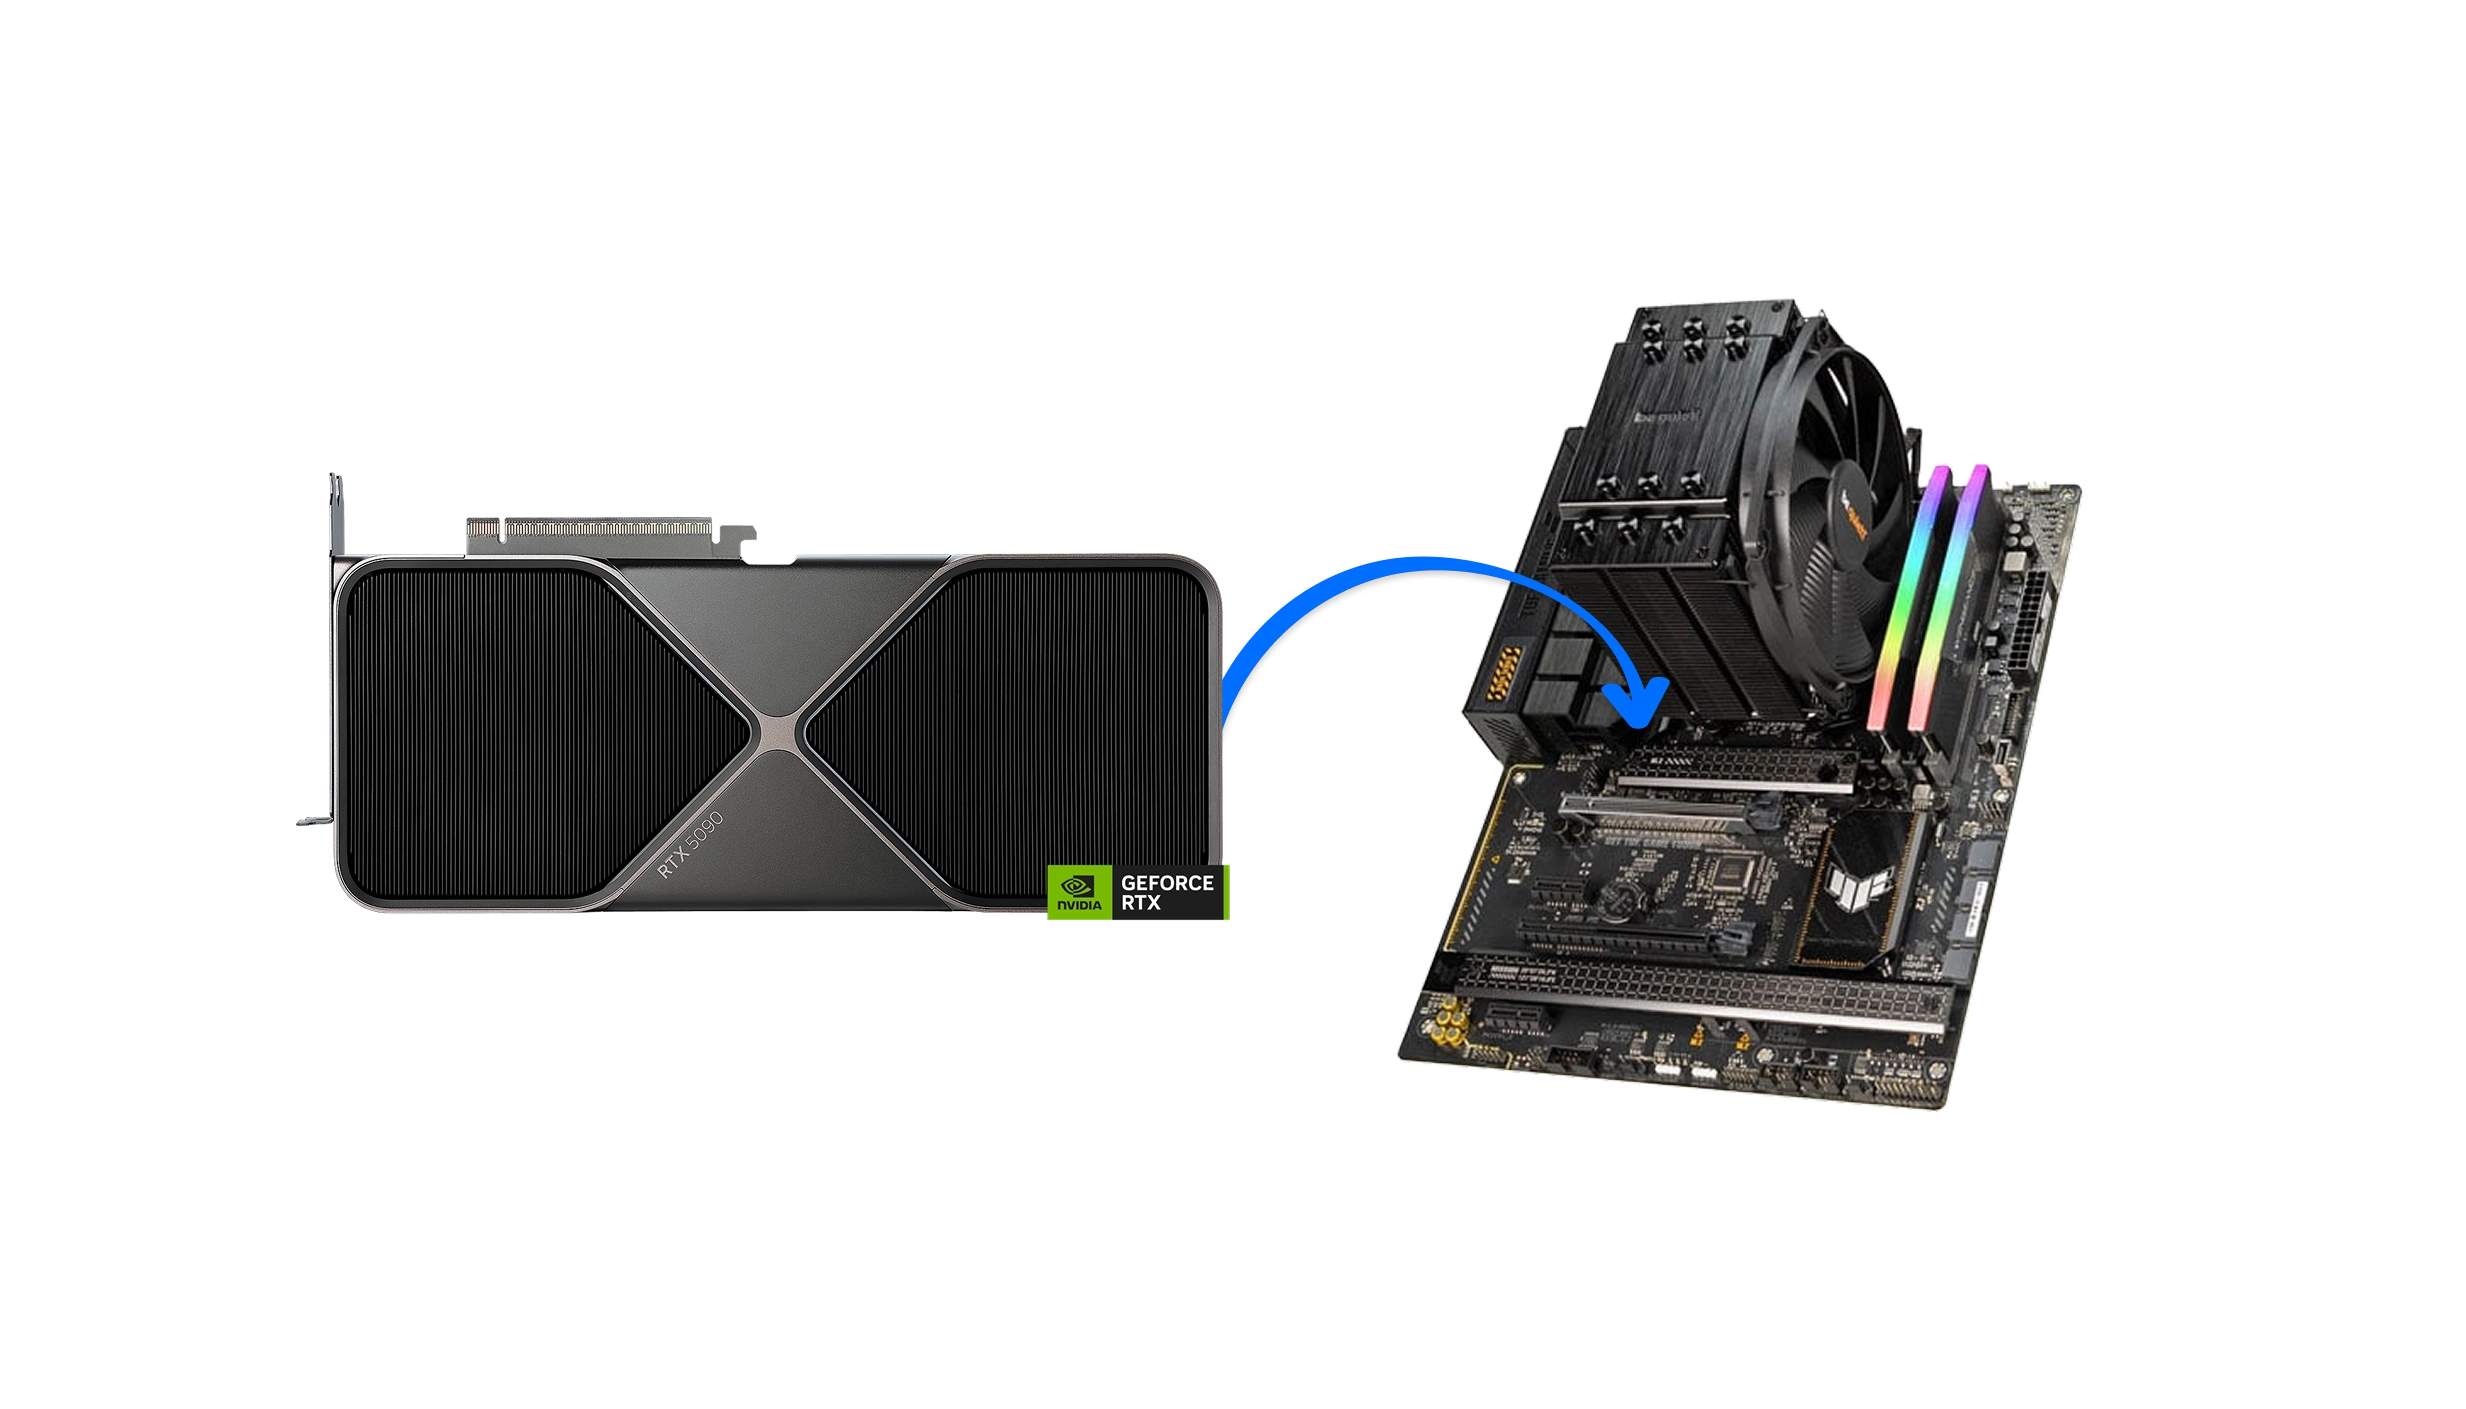
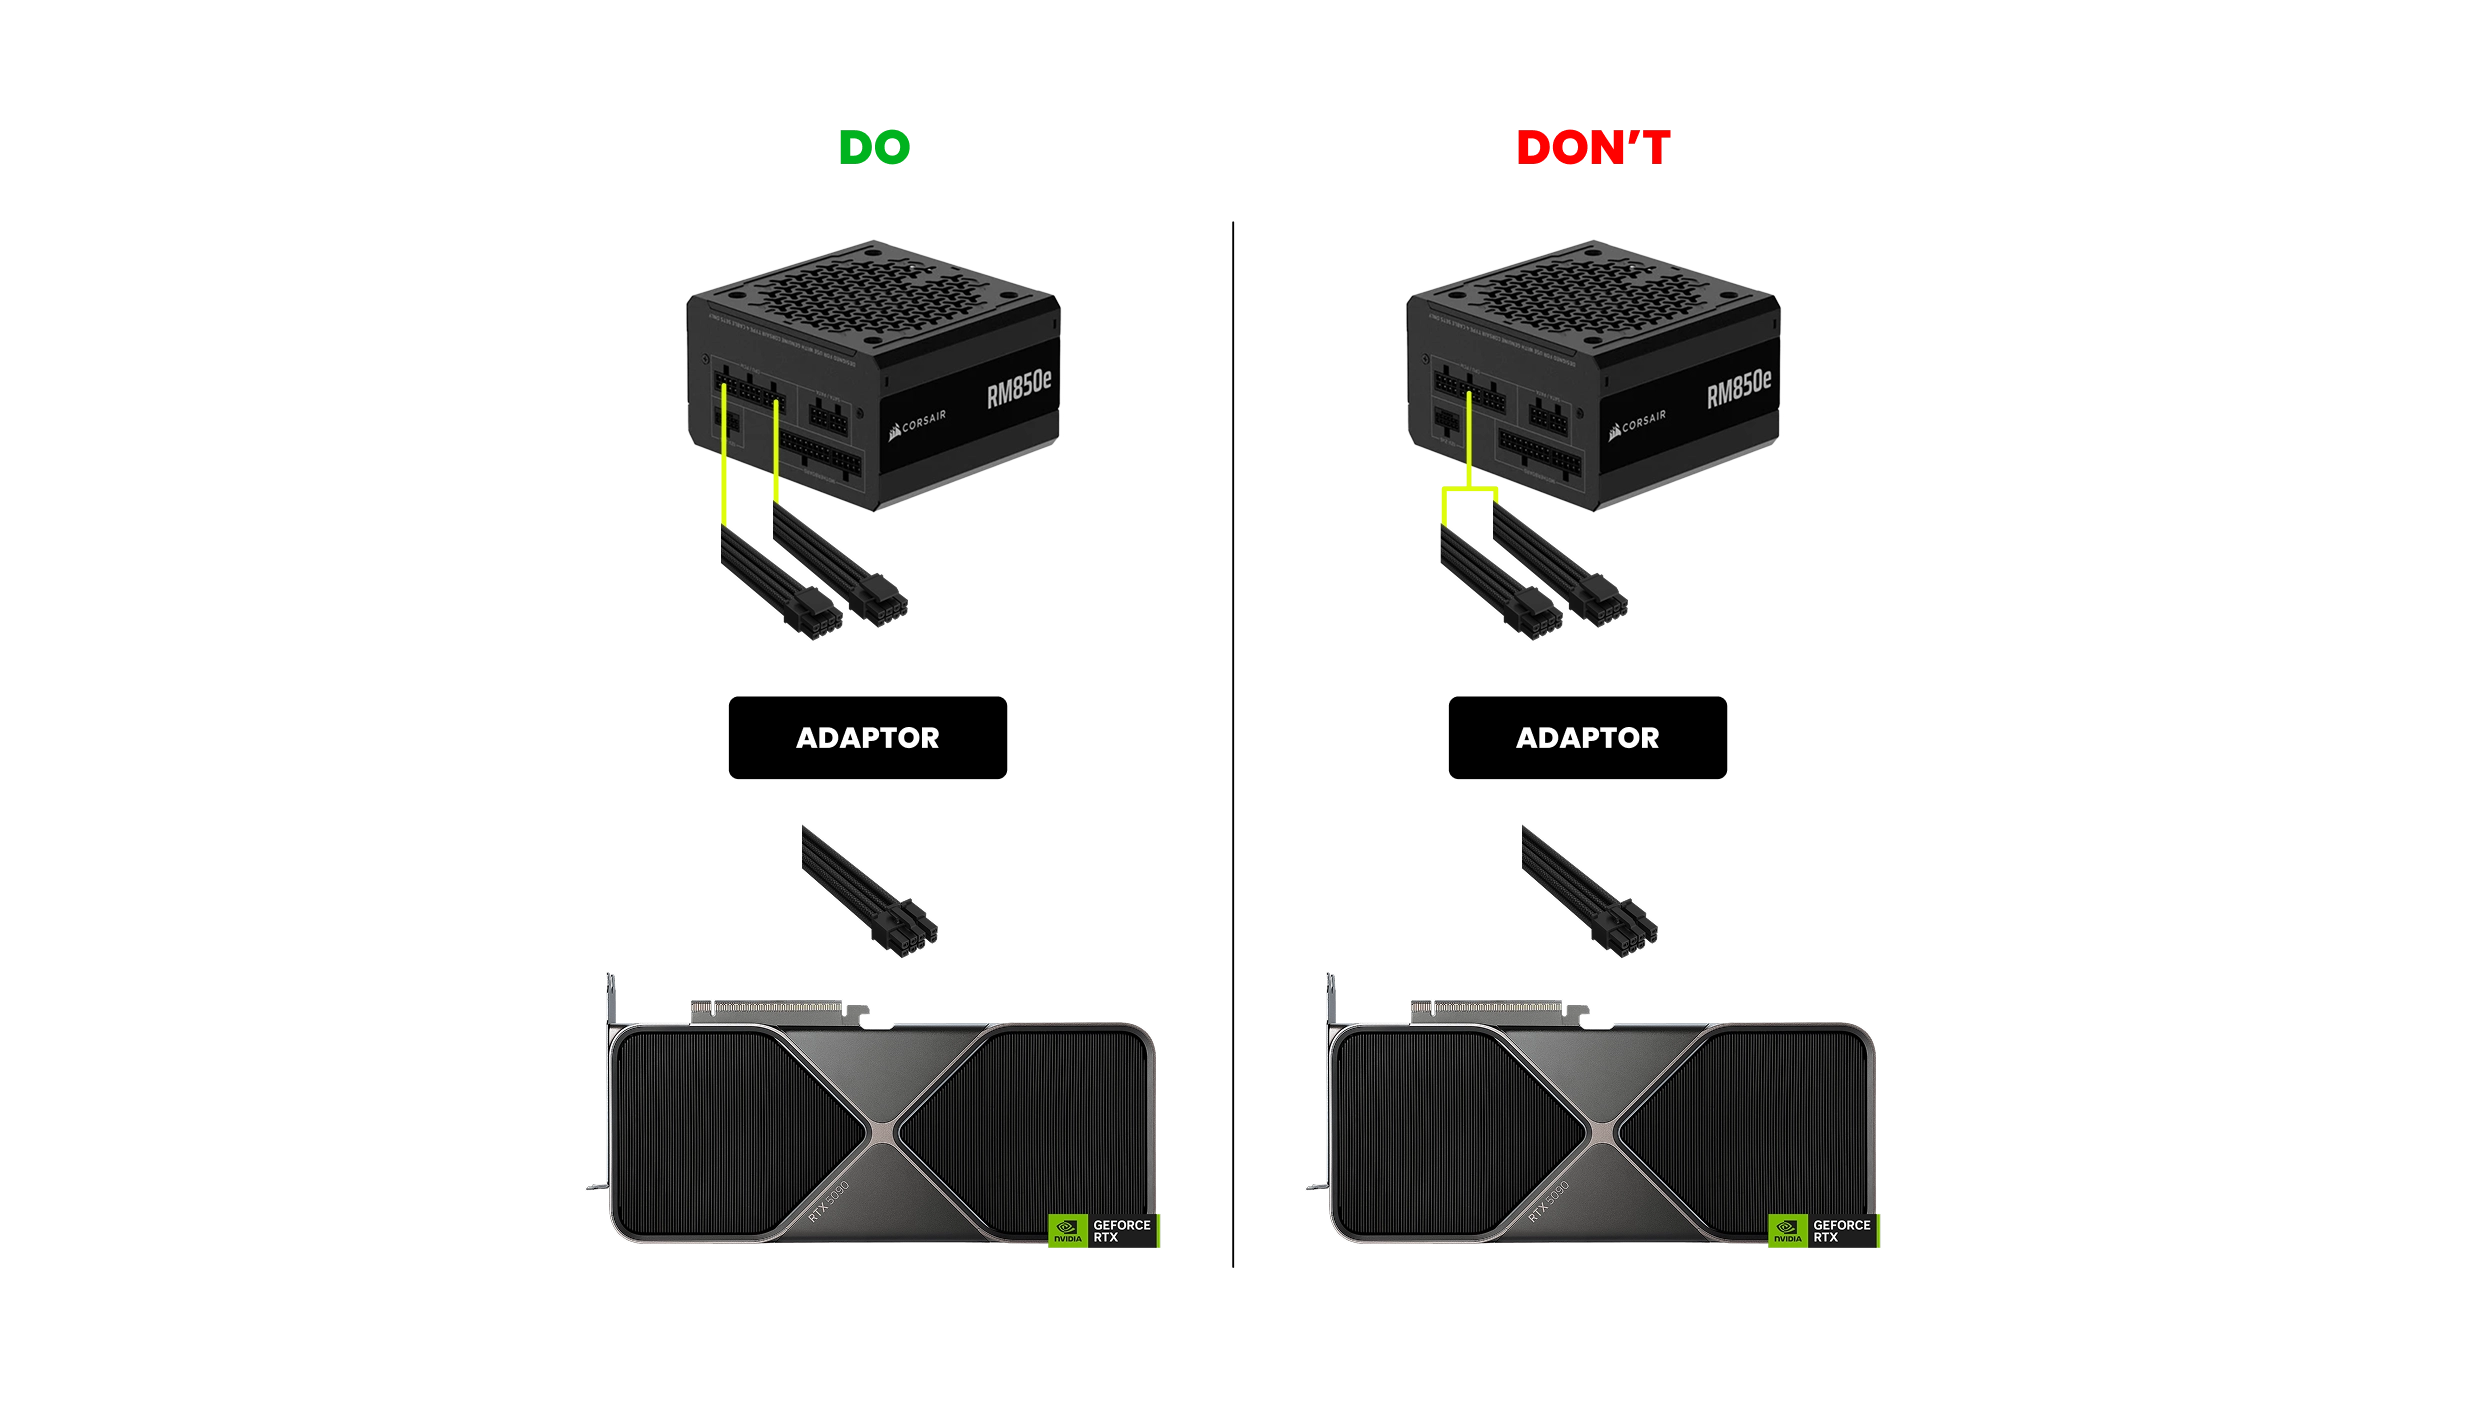
As already mentioned, the graphics card should be installed into a free 16x PCIe slot – the longest type of PCIe slot – typically the closest one to the CPU socket. If there's more than one 16x PCIe slot, check the motherboard manual for which slot to use. Once the card (and bracket if using one) is installed and screwed into the expansion slot at the back of the case, don't forget to reconnect the 8-pin / 6+2-pin PCIe / 16-pin PCIe 5.0 ATX 3.0 / ATX 3.1 power cables from the PSU to the graphics card.
If your PSU doesn't have native 16-pin PCIe 5.0 ATX 3.0 / ATX 3.1 power cables you can use adaptors to convert multiple 8-pin PCIe cables to a single 16-pin PCIe 5.0 ATX 3.0 / ATX 3.1 power cable. If you go down this route, make sure to use separate 8-pin PCIe cables rather than one cable. If not, you will overload a single cable, causing damage to the system.
Still undecided on what to buy?
If you're still struggling with what to buy, check out our AMD Radeon buyers guide and NVIDIA GeForce buyers guide.
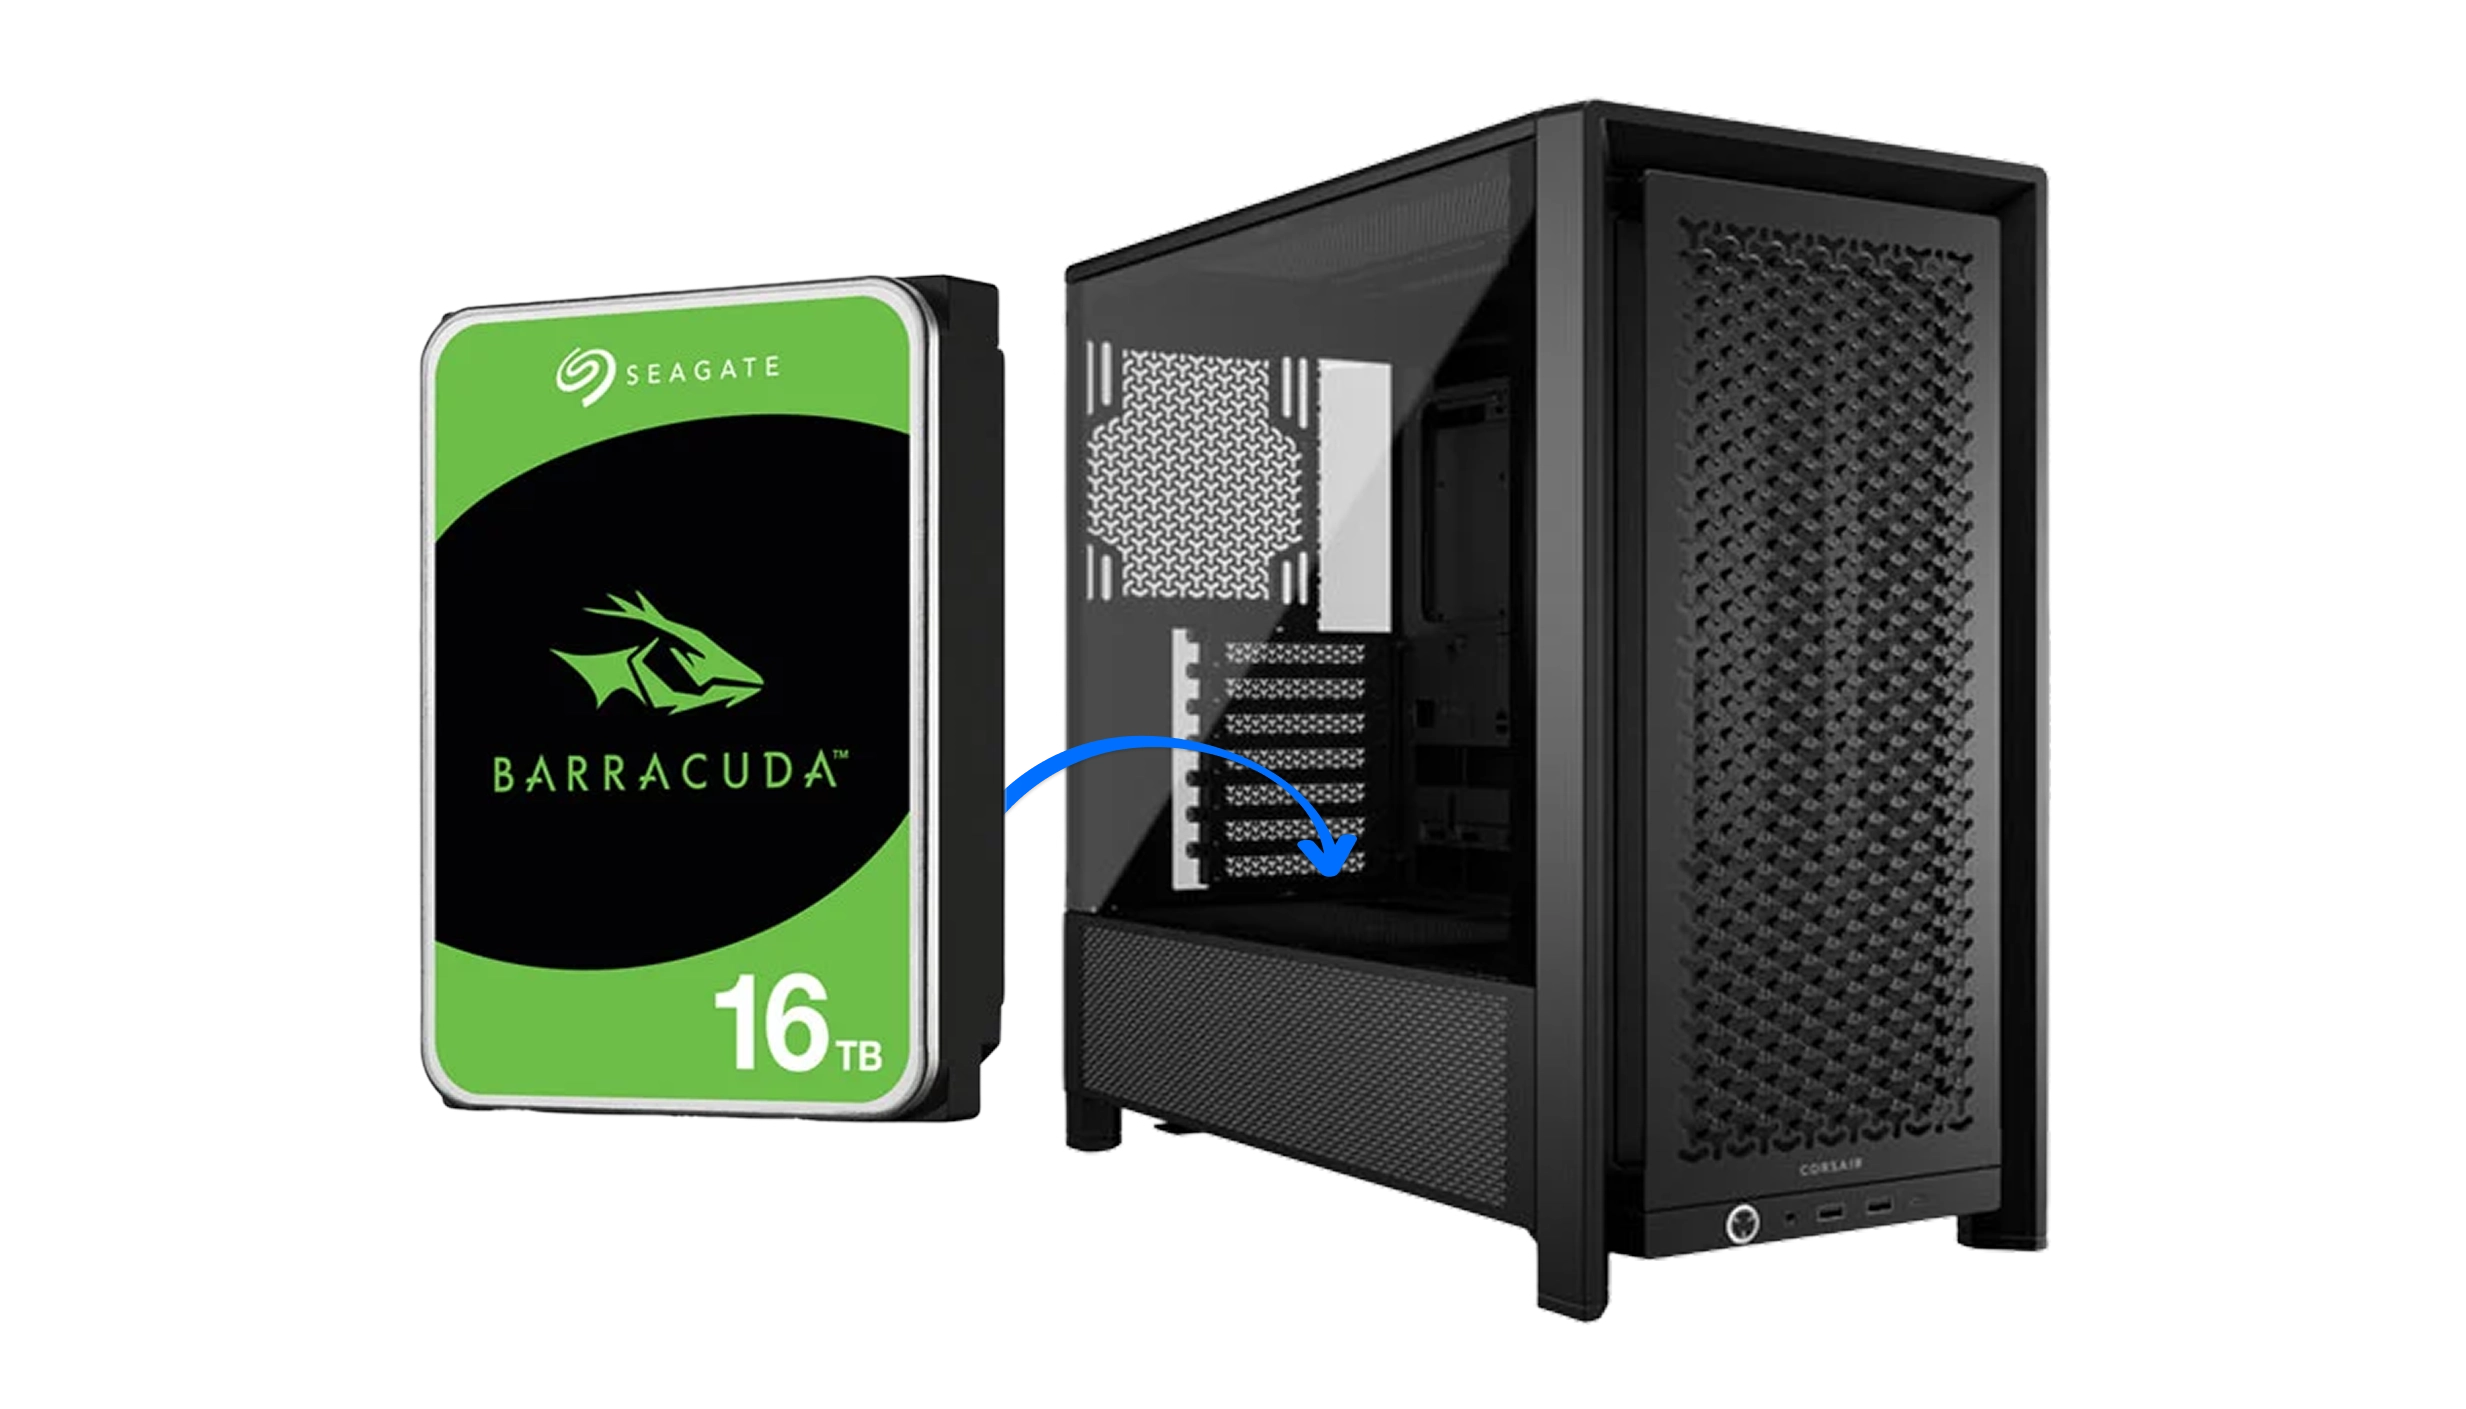
Install Other Drives
If you have any other SSDs or HDDs now is the time to install them. Most cases typically have a mix of 2.5in (suitable for most SSDs) and 3.5in (suitable for most HDDs) drive bays. If you do run out of compatible bays, you can buy drive bay adaptors. You'll need to screw the drive into place in a free bay and then connect a data cable from the motherboard and power cable from the PSU. A good way to keep these cables tidy is to tuck them behind the motherboard tray where possible.
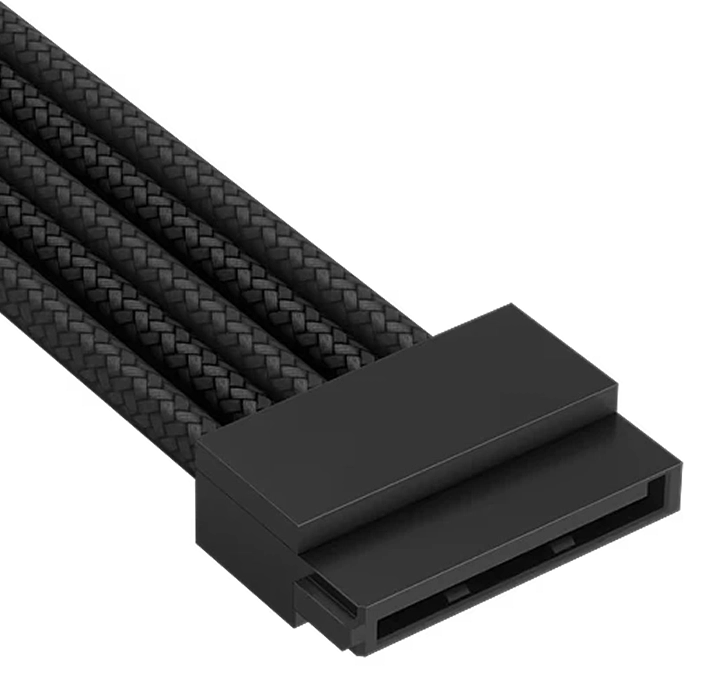
SATA power cable
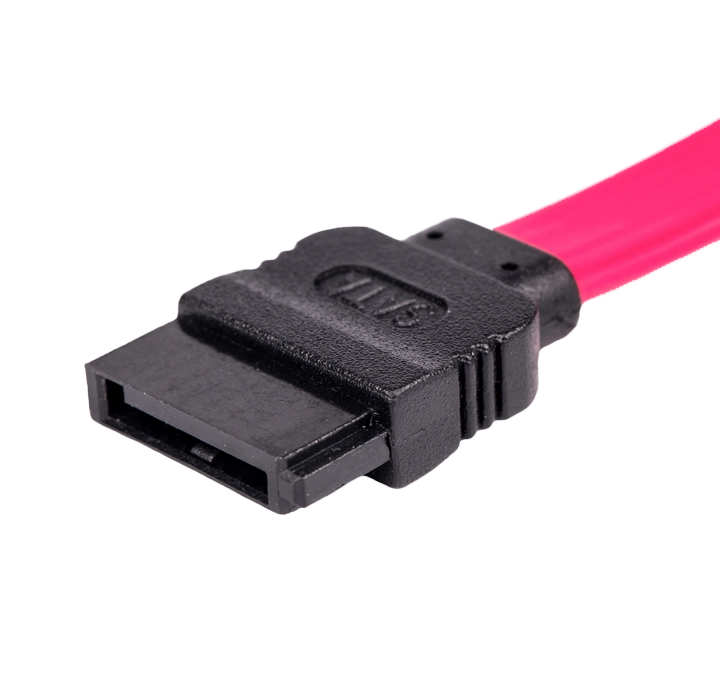
SATA data cable
Still undecided on what to buy?
If you're still struggling with what to buy, check out our SSD buyers guide and HDD buyers guide.
Tidy Cables
Although it makes sense to try and tidy cables as much as possible while installing individual components, now that everything is installed it's a good idea to go over the whole system. After all, you may find that you can now route cables in a different more efficient way.
Hide as many cables as possible behind the motherboard tray, you may also be able to hide some smaller diameter cables in between the motherboard and motherboard tray. Swapping out standard bulky cables for braided cables can really help with this process, as can cable ties, which are used to bundle up cables together in neat groups.
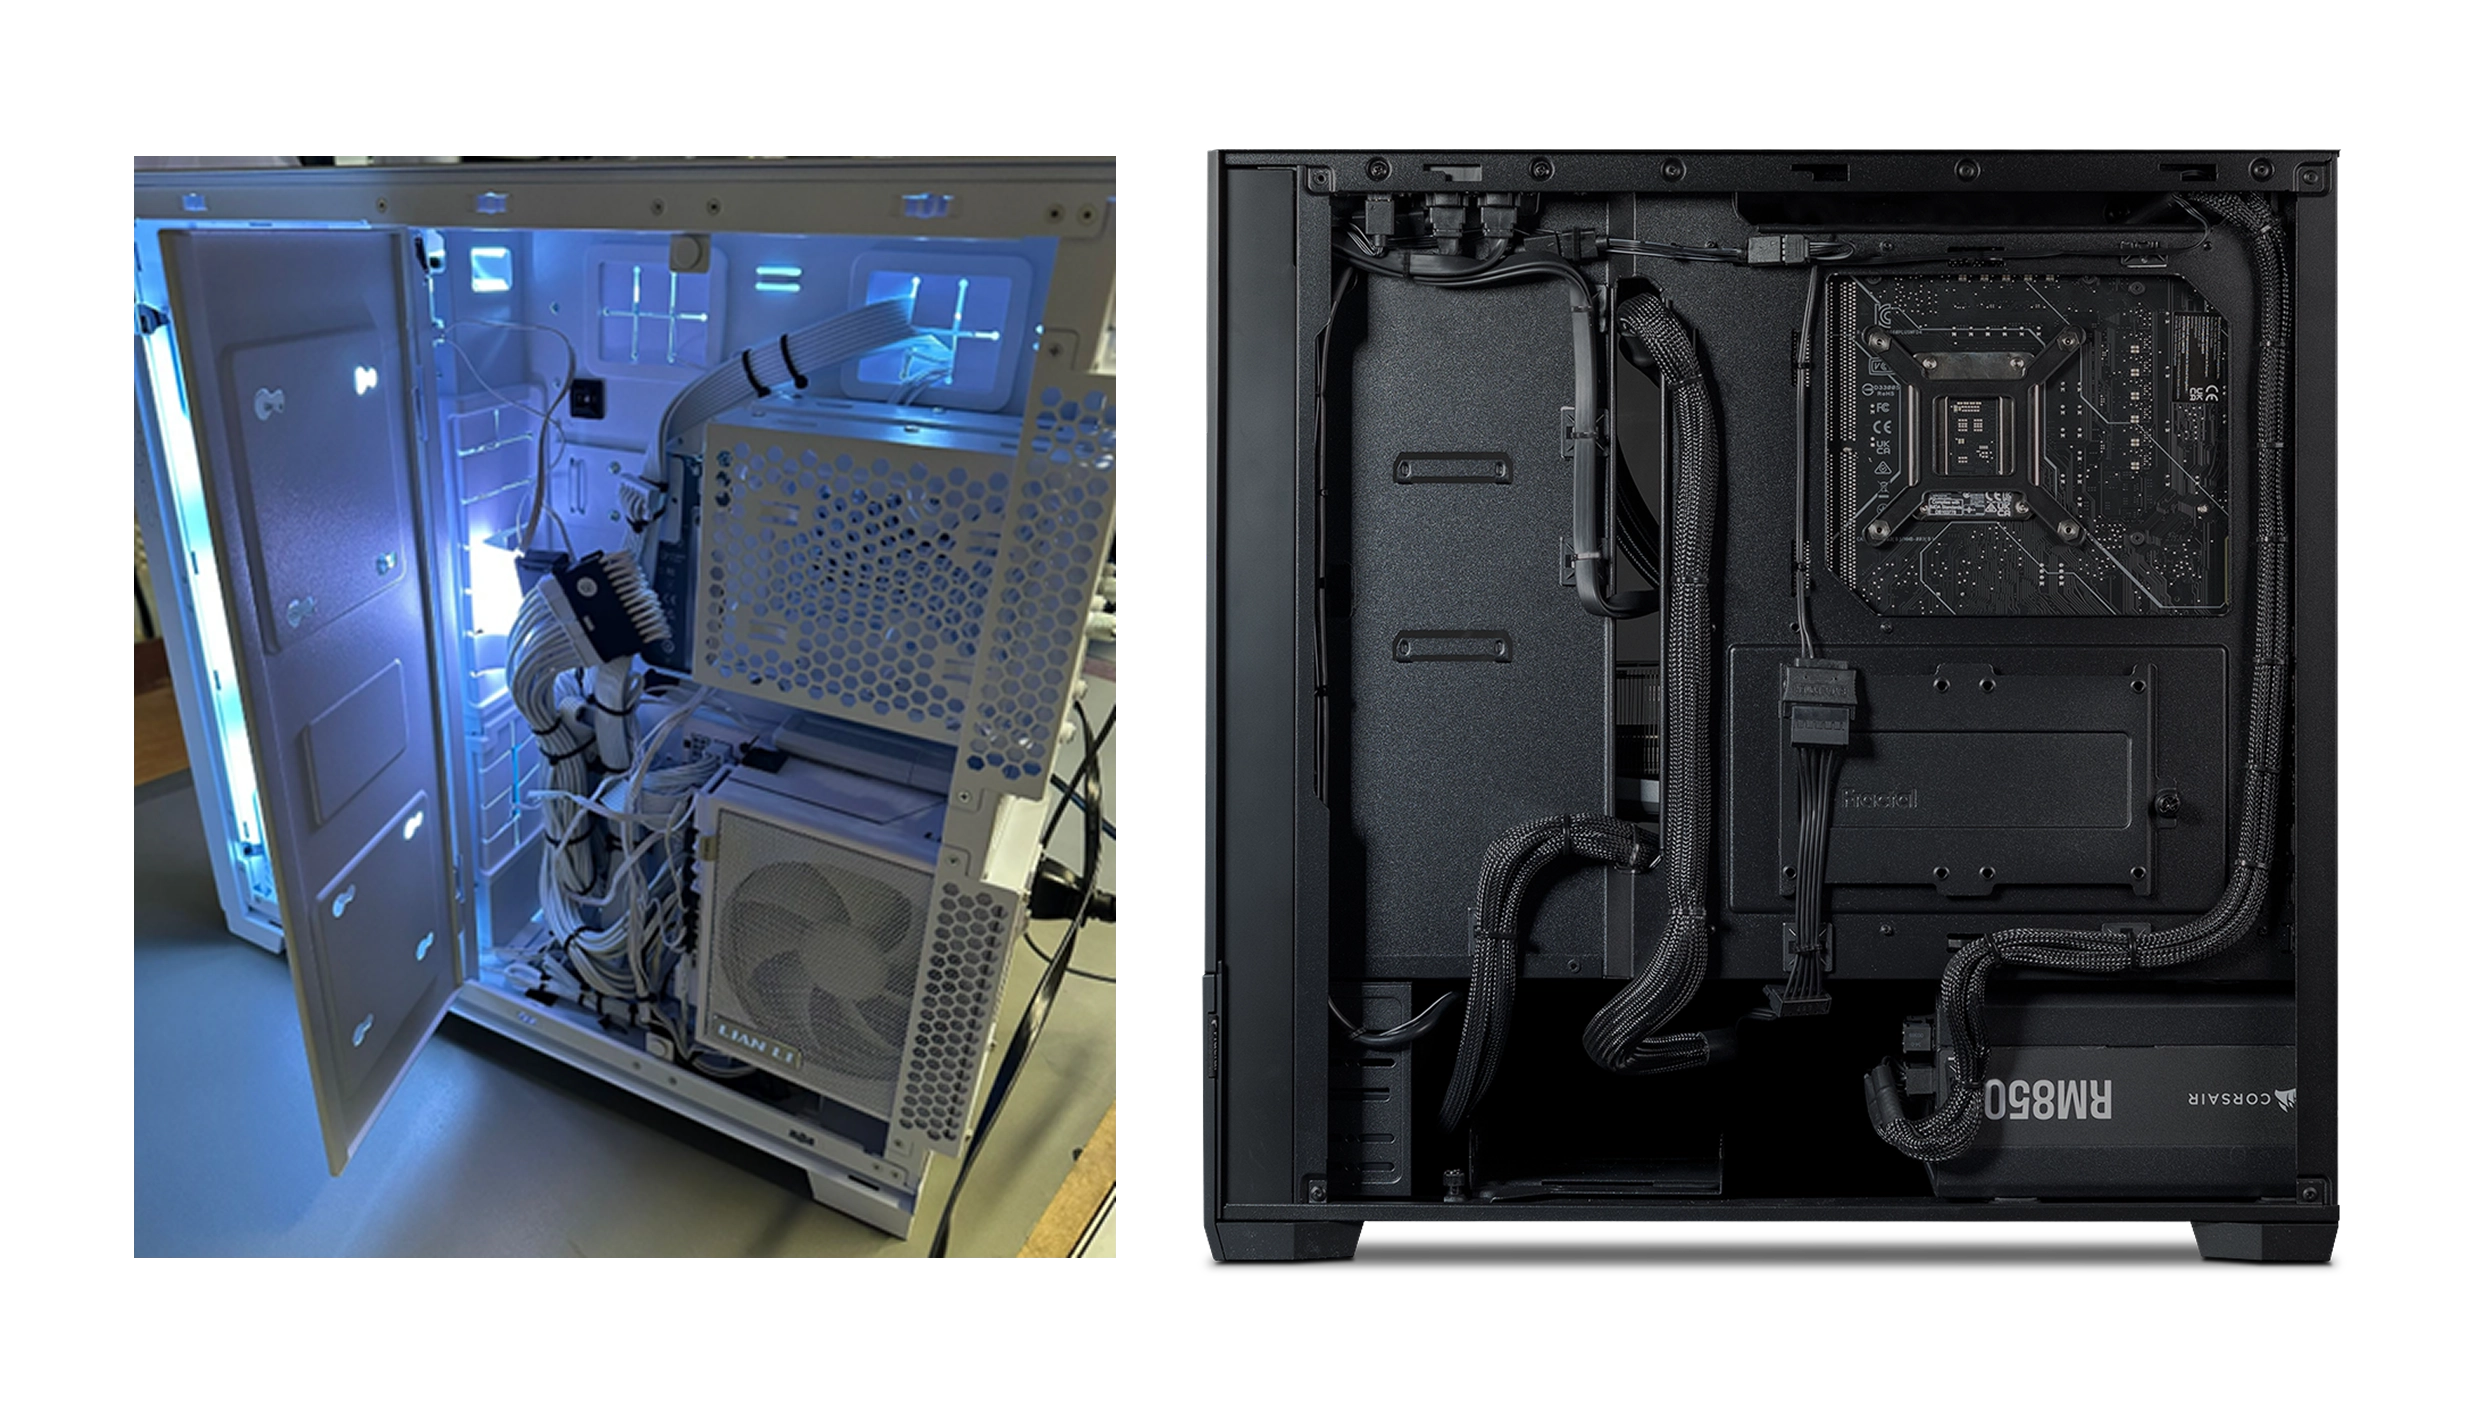
The goal is not only to make the system as visually appealing as possible but to keep the case interior as clutter free as possible. This will help improve airflow through the case, lowering component temperatures and noise as the fans won't have to work as hard.
Configuring the BIOS
It's now time to power up the complete system for the first time. Start by lifting and turning the case back on its feet and plugging in all the necessary cables (PSU mains cable, monitor, keyboard, mouse etc).
It's a good idea to leave the side panels off the case for now so you can see fully inside, this is important so you can check that all the case fans and CPU cooler fans are spinning as they should. You can also check if the fan(s) on the graphics card and PSU are spinning too, although many advanced models only spin these once they reach a certain temperature threshold, so they may not spin at this stage.
If all is well, your PC will start its POST (Power On Self Test) procedure, and the monitor will come to life. As before, you should enter the BIOS or EUFI, a management console for the motherboard. A prompt for this should appear on-screen temporarily, typically by pressing the Delete or F2 key on the keyboard.
If you do have any problems then check out the Troubleshooting section at the end of this guide.
The layout and options in different BIOS/EUFI varies enormously, so check the motherboard BIOS/UEFI manual.
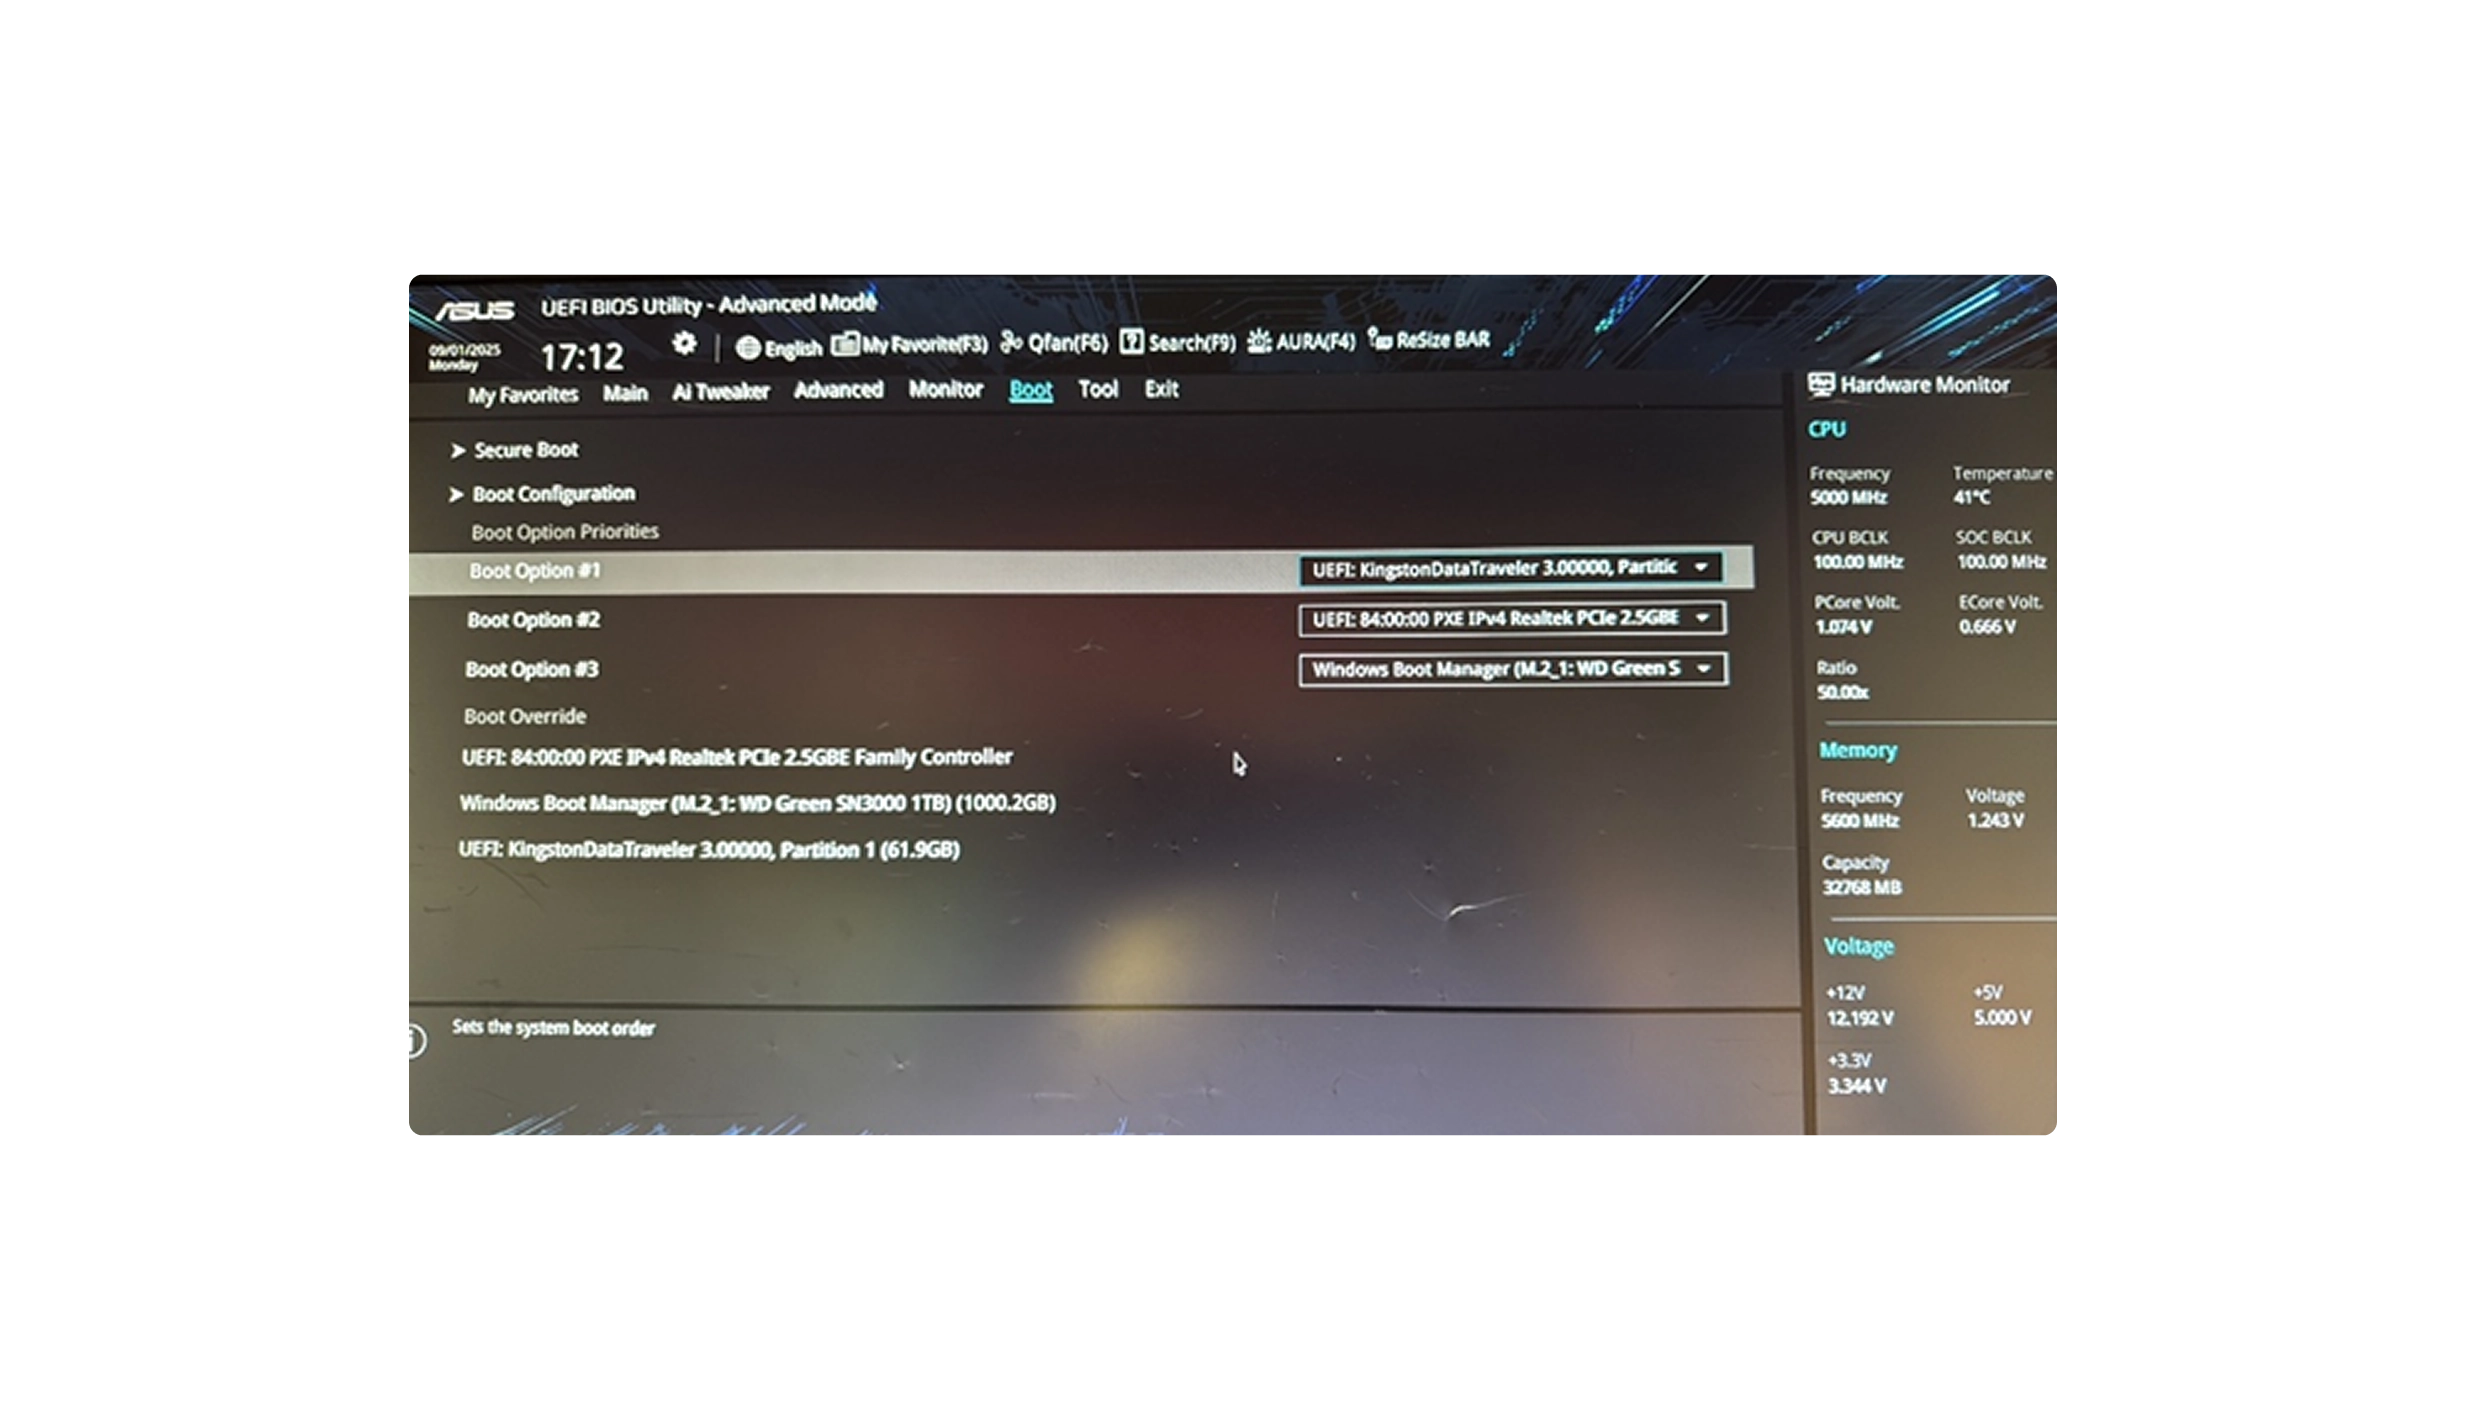
If in doubt, what you're looking out for is if the system has detected all your drives correctly. You then need to configure the boot order as follows so that you can install Windows:
- USB
- M.2 SSD (or SATA SSD if using instead)
While you're in the BIOS its worth checking a few other settings too such as if your PC is set to the correct date and time. You should also ensure that your memory is running at the optimum frequency, voltage and latency timings. The easiest way to do this is by enabling EXPO (for AMD CPUs) or XMP (for Intel CPUs) which will do this automatically for you.
Beware, while you can increase system performance and customise the BIOS further, you can also quite easily choose a setting that will cause instability or stop the system from booting, so be careful tinkering in the BIOS.
Once you're ready to proceed and save and exit the BIOS which will reboot the system.
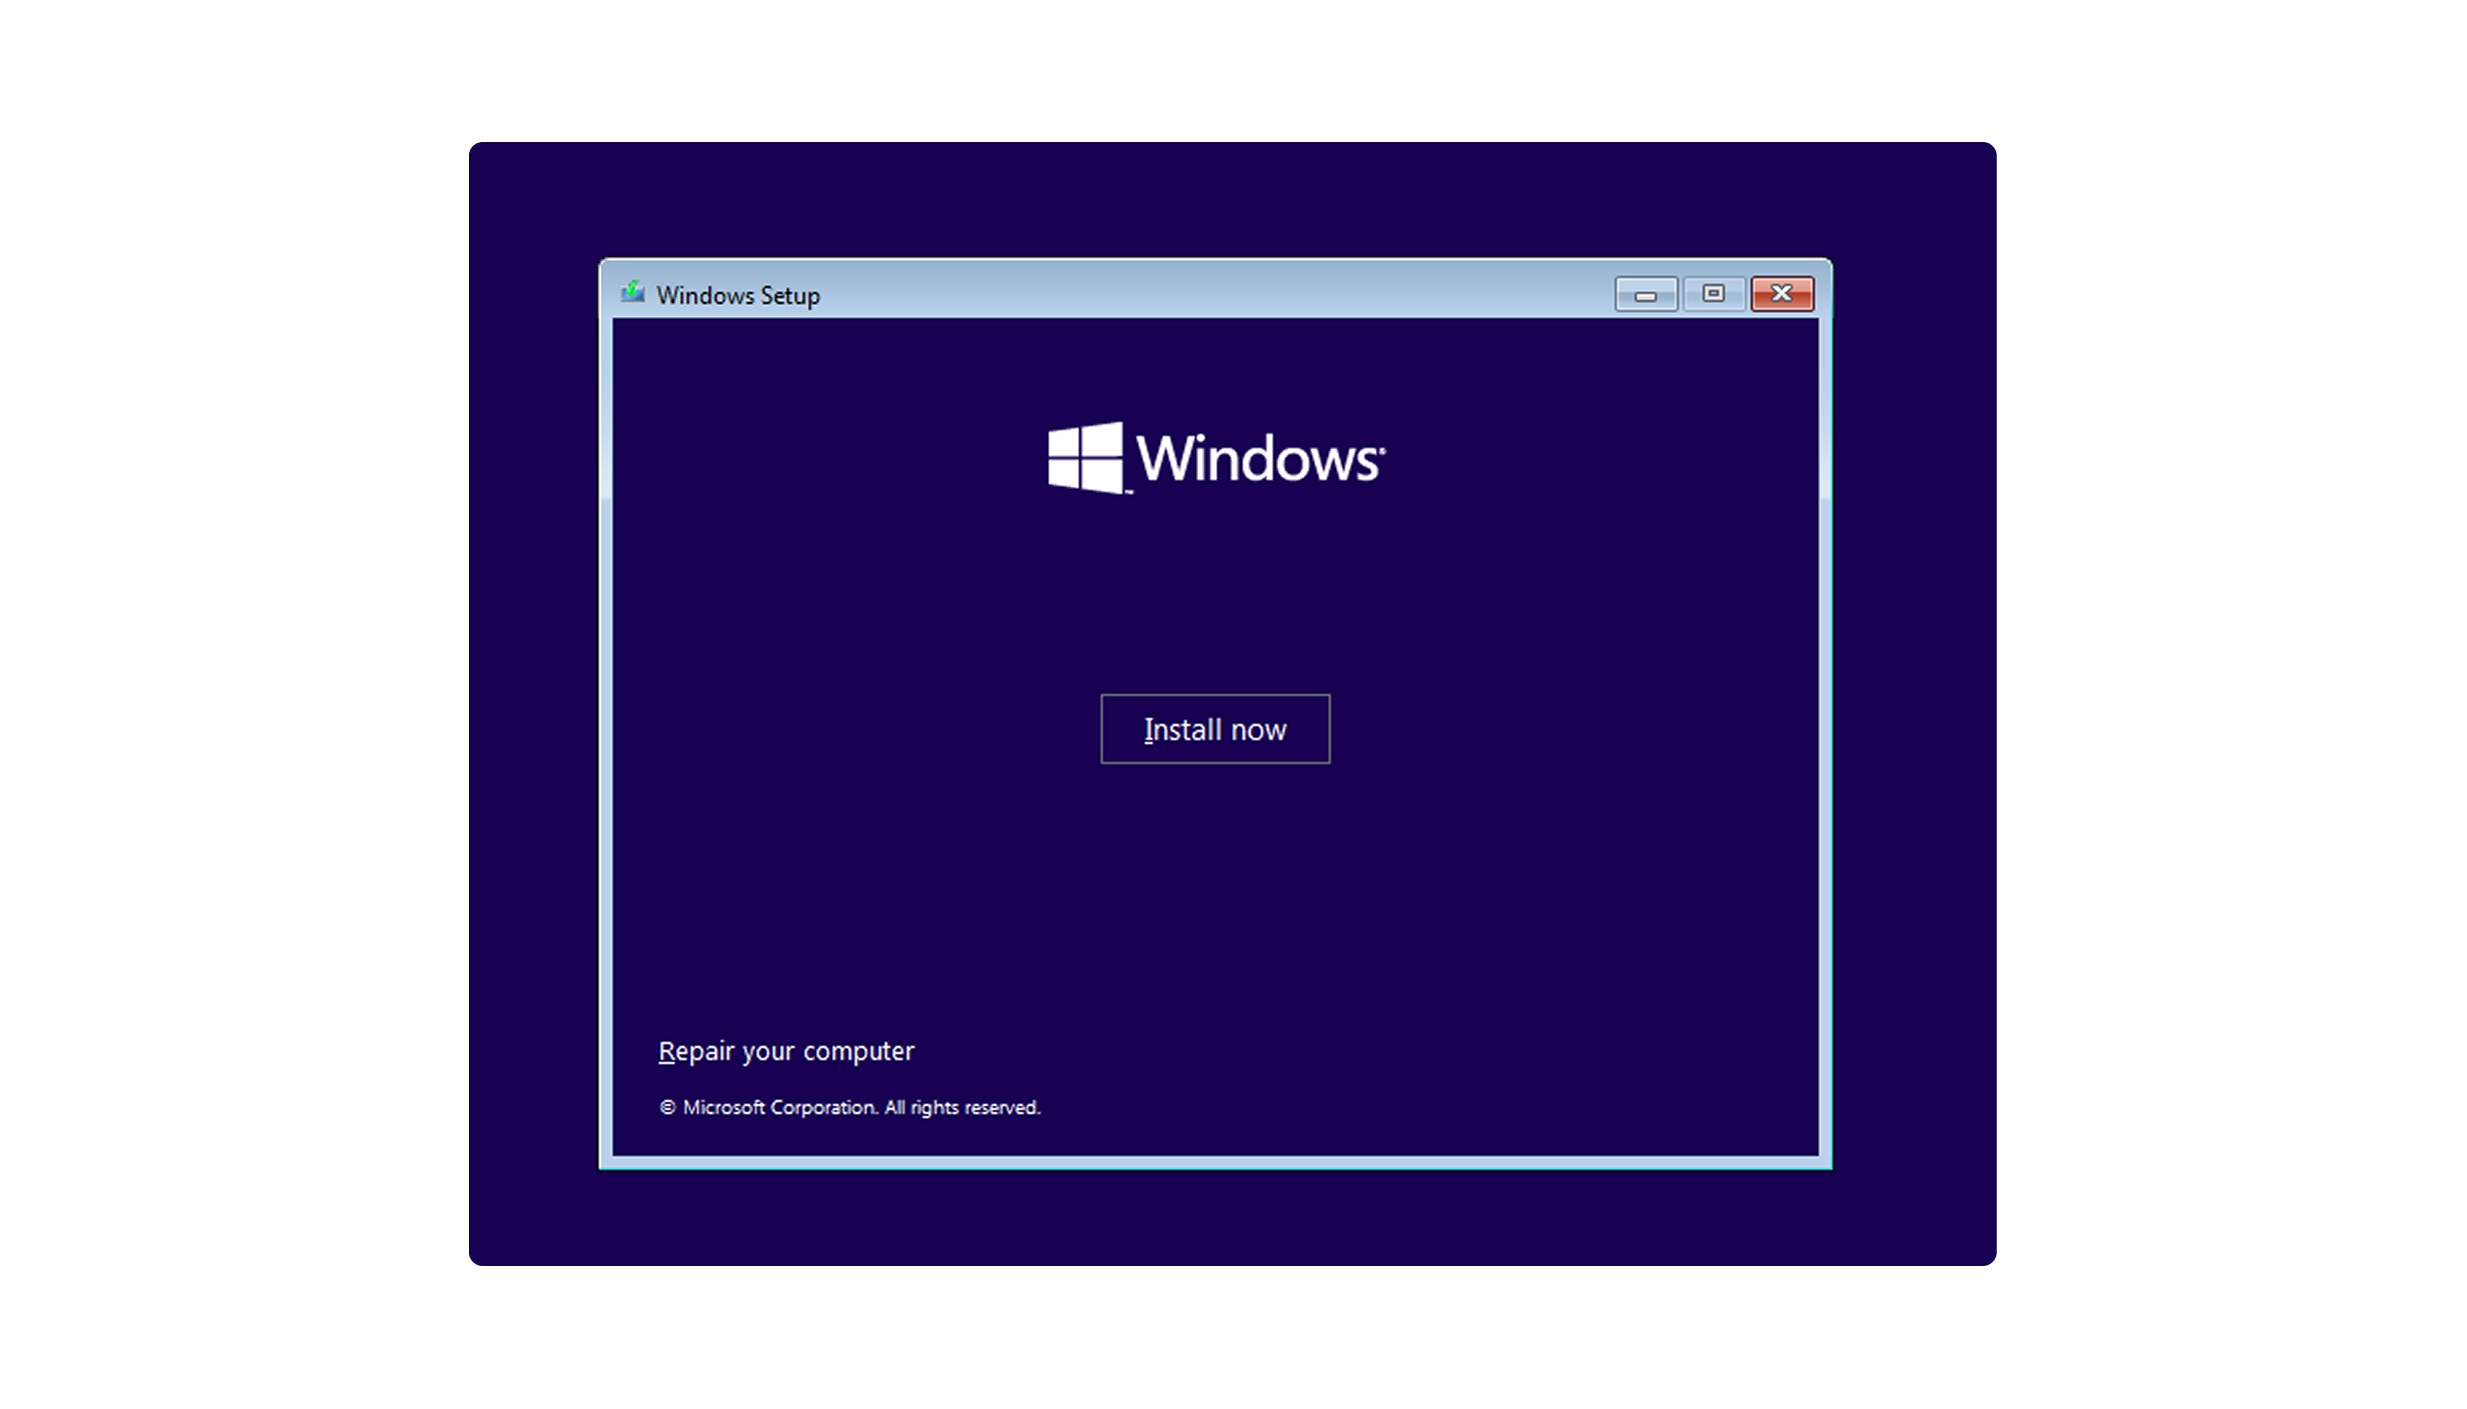
Install Windows
Start by plugging in your Windows 11 USB stick into a free USB port. After saving and exiting the BIOS your PC will reboot and attempt to boot from your Windows USB stick. Follow the prompts on-screen to install Windows.
Once this process is complete you'll be presented with the Windows desktop for the first time, at which point you can safely remove the Windows USB stick so that next time the system boots up it loads from the M.2 or SATA SSD instead.
However, before diving in and gaming its crucial to install the latest drivers for components such as the motherboard and its sub-components such as audio and LAN, plus the graphics card. This is because while Windows includes basic drivers as standard, these aren't optimised for performance. Most motherboards and graphics cards also come with lots of useful software for monitoring the health of your system, customising fan profiles and adjusting RGB lighting.
Your motherboard and graphics card should come with instructions on where to download the latest drivers and utilities, but if in doubt do a web search for the official product page on the motherboard and graphics card manufacturers' website and look for the support section which should list all the available downloads.
It's also a good idea to update the motherboard BIOS to the latest version as this can improve system performance and stability - the current version is typically displayed on the BIOS home screen. Do a web search for the official motherboard product page on the manufacturers website and look for the support section which should list the latest BIOS downloads and follow the instructions in your motherboard manual on how to update the BIOS as this varies from manufacturer to manufacturer.
Need a Windows license?
Don't forget to buy a genuine Windows license and installation media.
Shop WindowsSuccess! You've Built Your Gaming PC
Congratulations! You've successfully assembled your gaming PC from scratch. This is a significant achievement that showcases your technical skills and dedication.
Why not head over to the Scan Discord and say hello to our community of likeminded gamers and PC builders and upload some photos of your PC to show it off.
What You've Accomplished
- Successfully installed a CPU and applied thermal paste
- Mounted RAM modules and an M.2 SSD
- Installed a CPU cooler for optimal temperatures
- Mounted the PSU and motherboard in the case
- Connected all front panel and case cables
- Installed a graphics card and additional drives
- Configured BIOS settings for optimal performance
- Successfully installed Windows and updated drivers
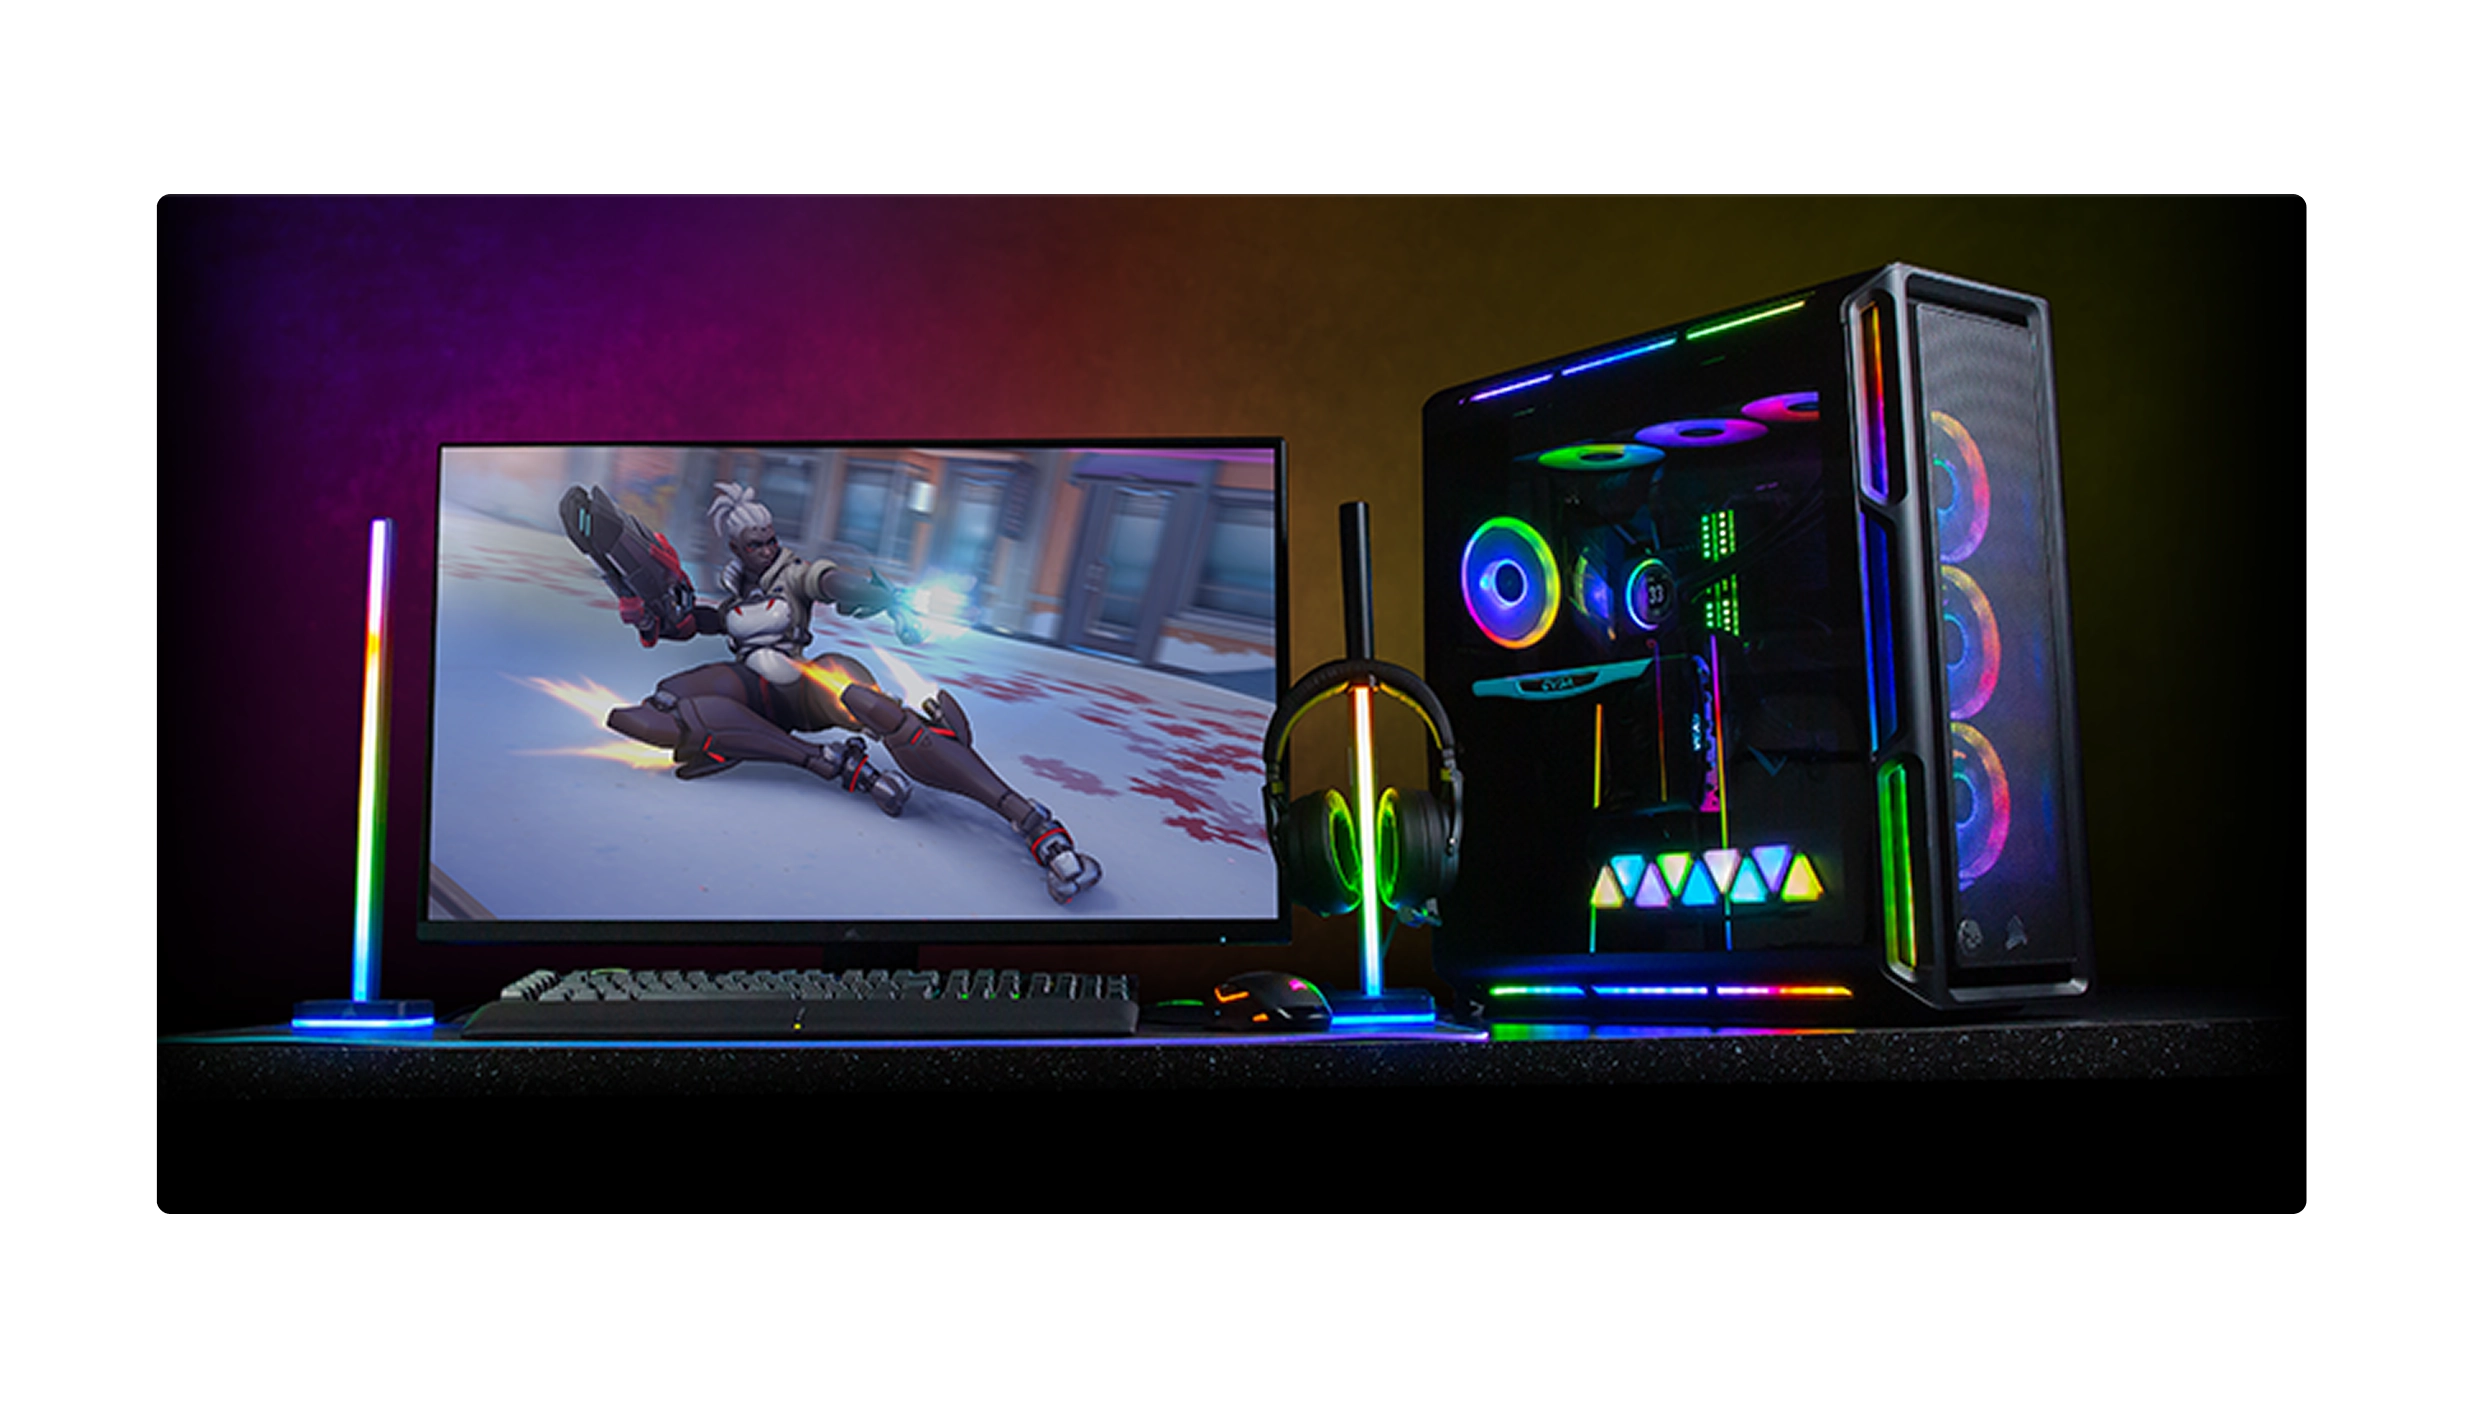
Next Steps
Now that your system is up and running, consider installing your favorite games, benchmarking software to test performance, and personalising your setup with RGB lighting and custom settings.

Troubleshooting your new PC
If your PC doesn't power up properly or display anything onscreen, it may not be that a component or component(s) are faulty. Here are our top troubleshooting tips to helping bring your new PC to life.
Building a PC can be challenging, but most issues have simple solutions. Don't panic - follow our systematic troubleshooting guide to identify and resolve common problems with your new build.
Troubleshooting Common Issues
- Check that all the power cables (see PSU section) are correctly installed between the PSU, motherboard and graphics card and that the PSU is switched on and plugged into the mains.
- Check the motherboard manual to ensure you're shorting the right two pins for the power switch / have connected the case front panel to the correct header the right way around.
- If testing the system before installing it in the case, ensure that the motherboard is on a non-conductive surface such as the cardboard motherboard box. If the motherboard is now in the case ensure there aren't any short circuits – physical contact between it and the case. Also check that all stand-offs are screwed down tight and that there aren't any un-used stand-offs touching the underside of the motherboard.
- Check the graphics card is securely installed in the correct 16x PCIe slot. Next, check the display cable is securely plugged in between the graphics card and monitor, not the motherboard and monitor. Now check if the monitor has power and is switched on. Most monitors automatically detect a new signal, but you may need to enter the OSD of the monitor to select the right connection, i.e. HDMI or DisplayPort.
- Check the motherboard manual to ensure you've installed the RAM in the right DIMM slots.
- Reset the BIOS to its factory default settings: start by powering off the system and removing the mains cable from the PSU. Look for the 'CMOS clear header' on the motherboard, and using the tip of a screwdriver create a short circuit by touching both pins for five to ten seconds. Plug the power back in switch it back on – you will need to re-enter any previously saved BIOS settings.
- It's possible that your motherboard supports your CPU, but needs a BIOS update to work. Most motherboards include a way to update the BIOS using a USB stick without a system POSTing. Have a look in the motherboard manual to see if this is the case.
Graphics card make this noise when they aren't receiving sufficient power. Check that all the necessary 8-pin / 6+2-pin PCIe / 16-pin PCIe 5.0 ATX 3.0 / ATX 3.1 power cables from the PSU to the graphics card are installed firmly.
A likely cause of this is the CPU overheating. Check that the CPU cooler's fan(s) are installed and are spinning. If this isn't the cause, try remounting the CPU cooler, using TIM cleaner to remove the existing TIM, and then applying fresh TIM.
Still struggling?
If all else fails then head over to the community Help section of the Scan Discord or try searching the Internet for issues with your specific components. Finally, you can also reach out to the Scan Technical Support team which will be able to help if you have faulty components.
Contact Support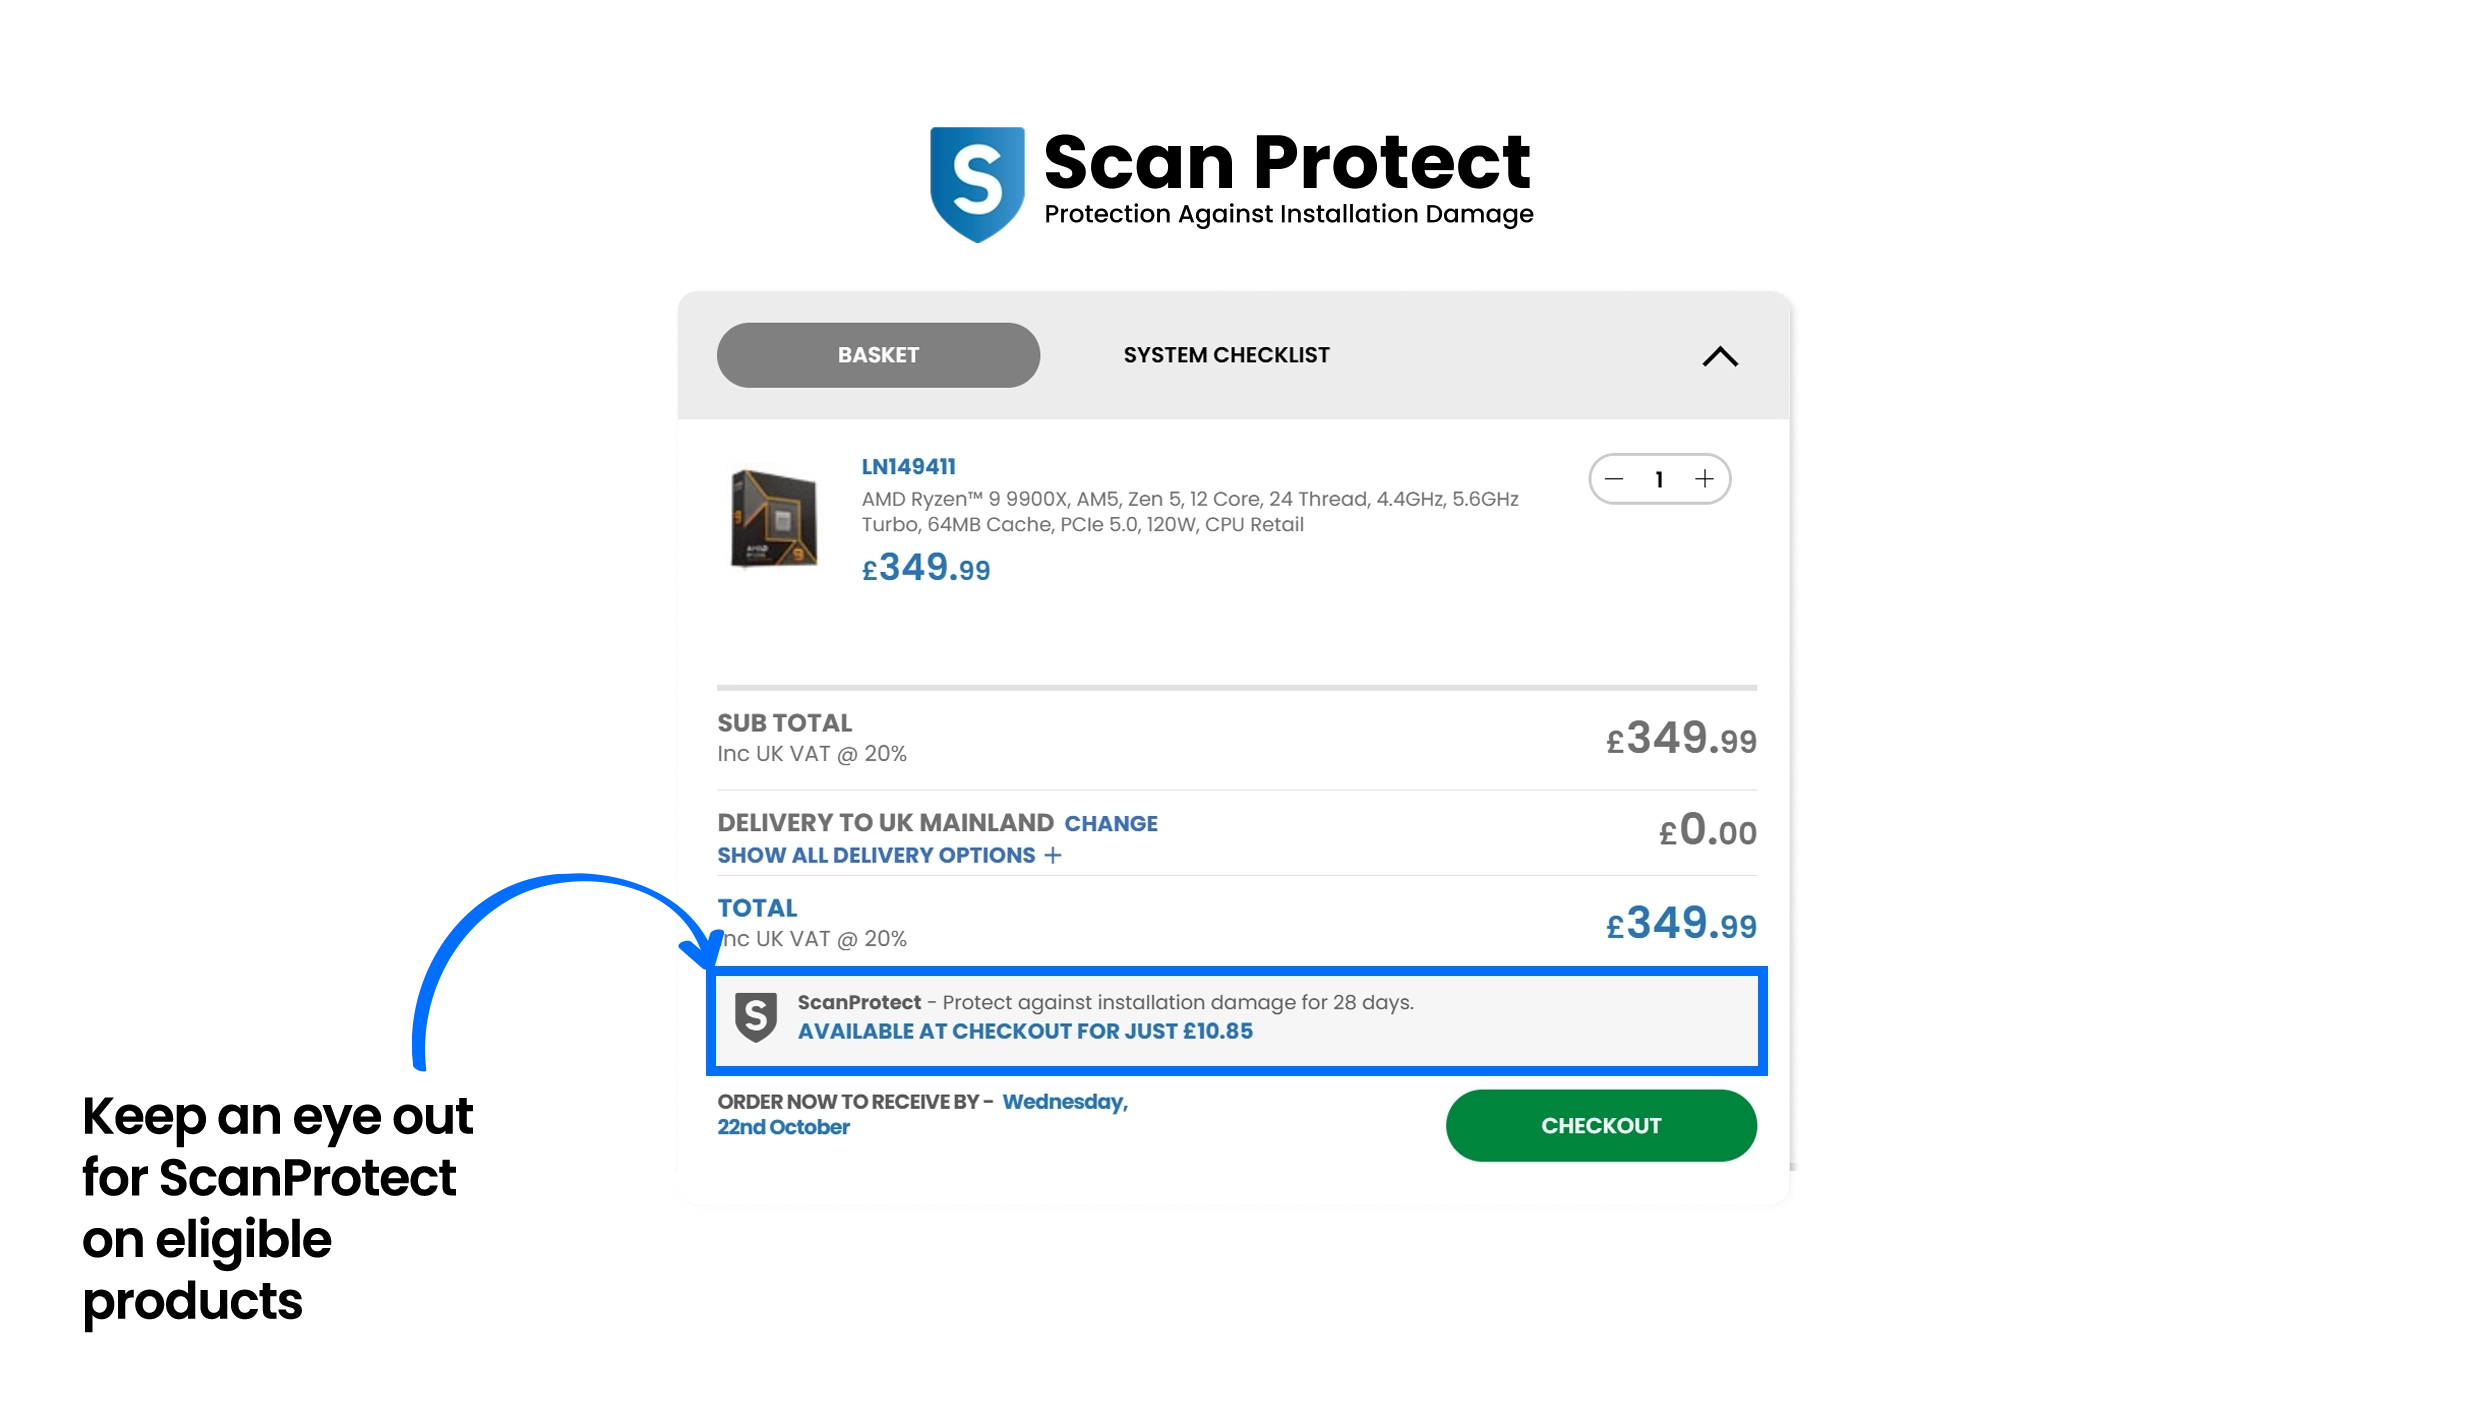
Scan Protect
If you haven’t already purchased all your components don’t forget we offer ScanProtect, an enhanced warranty that provides you with a replacement product if there’s accidental damage during installation.
PC Components Buying Guides
These are the components, peripherals and software you’ll need to have bought to build a PC. In case you’re still trying to decide which components to use in your new build there we’ve provided links to our in-depth buyers guides to help you make an informed purchasing decision.
CPU COOLER
M.2 SSD
CASE
MONITOR
KEYBOARD


SPEAKERS/HEADPHONES