Lighting and Chromakey Buyers Guide
Light is the basis of our vision and a such is an important part of any production. The human eye is capable of perceiving roughly 20 stops of dynamic range allowing us to notice details in shadows whilst outdoors on a sunny day. Most modern professional cameras are capable of recording roughly 10-16 stops. As such we have to ensure that we light the key elements of our scene. Whilst not always obvious even dark or dim scenes within film and television use very controlled lighting.
This guide is aimed at helping you understand the different type of lighting and chromakey solutions to help you choose the right product for your needs.
Hard vs Soft Light
When lighting our scene, we have many different ways of doing so. We can use a traditional 3-point lighting setup, with a key, fill and back light or we can add or reduce the number of lights to create a specific mood or look. One major decision is the use of hard or soft light to achieve our look. The difference between hard and soft light is the relationship between the size of the light source and the distance between the subject. The closer and smaller a light source is to the subject the harder the light will be, whereas the further away and larger a light source is, the softer it will be. You can easily see this effect by making some shadow puppets with a torch! If you move the torch closer to your hand, the shadow becomes much more defined and as you start to move it away
you will see the shadow becomes blurry and less defined.
Hard light creates sharp shadows and does not wrap around the subject. This often used to create very moody looks with a good example being film noir. The high contrast and sharp shadows are a key part of creating the overall feel of the scene.
Soft light tends to wrap around the subject creating less harsh shadows. This type of lighting is much more common in productions as it is more natural looking to the human eye. Soft lighting used to create a sense of realism or in beauty work to reduce skin imperfections and evenly light the talent.
HARD LIGHT

SOFT LIGHT

It’s always good to remember that it’s far easier to make a hard light soft than it is to make soft light hard!
Different light sources
Now that we better understand how different light affects our subject we can delve into the technology behind the lights themselves. The main contenders in the when it comes to lights are LED, fluorescent and tungsten. When discussing the different types of lighting it helps to understand the how the quality of the light emitted from the source can affect your final image. Lighting within professional video applications is measured against certain standards like CRI (Colour Rendering Index) or TCLI (Television Lighting Consistency Index). These standards measure how accurate a light source is when rendering colours. A low quality light source can cause colour reproduction to be vastly inaccurate.

LED lights are newer within professional lighting setups and are starting to become more widely adopted. These lights are so popular because of high efficiency, very low power consumption, lifespan and level of control that they offer. LEDs can be easily dimmed and controlled and offer up to 50,000 hours of use when compared to under 2000 hours for traditional tungsten lights. There are disadvantages to using LED sources however, as they are more expensive relative to their total output and cheaper lights can produce colour casts.

Fluorescent lamps are more common on sets, particularly interior scenes. Like LEDs they require less power than traditional tungsten lights and have long lifespans. However, they often do not render colour as accurately and require professional electronic ballasts to emit flicker free light.
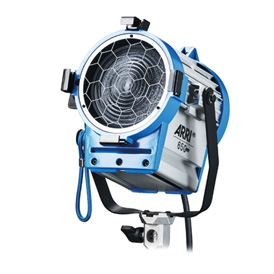
Tungsten lights are an industry standard and have been used in film and television for decades. They are relatively inexpensive and produce almost perfect colour rendition. Tungsten lights also have their drawbacks as they can produce large amounts of heat, requiring protective gloves to angle or move if they have been on for any length of time, and require large amounts of power.
Filters, bounces, softboxes and accessories
Designing your lighting doesn’t just depend on the type of light source you choose.
There are is a vast array of accessories and tools you can use to help craft your lighting setup.
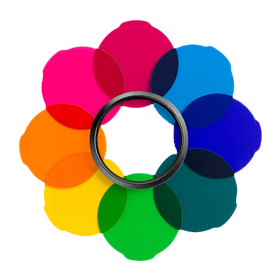
Whilst we have already covered colour reproduction, this has no effect on the temperature of the light source, measured in Kelvin (K). 5600K, considered equal to daylight on a warm sunny day, and 3200K, tungsten or “indoor” lighting, are the two most common temperatures. Temperatures above 5000K are referred to as cool, giving a blue tint, whilst temperatures below 5000K are considered warm and have more of a red tint. With the use of gels or filters we can alter the temperature of the light or even cast specific colours to alter the look of the scene.
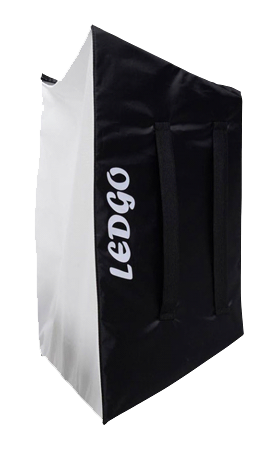
Softboxes and screens can be added to lighting rigs to diffuse a had light by spreading it across a larger surface. This makes the overall light source larger and, as discussed above, larger light sources cast a softer light.
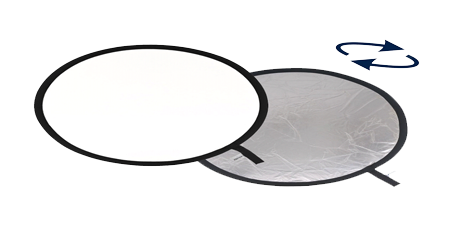
Reflectors are another way to add more light into a scene. These are reflective surfaces used to bounce light back onto a subject. These are great for managing shadows and as they are not a light source themselves, they retain the quality of the original light source, avoiding any mismatches in temperature.
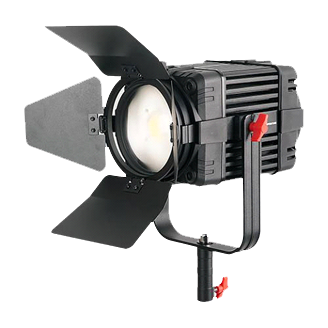
Barndoors can be added to a light fixture to give you greater control over where the light is cast. These moveable panels help you shape the light cast onto the subject.
Chroma Key

Chroma keying is the technology of “keying” or cutting a specific colour out of your image. The colours most commonly associated with chromakeying are green and blue and is more commonly recognised when referred to as greenscreen or bluescreen. This allows you to replace elements within a shot or even use virtual studio.
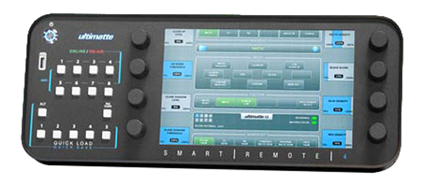
Chroma keying relies mainly on two components, the coloured screen or object that will be keyed out and the chroma keyer itself. Whilst many software applications allow you to key out a colour in post production there are also a range of hardware devices that help you to achieve this with live video signals.
Chromakey systems also require very controlled lighting. If a green or blue screen is unevenly lit, then keying that colour becomes more of a challenge as there are different shades that the keyer must encompass rather than a flat hue.
The best lighting and Chromakey equipment
There you have it, everything you need to know when choosing lighting and Chromakey equipment. We hope you've found this buyers guide helpful. Don't hesitate to contact one of our friendly advisors for more advice if you still have questions on how to select the perfect lighting and Chromakey equipment. If you’re all set to go we recommend checking out the lighting and Chromakey equipment from these top brands.
VIEW RANGE