Our Aim
To provide you with an overview on New And existing technologies, hopefully helping you understand the changes in the technology. Together with the overviews we hope to bring topical issues to light from a series of independent reviewers saving you the time And hassle of fact finding over the web.
We will over time provide you with quality content which you can browse and subscribe to at your leisure.
TekSpek 's

Overclocking
Date issued:
Overview
This TekSpek explains why you'd want to overclock your graphics board, the risks in doing so and how you can go about doing it.
Why?
Most of you reading this TekSpek will know that if your graphics card is the limiting factor in your PC's games performance, that making it run faster will give you more performance at your chosen settings. Depending on the game and the rest of your PC's components and their setup, there's a balance between being limited by the graphics board and being limited by something else.
So if you're able to make your graphics card go faster than normal then you'll get more performance, and for nothing other than your time and effort. Board performances can almost always be adjusted with software, which makes it very simple to do. Things to consider when overclocking are simple (and somewhat obvious too), making the whole process a doable one with little fuss. This TekSpek will show you how.
Risks
The risks in overclocking are potentially fatal to the graphics board, since they create more heat for the cooler to manage and may also increase the voltage supply to the GPU and memory devices. Running things out of specification therefore carries a risk, but as long as limits are explored sensibly then permanent problems or damage can almost always be avoided. However, be aware that improper overclocking can have bad side effects and therefore you do so entirely and absolutely at your own risk, not ours!
How to do it
We'll illustrate how it's done with RivaTuner, the very popular tweak utility for NVIDIA (and some ATI) graphics cards, and your author's NVIDIA GeForce 7800 GTX 512, however the basic techniques and methods are applicable to almost any modern graphics board and its associated overclocking tools. We'll present a list at the end of this TekSpek.
When running RivaTuner for the first time you'll see the following, which confirms what graphics board you have installed and its basic configuration.
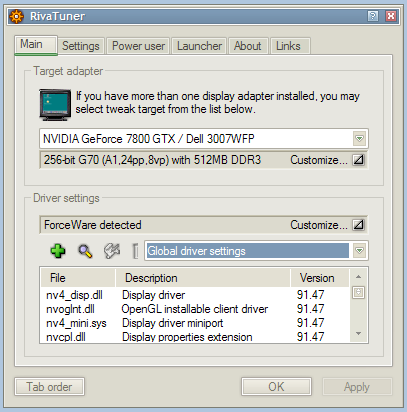
To access the overclocking tool inside of RivaTuner you click the button next to "Customize..." alongside "ForceWare detected". That gives you the flyout menu with access to the button (first one) that'll bring up the overclocking tool.
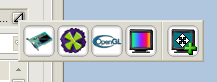
Clicking the right button then shows you the following, where clocks can be adjusted.
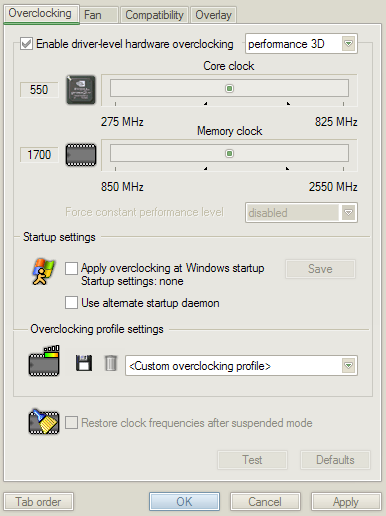
Ticking the "Enable driver-level hardware overclocking" checkbox and the subsequent "Detect now" button to grab the current clock rates lets you start adjusting them. Note the current 550/850 (with the 850 shown at its effective clock rate of 1700) clocks and the sliders for adjust.
Now the meat of the whole thing: adjusting the clocks incrementally and testing things out. To find the reasonable limits of both core and memory, you want to adjust both at the same time in reasonable increments, setting those clocks and playing a game or running a benchmark to test stability, monitoring heat output and what's on the display to make sure things are alright for an extended period of time.
We suggest 5 or 10MHz jumps, until things go wrong and the application crashes, you get display corruption, the entire system hangs or resets, or something else out of the ordinary. The small increments and thorough testing for anomalies here means that things won't break, just get unstable at a certain point. When that happens, take the last known good clocks -- whatever they happen to be -- and start adjusting core and memory clocks individually in smaller (1 or 2MHz) increments until you reach the absolute limits, testing for good operation in your favourite game or strong stress test such as 3DMark. If your chosen overclocking tool has a stability or rendering artifacts test, you can use that in conjunction with something a little more real world.
The act of small incremental increases and heavily stability testing is the key to a successful overclock, and be sure and monitor temperatures on your graphics card and system to make sure the extra heat output of the faster switching transistors on GPU and memory devices.
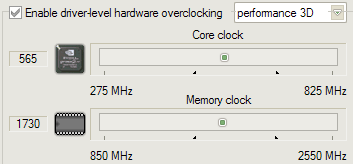
Here we are 15MHz away from the base clocks on our test board, just so you can see it in action.
Tools to help you overclock your graphics board
Here's a list of tools, drivers and their targets, to help you have a go at overclocking your own board.
RivaTuner - Almost all NVIDIA and some ATI products
ATI Tray Tools - ATI graphics boards
ATI Tool - ATI graphics boards
Official ATI display drivers
Official NVIDIA drivers
3DChipset - Official and unofficial drivers repository for NVIDIA
and ATI
Summary
Overclocking your GPU is free and easy, and provided you take it slow and test each incremental step thoroughly, free performance should come at the expense of nothing more than a bit more heat, and your time and effort of course. This TekSpek sought to explain the hows and whys, and give you a list of tools to help you on your way.